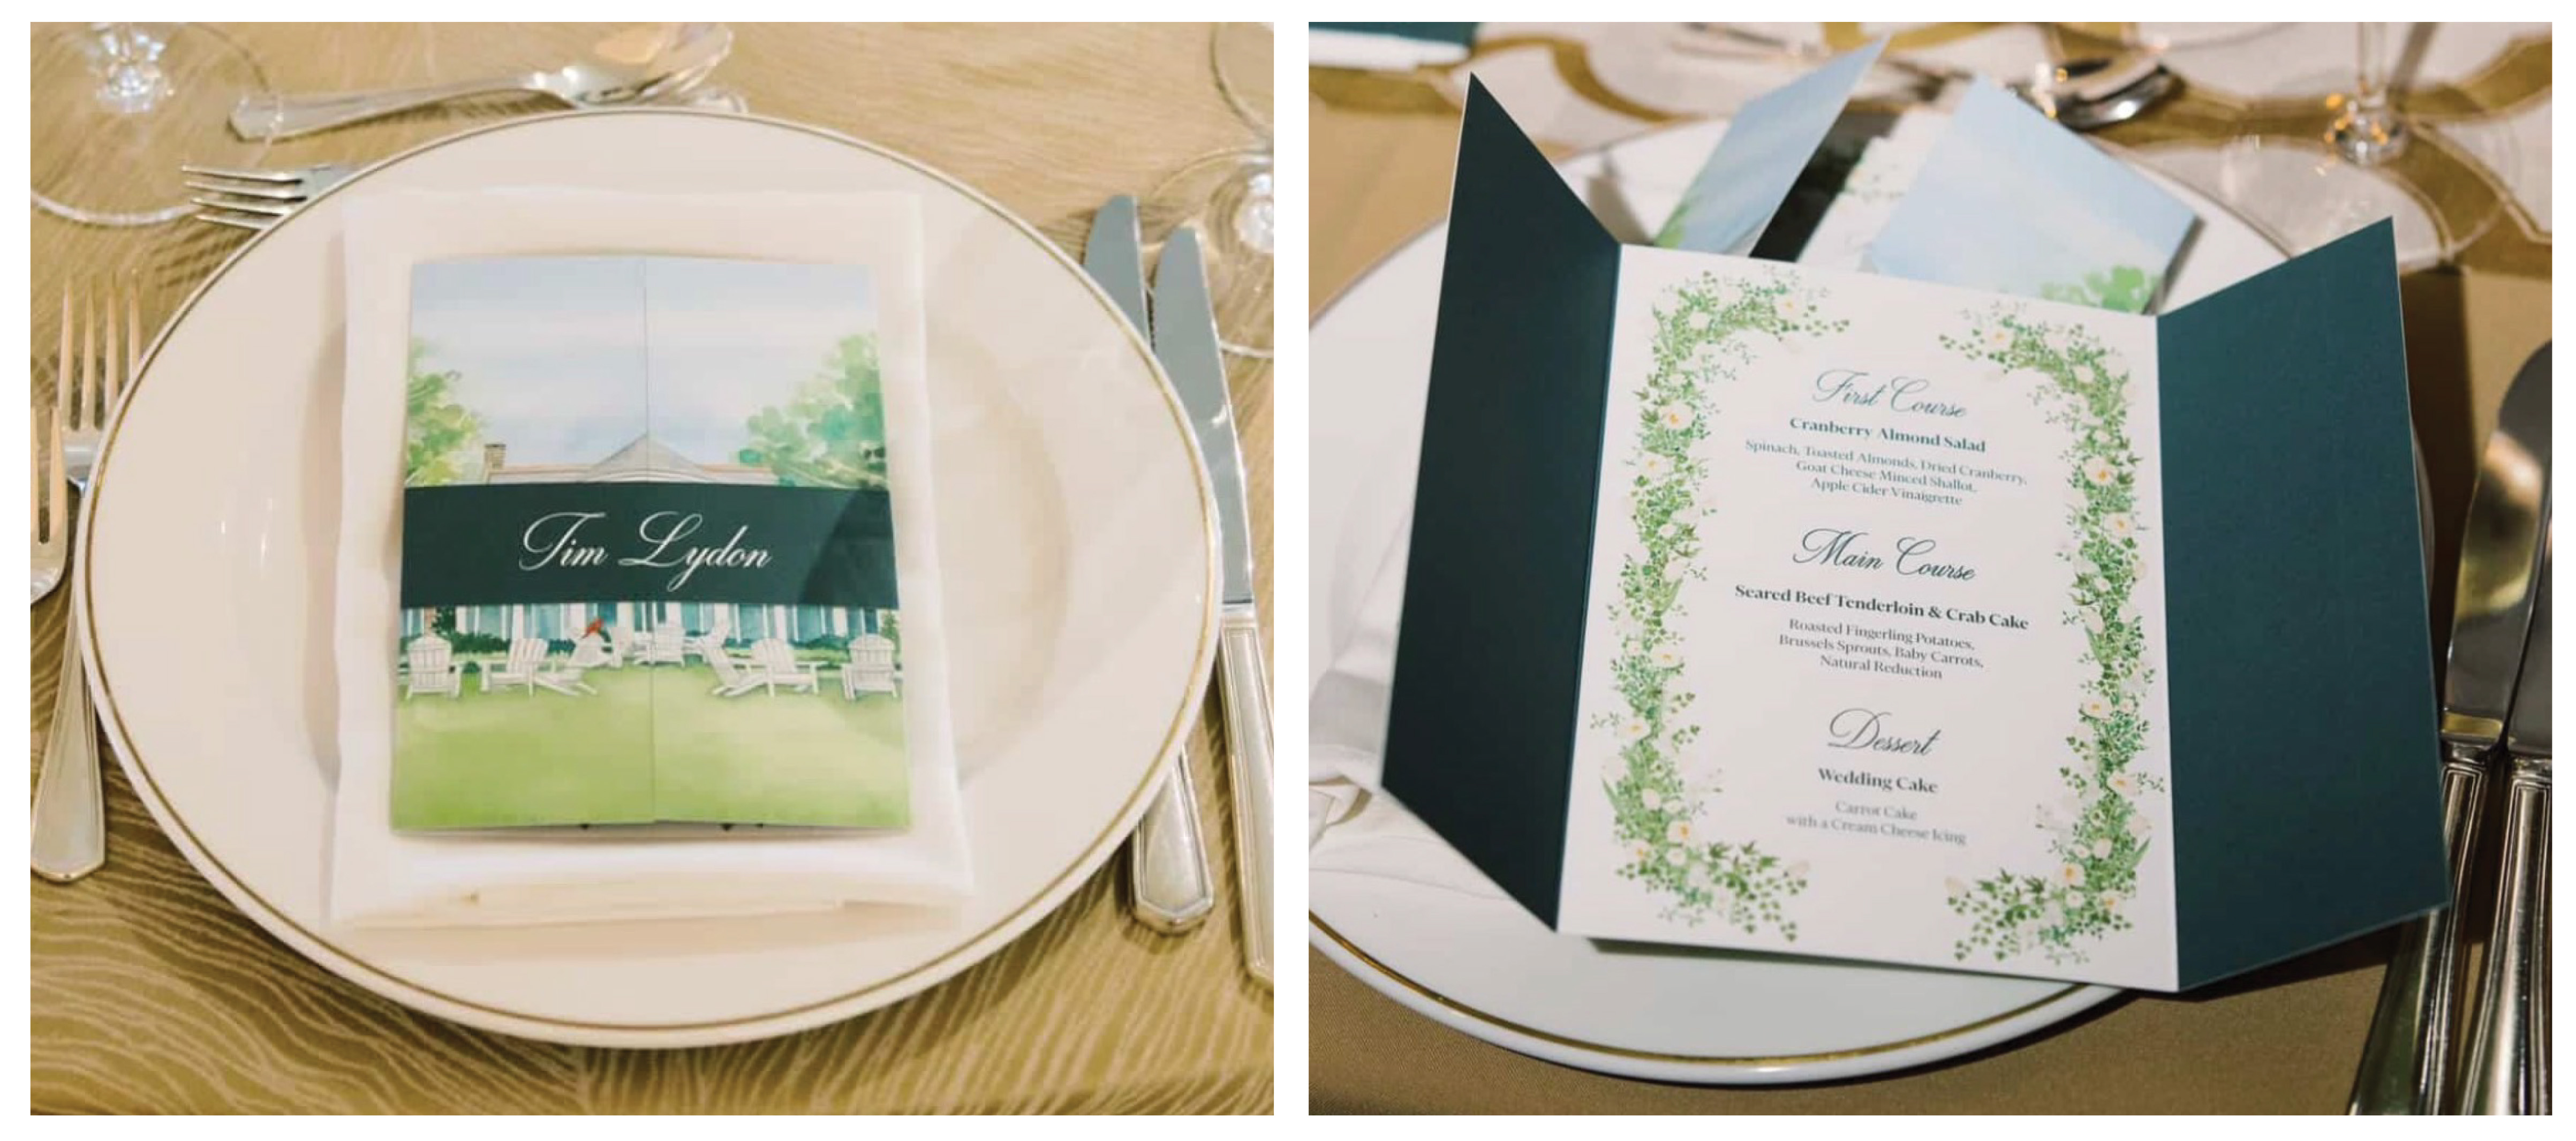
When setting up a file for a Gatefold card that has artwork or text elements continuing across the opening of the card, it is important to "mirror" the artwork into the bleed edge of your file. This ensures the design prints seamlessly across the opening of the card without misalignment after trimming and scoring.
This article will walk you through what "mirroring" artwork means, and how to setup your Mirrored Gatefold file for printing.
What Is a Bleed Edge?
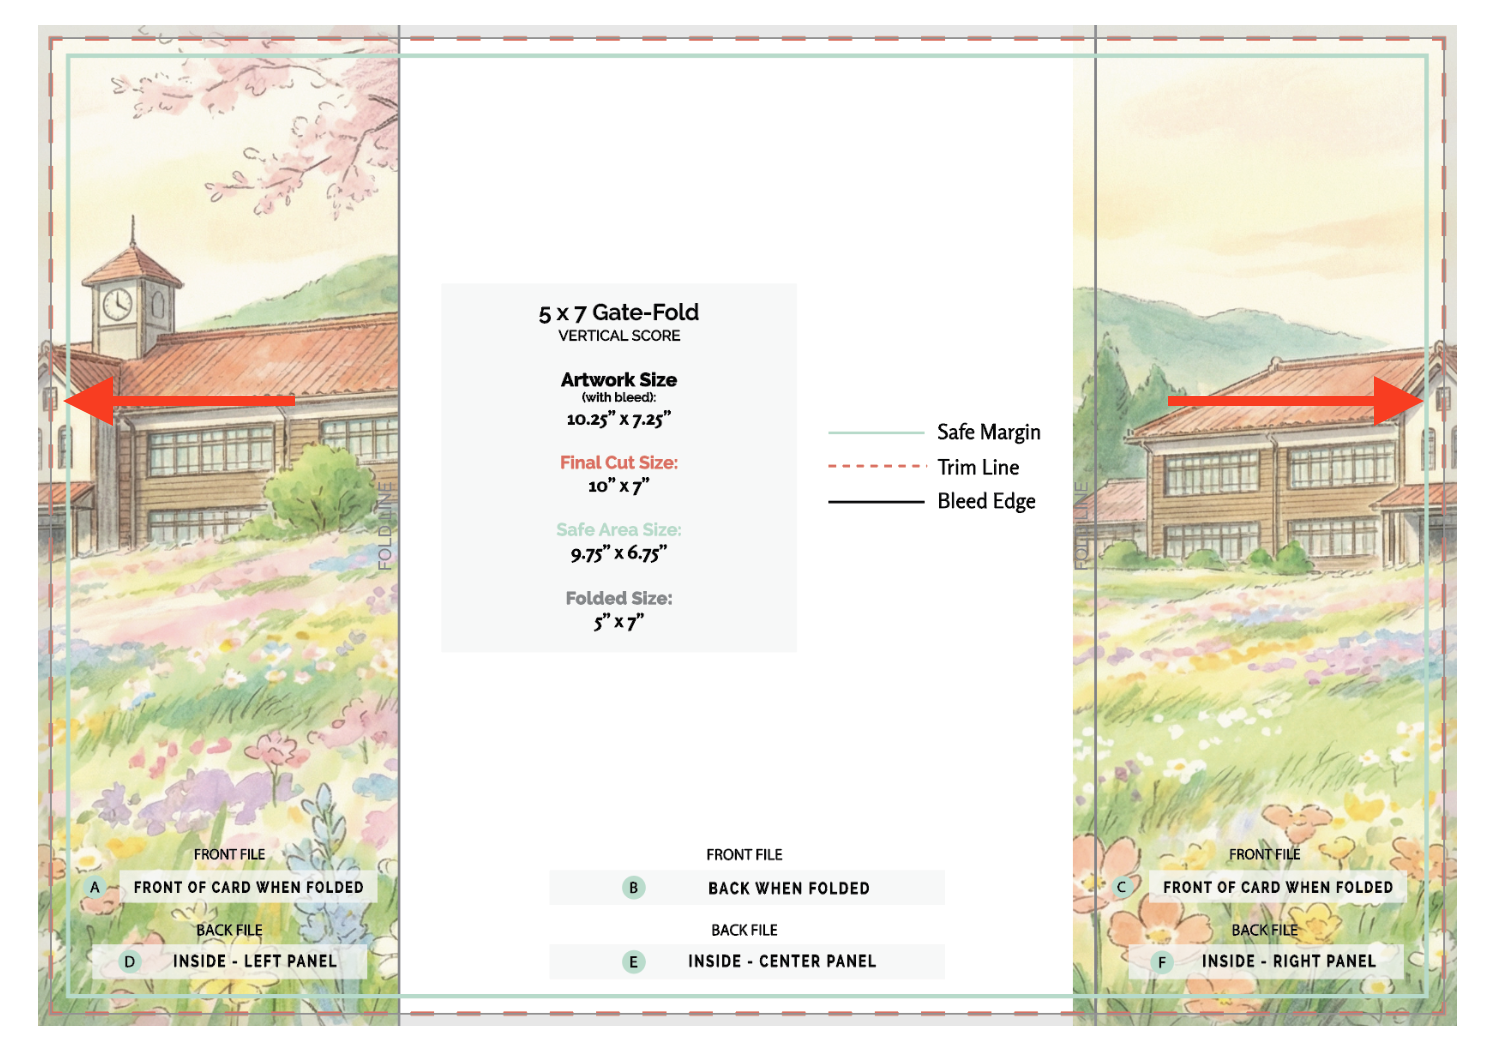
The bleed edge is the extra area that extends beyond the card’s trim line and is 0.125 inches (⅛ inch) on all sides. This area is trimmed off during production to ensure your design reaches the very edge of the finished card, leaving no unprinted edges.
Why You Should Mirror Artwork into the Bleed Edge
On a gatefold card, the two front panels meet precisely at the center. Even the slightest shift in trimming or folding can potentially make your artwork and details not line up properly.
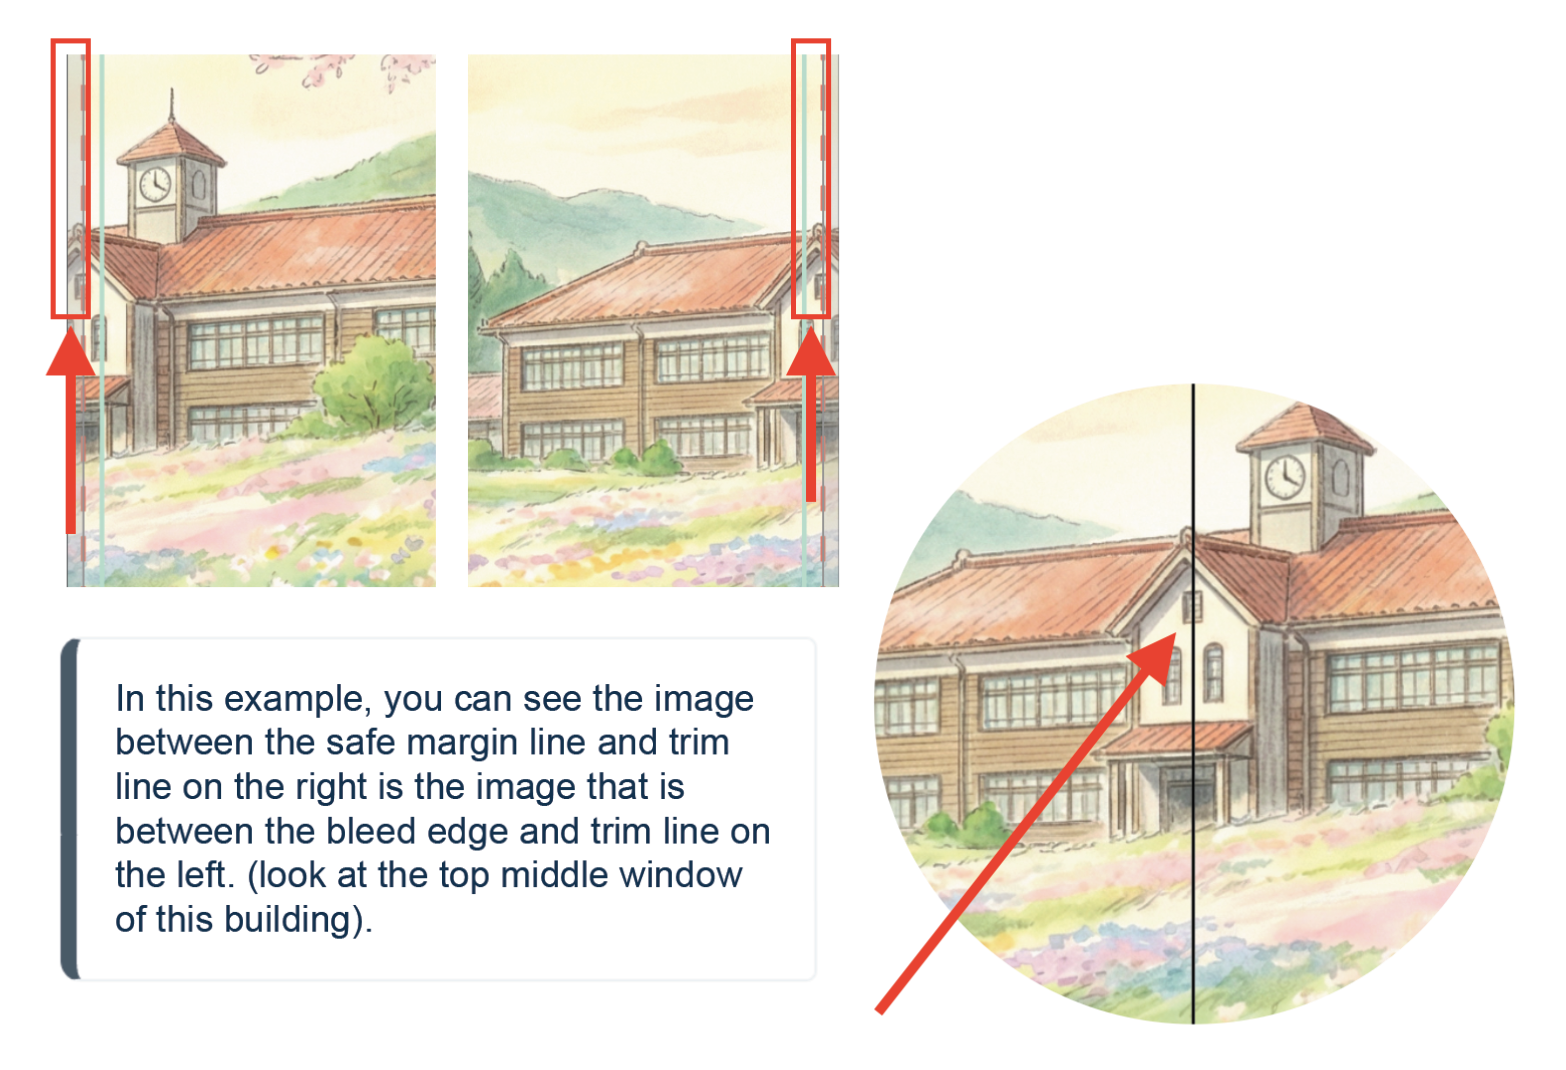
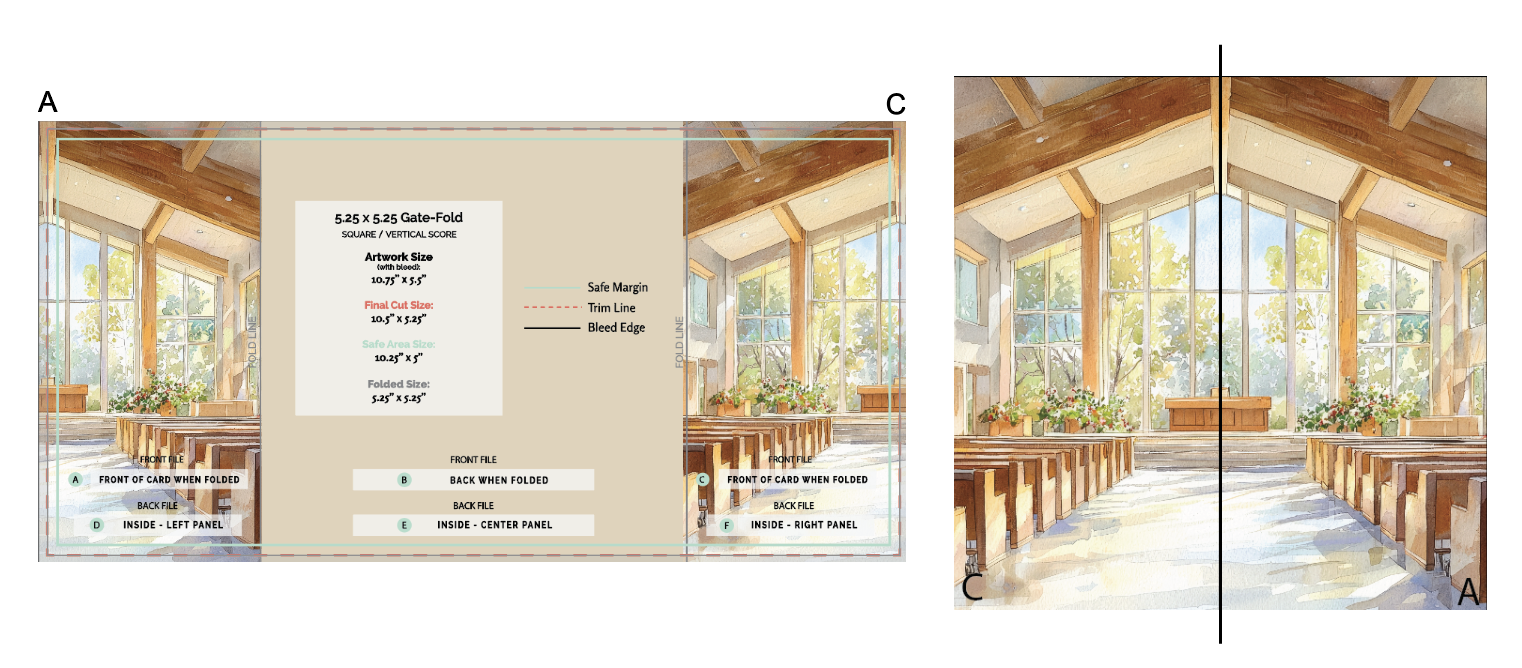
Mirroring the artwork into the bleed helps prevent this issue by extending design elements past the cut line, creating a seamless transition when the card is closed. The bleed edge on the left will need to be the mirrored edge of the right side and the bleed edge on the right will need to be a mirrored edge of the left side. That way, when they are cut down, the edges line up evenly, even in the event of shift. This means none of the artwork will be lost on the final product.
How to Mirror Artwork in the Bleed Edge
- Set up your file unfolded and flat - Include a 0.125-inch bleed on all sides of your file as stated in our general File Setup Guide.
- Identify your fold lines - Divide your layout into three panels: left, center, and right (or top, center, and bottom depending on the orientation of your desired printed product).
- Extend or mirror design elements - If your artwork includes color, texture, or imagery that continues across the fold, duplicate and flip (mirror) a small portion of that design from the trim line and into the bleed area on both the left and right edge. Where you want the artwork to meet when folded should fall along the cut line, and the artwork should continue into the bleed area.
- Check alignment visually - Zoom in to confirm the mirrored edges blend naturally. The goal is to make the gated artwork appear seamless once printed and trimmed.
Gatefold Card Design Tips
Photographs, text, or busy design elements can be extremely challenging for gatefold panels. Subtle and simple transitions work best.
We recommend ordering test prints for Gatefolds with detailed front panel or custom sized gatefolds to ensure you receive your desired results for your full order.
Placing our templates as an overlay on your file, printing, and cutting at home is also a good way to test your artwork placement.
Related Articles:
Was this article helpful?
That’s Great!
Thank you for your feedback
Sorry! We couldn't be helpful
Thank you for your feedback
Feedback sent
We appreciate your effort and will try to fix the article