Bleed plays an important role in bringing your designs to life. This guide walks you through what it is, when it’s needed, and how to set it up.
What is Bleed?
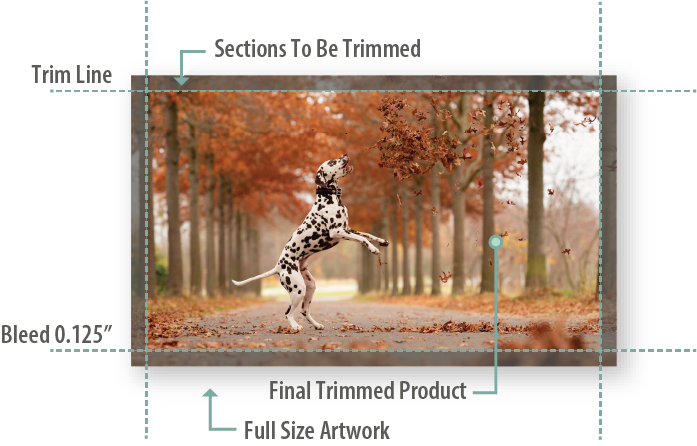
In printing, bleed is the extra space added around the edges of your design. This area extends beyond the final cut size to allow for slight movement during trimming.
At PrintsWell, we require a 0.125" bleed on all sides (adding 0.25" to both the width and height of your file).
Why it Matters
Bleed ensures your design prints all the way to the edge of your card without any unexpected white borders.
During production, we print on large press sheets that are then cut down to their final size. Even with precise equipment, slight movement can occur when trimming. Bleed gives your design a buffer so that if this happens, your artwork still extends fully to the edge and remains visually centered, preventing unwanted white borders in the final product.
When Bleed is Required
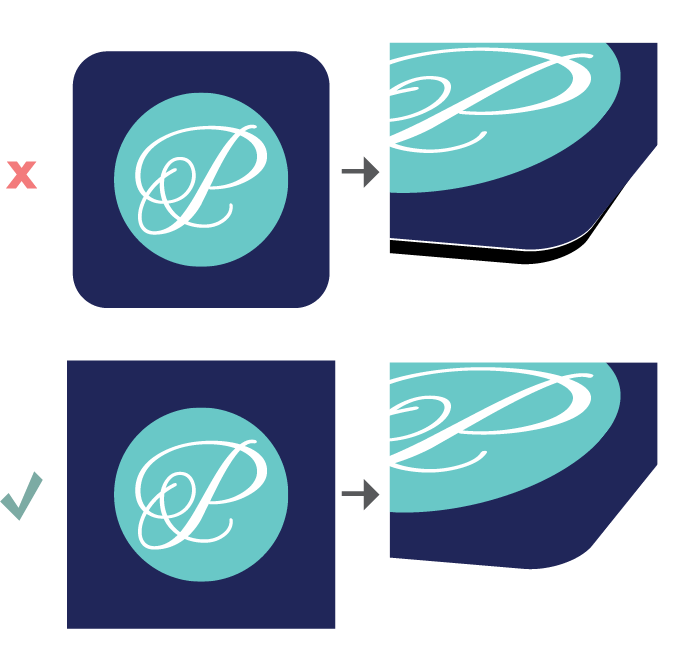
Bleed is required when any part of your design touches or extends to the edge of the card.
Common examples include:
- Background colors that go edge-to-edge
- Full-bleed photos
- Patterns or textures that reach the edge
Without bleed, these designs may result in white edges after trimming.
When Bleed is Not Required
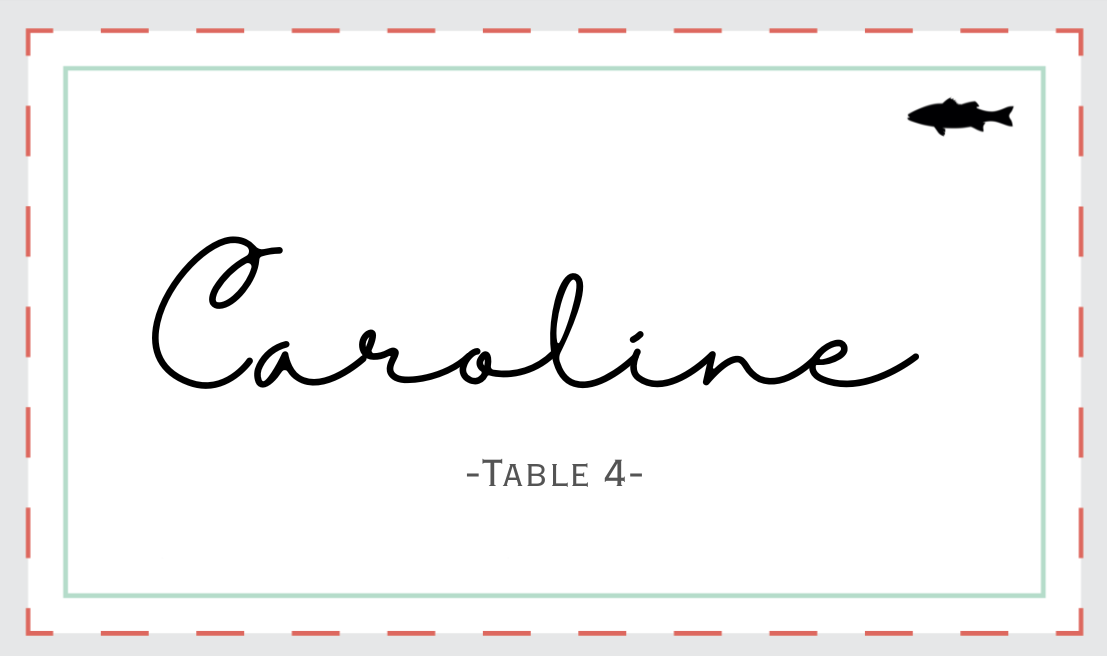
Bleed is not required when all artwork stays within the safe margin of the card and does not extend to the trim edge.
The safe margin is indicated by the solid green line on our templates (also shown in the example below).
Examples include:
- Centered text with wide margins
- Designs with intentional white space around all edges
Even if your design doesn’t require bleed, including it on all files is a simple and reliable rule of thumb. It helps prevent issues if your design changes later!
How to Set It Up
Canva & Adobe Photoshop
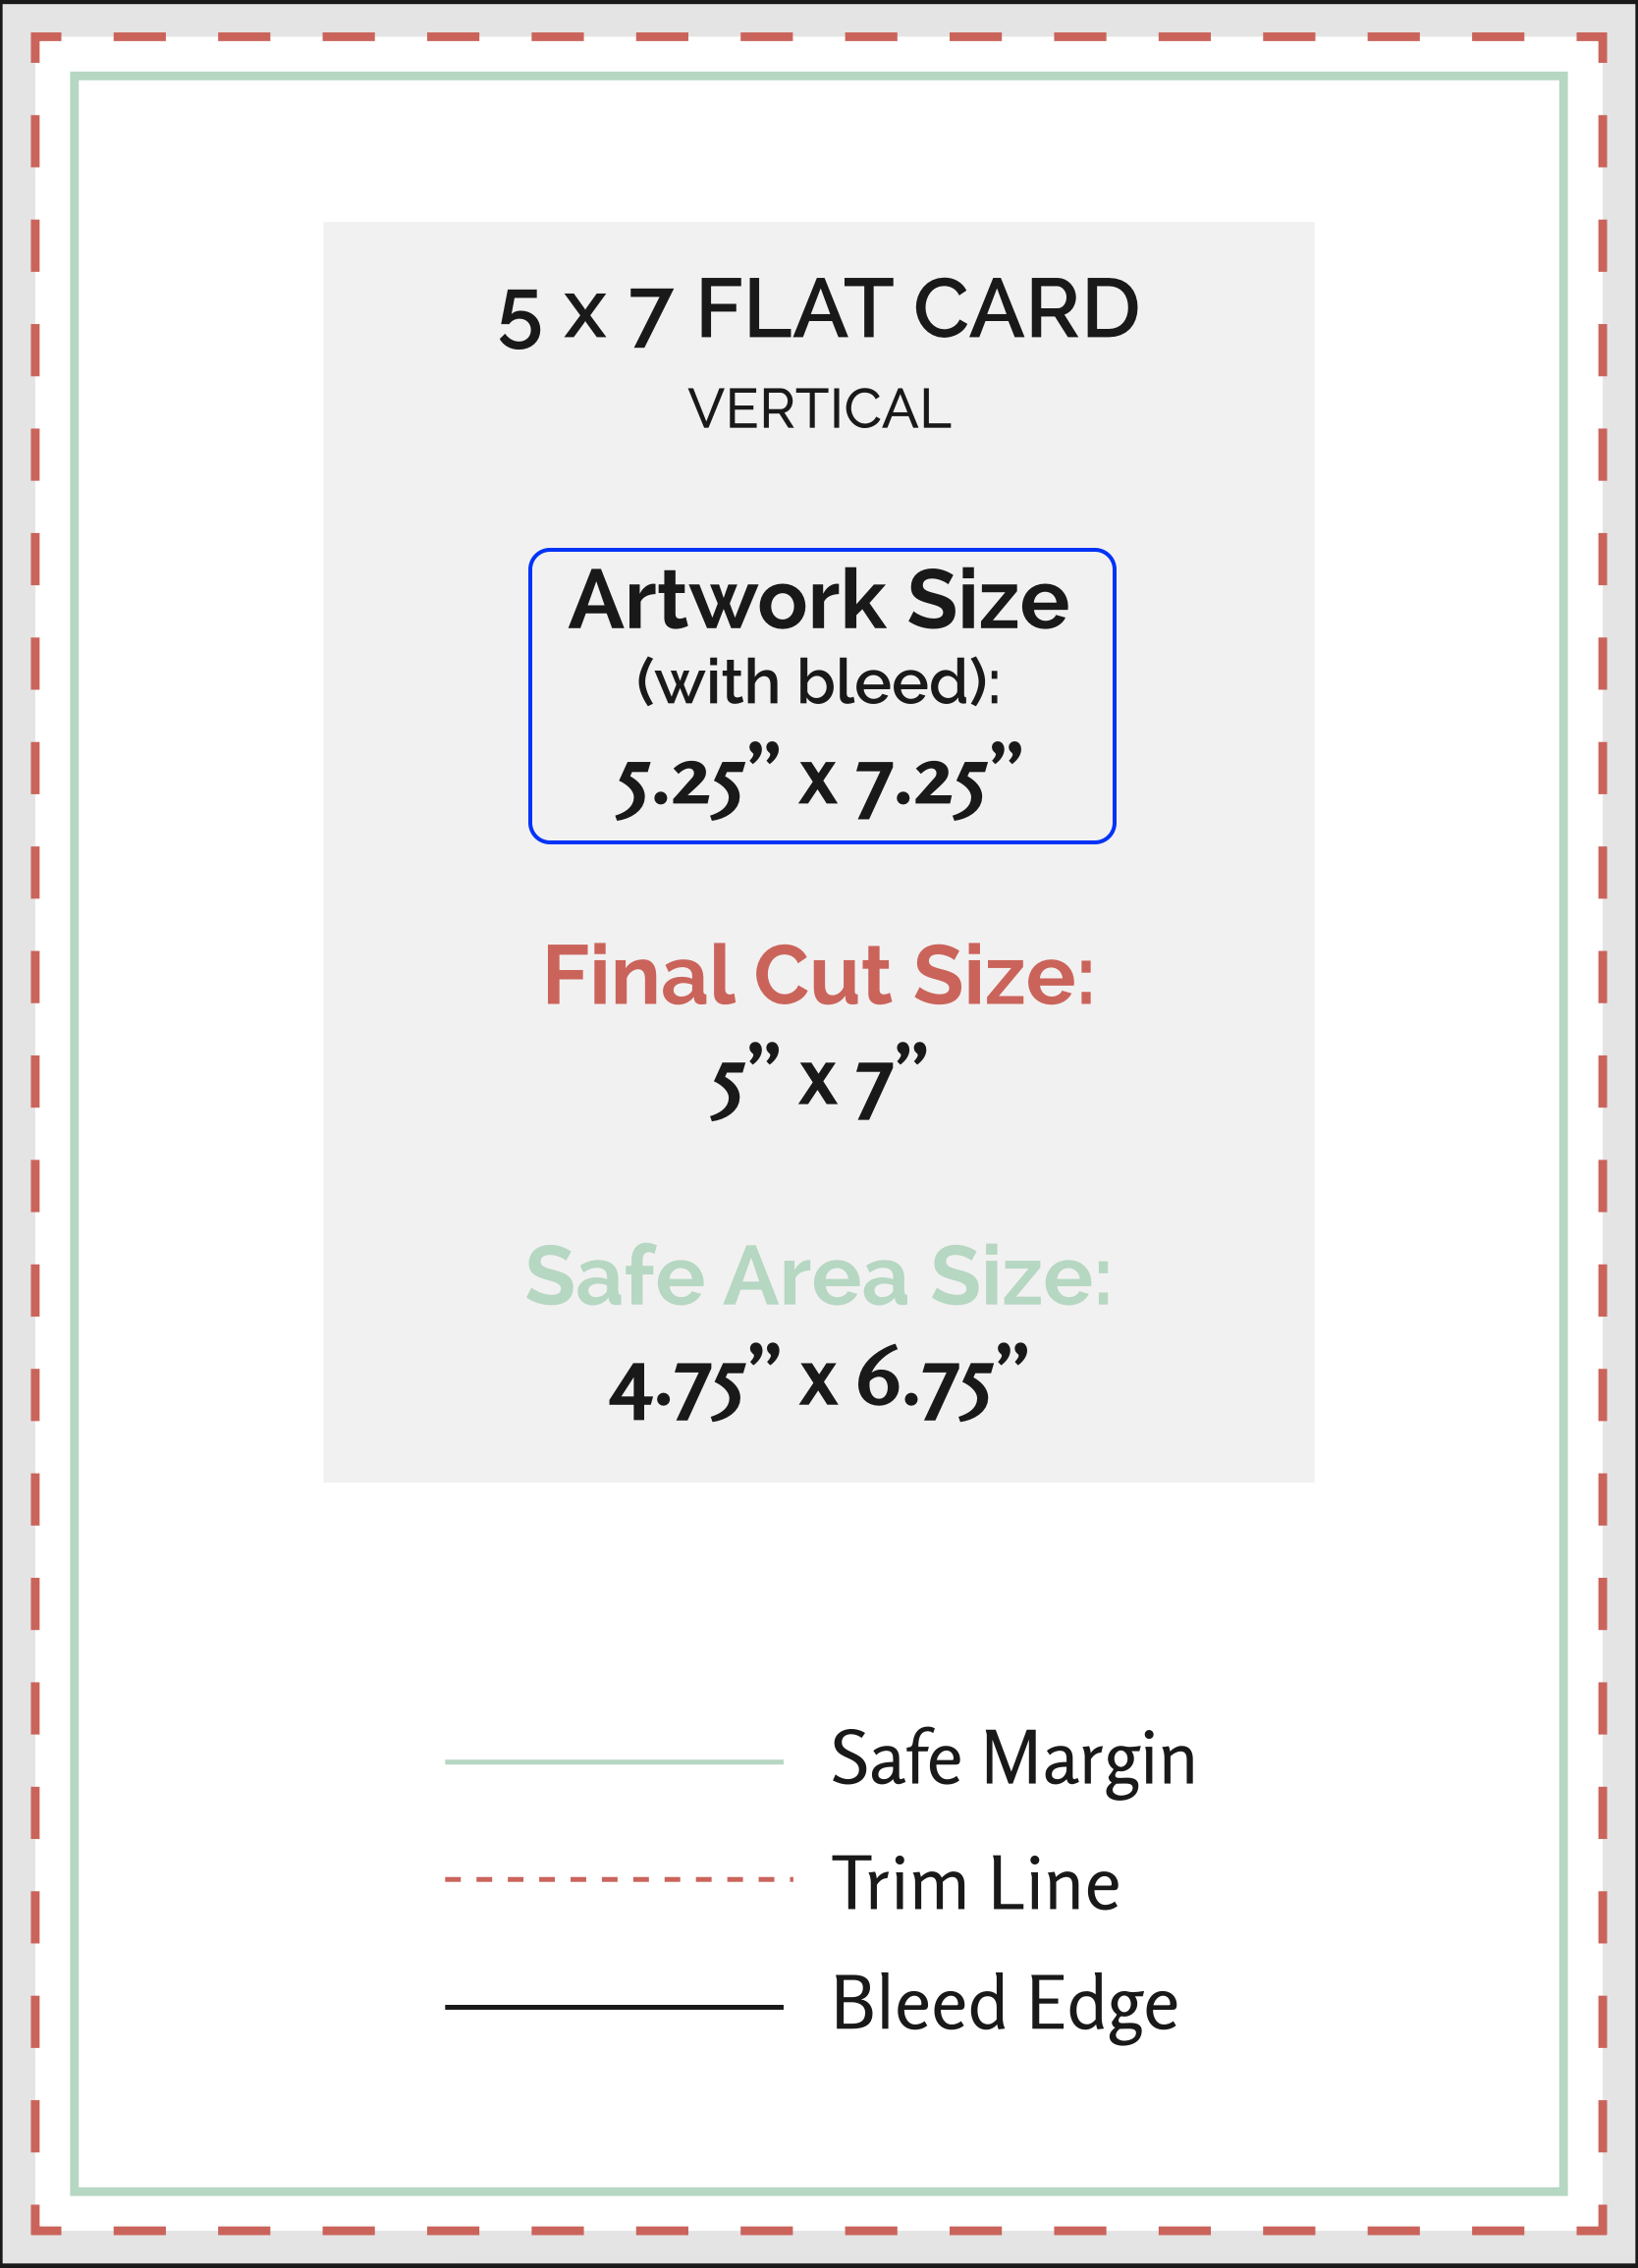
Due to the limitations of these programs, bleed must be built into your file size from the beginning. You cannot add it after your design is complete, so be sure to increase your canvas size to include the extra 0.125" on all sides.
The full file size, including bleed, is listed as the Artwork Size on our templates. For sizes not included in our template selection, simply add 0.25" to the width and the height.
Adobe InDesign & Illustrator
You can add bleed directly in your document setup or presets by entering 0.125" in the bleed settings.
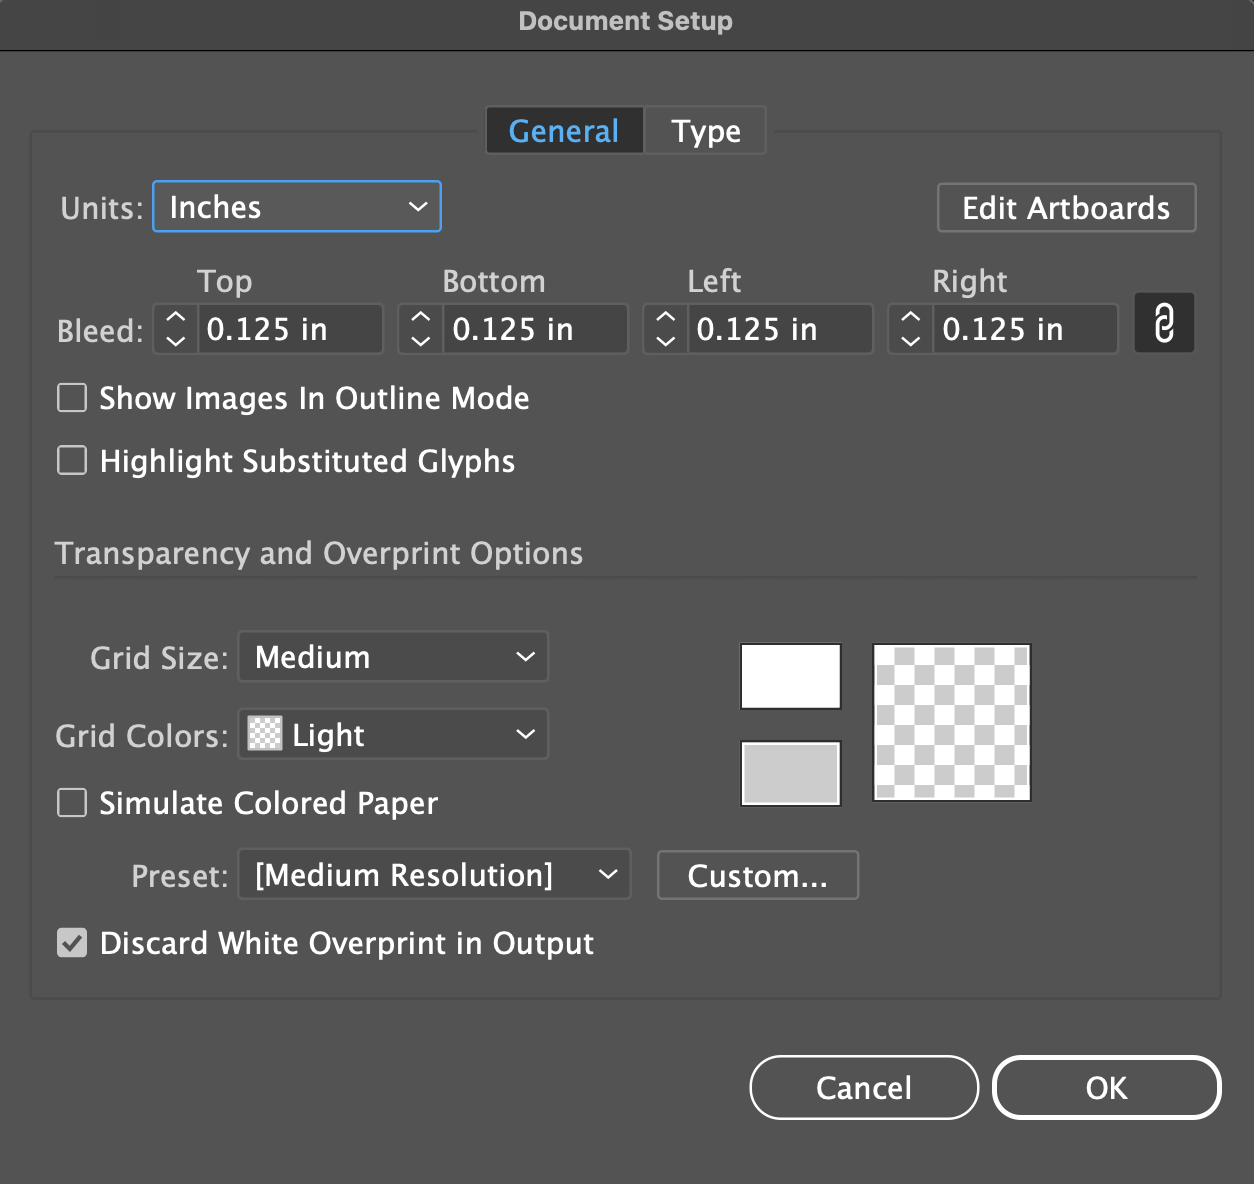
Select your design program below for additional setup instructions:
Design Specific Bleed Setup:
Each of these topics is covered in more detail in the articles linked above.
Was this article helpful?
That’s Great!
Thank you for your feedback
Sorry! We couldn't be helpful
Thank you for your feedback
Feedback sent
We appreciate your effort and will try to fix the article