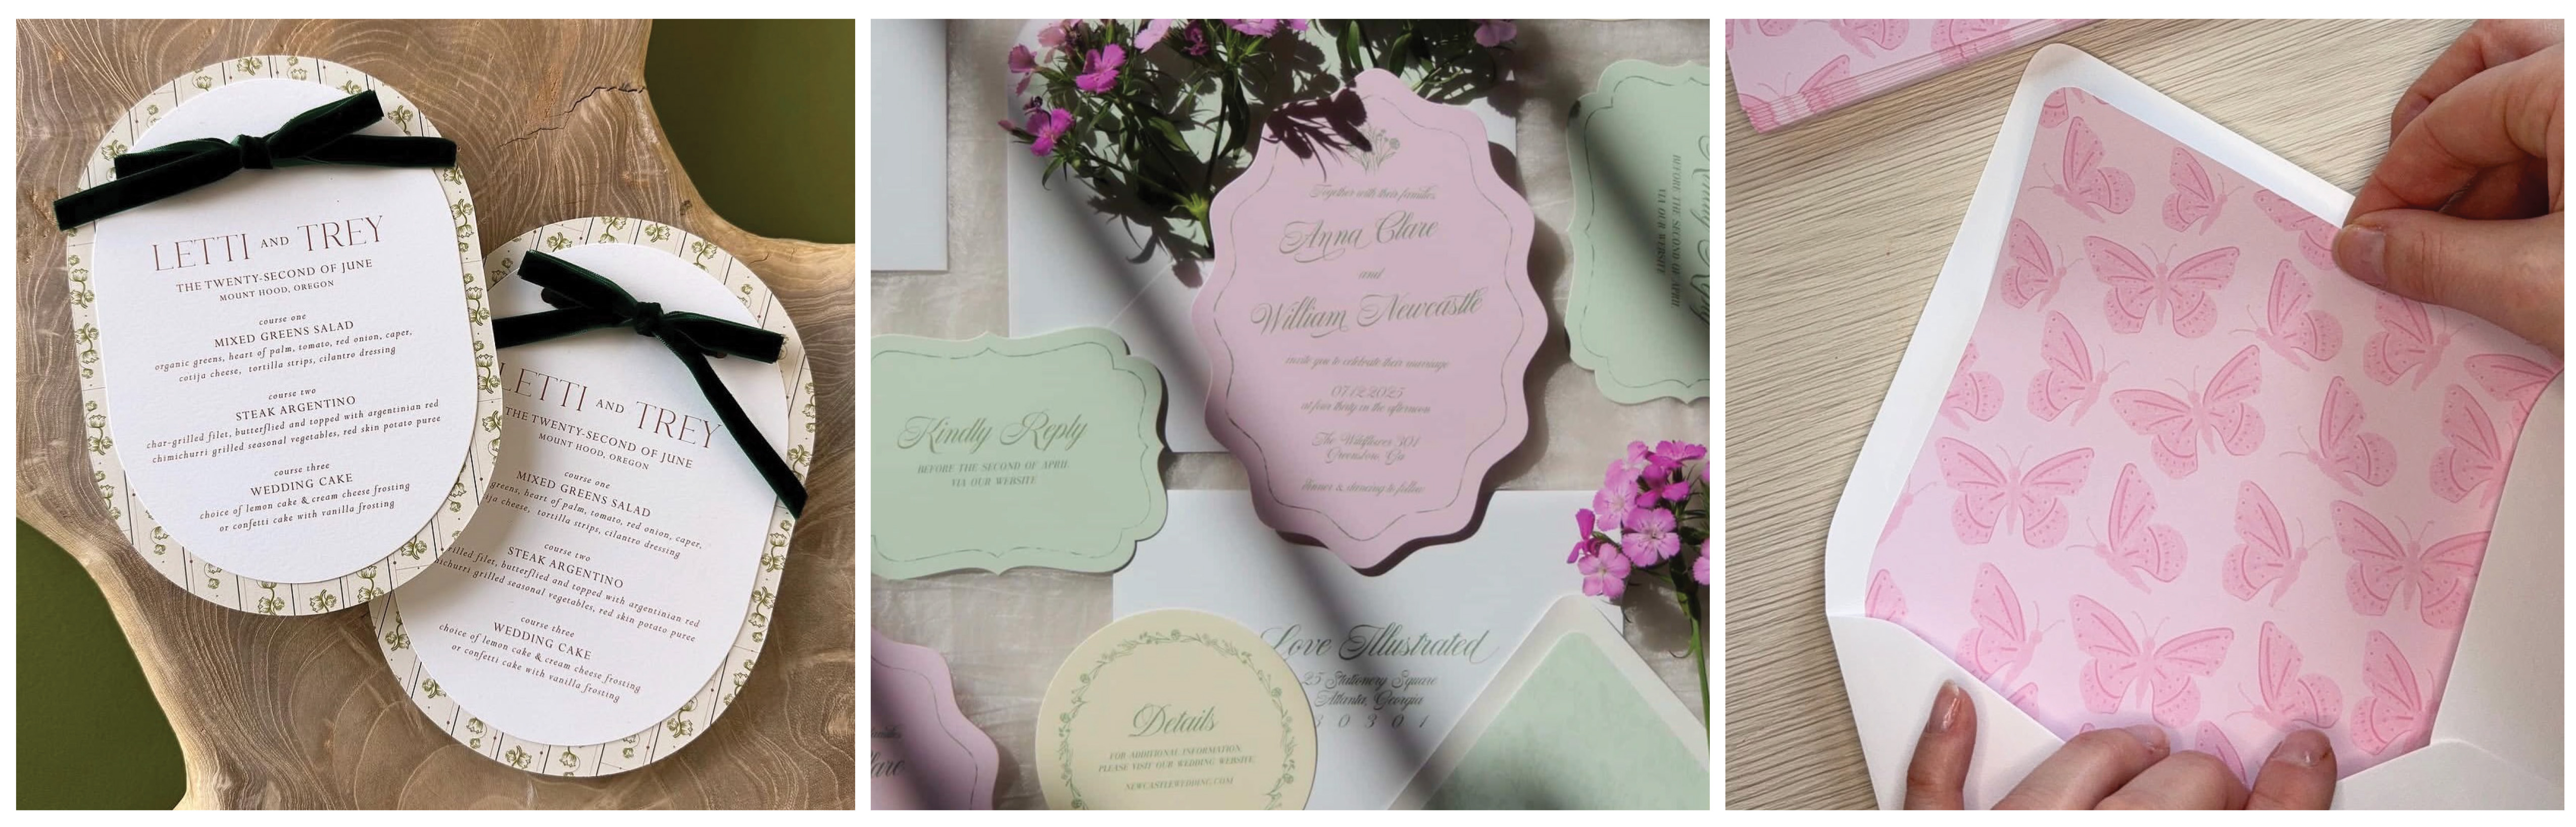
General Guidance for setting up a Die-cut print file
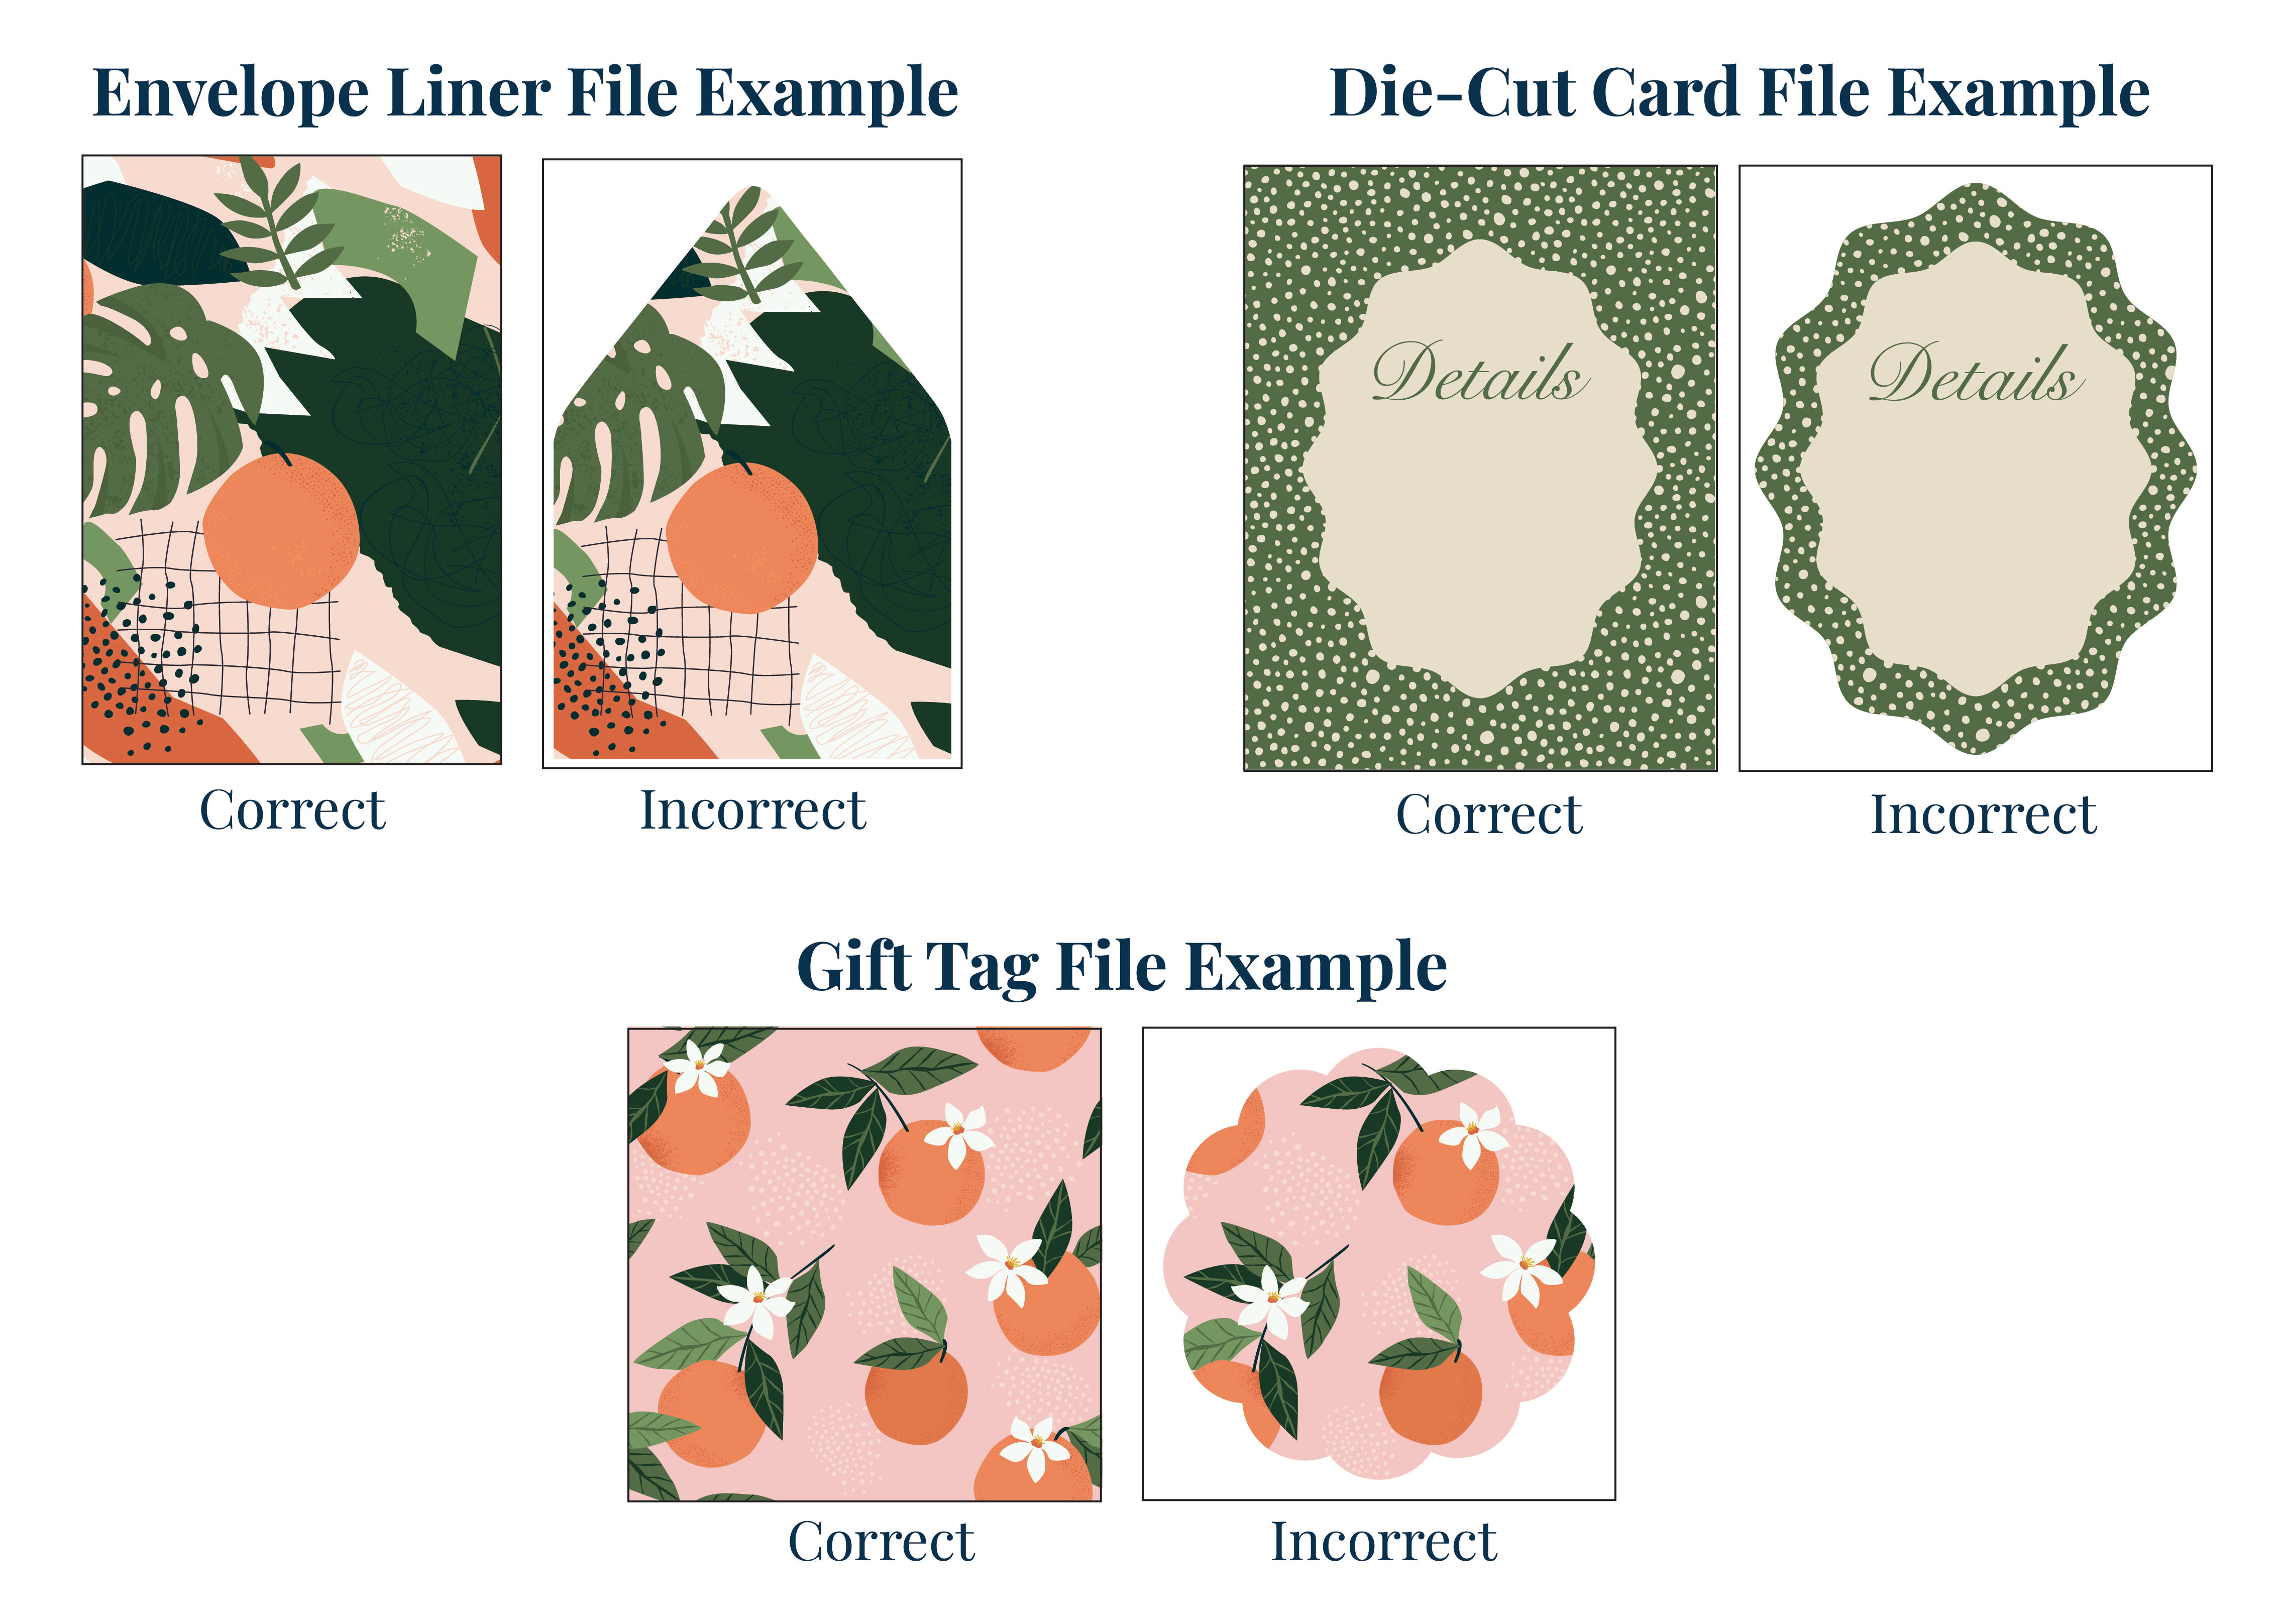
When creating a file for die-cut finishing, you will setup your file in accordance with our file setup guide. These files will be setup as rectangles or squares sized at the dimensions of the card you are ordering.
Files for die-cut shape products do not need to be shaped like the die-cut shape.
The die-cut machine will trim the card to the selected shape regardless of your file’s shape.
Tips for Designing
- Utilize Templates - We have a folder of templates that are built for our die-cut shapes. This will help you line up your artwork within your desired die-cut shape.
- Full Color Flood Die-Cuts - For full-color flood, die-cut items, you can fill your entire file background with the color or artwork you want to have on the finished piece. This helps prevent any white edges from showing after the card is cut.
- Wider Borders - Borders are tricky to make completely even on die-cut shapes. Borders on shapes with finer details like the "Scallop" shape die-cut can make any production shift more noticeable on the printed product. We recommend opting for wider borders.
How To Create a Die-Cut Shape Outer Border
You can follow the steps below to create a border that matches your die-cut shape using Adobe Illustrator. Remember to stay in line with the guidelines for creating borders for print files.
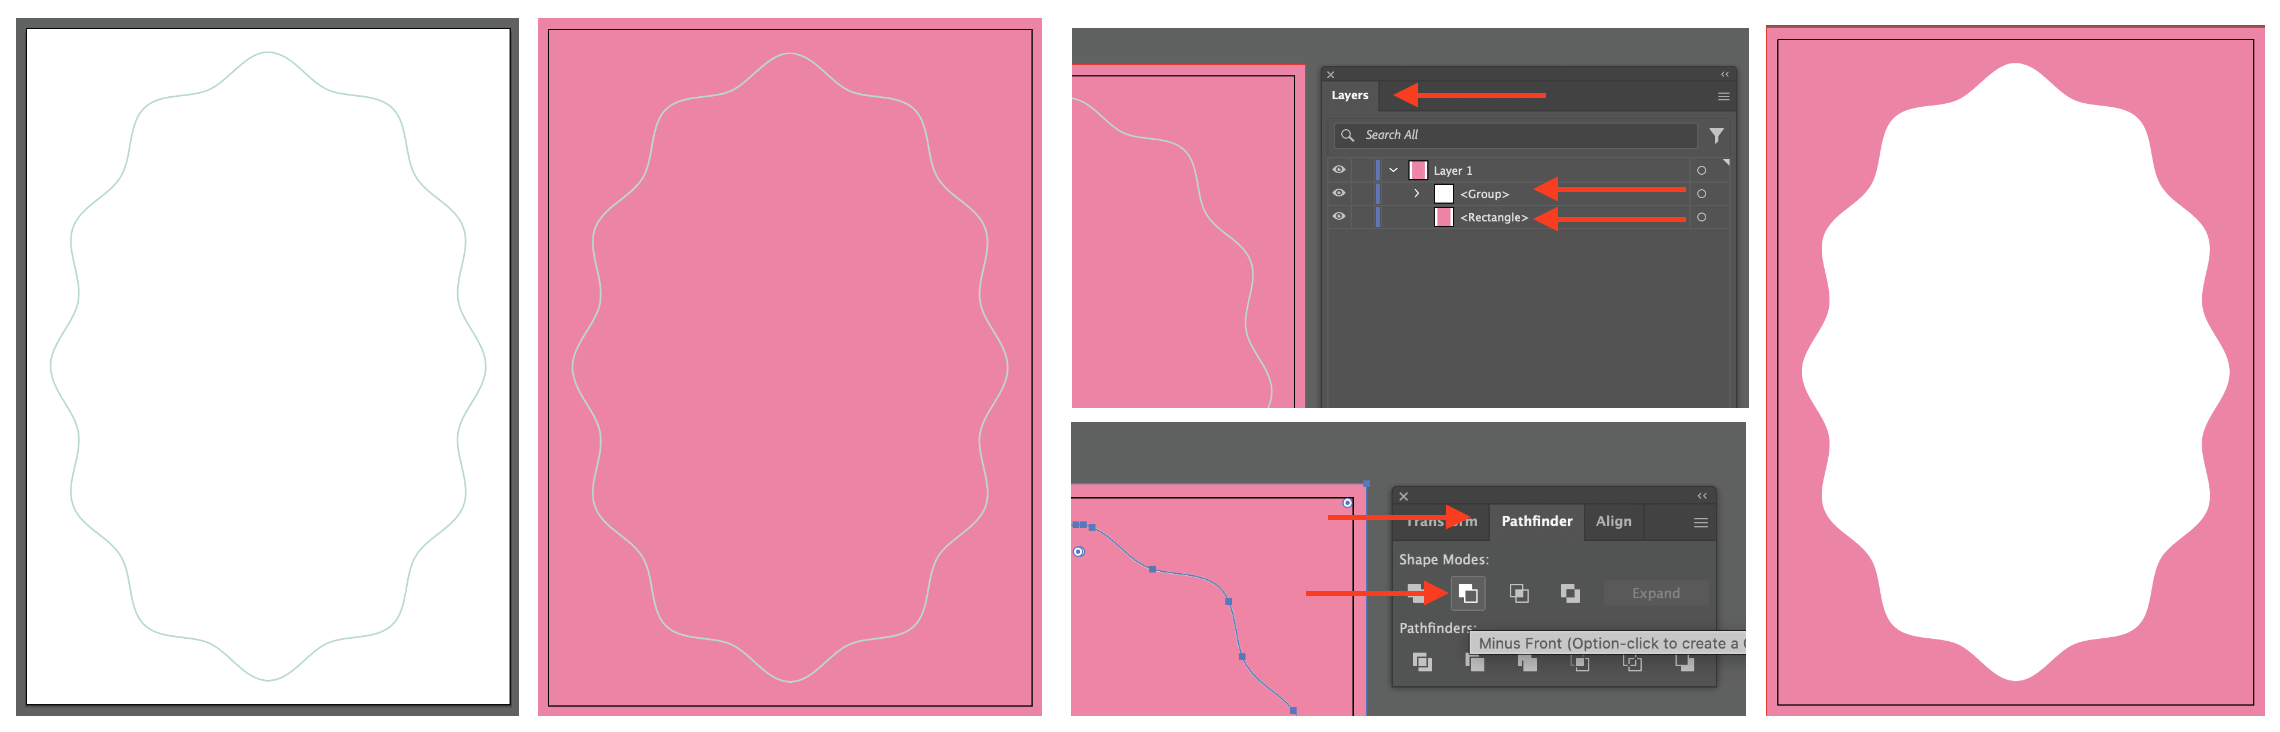
- Open the Illustrator template for your die-cut shape
- Use the existing green safe area line as your border guide, and remove the remaining design elements so that only the green safe line remains
- Shrink the green safe area down slightly, and center it with your artboard so that your border falls inside the safe area for printing
- Create a rectangle sized at the full file size with bleed
- Open the "Layers" panel and check that the "rectangle" layer is under the green safe line layer
- Open the "Pathfinder" window
- Select both the safe line outline and the rectangle
- In the "Pathfinder" window, select the option "Minus Front"
Related Articles:
Was this article helpful?
That’s Great!
Thank you for your feedback
Sorry! We couldn't be helpful
Thank you for your feedback
Feedback sent
We appreciate your effort and will try to fix the article