Adobe Photoshop can be used to create print files, especially when the design relies heavily on raster artwork or photo editing. More limited for print layout setup, vector artwork, and proofing, so extra care is needed when building files for professional printing.
File Setup in Adobe Photoshop
When starting to setup a file in Adobe Photoshop the two most important things to check is your file size and the Color Mode.
File Size
Because Photoshop does not have the automatic bleed setting like illustrator or inDesign, you need to create your file size with bleed in mind. We require files to be set up with .125 inch bleed on all sides, which means your files should be .25 inches larger in width and height than the product that you are creating.
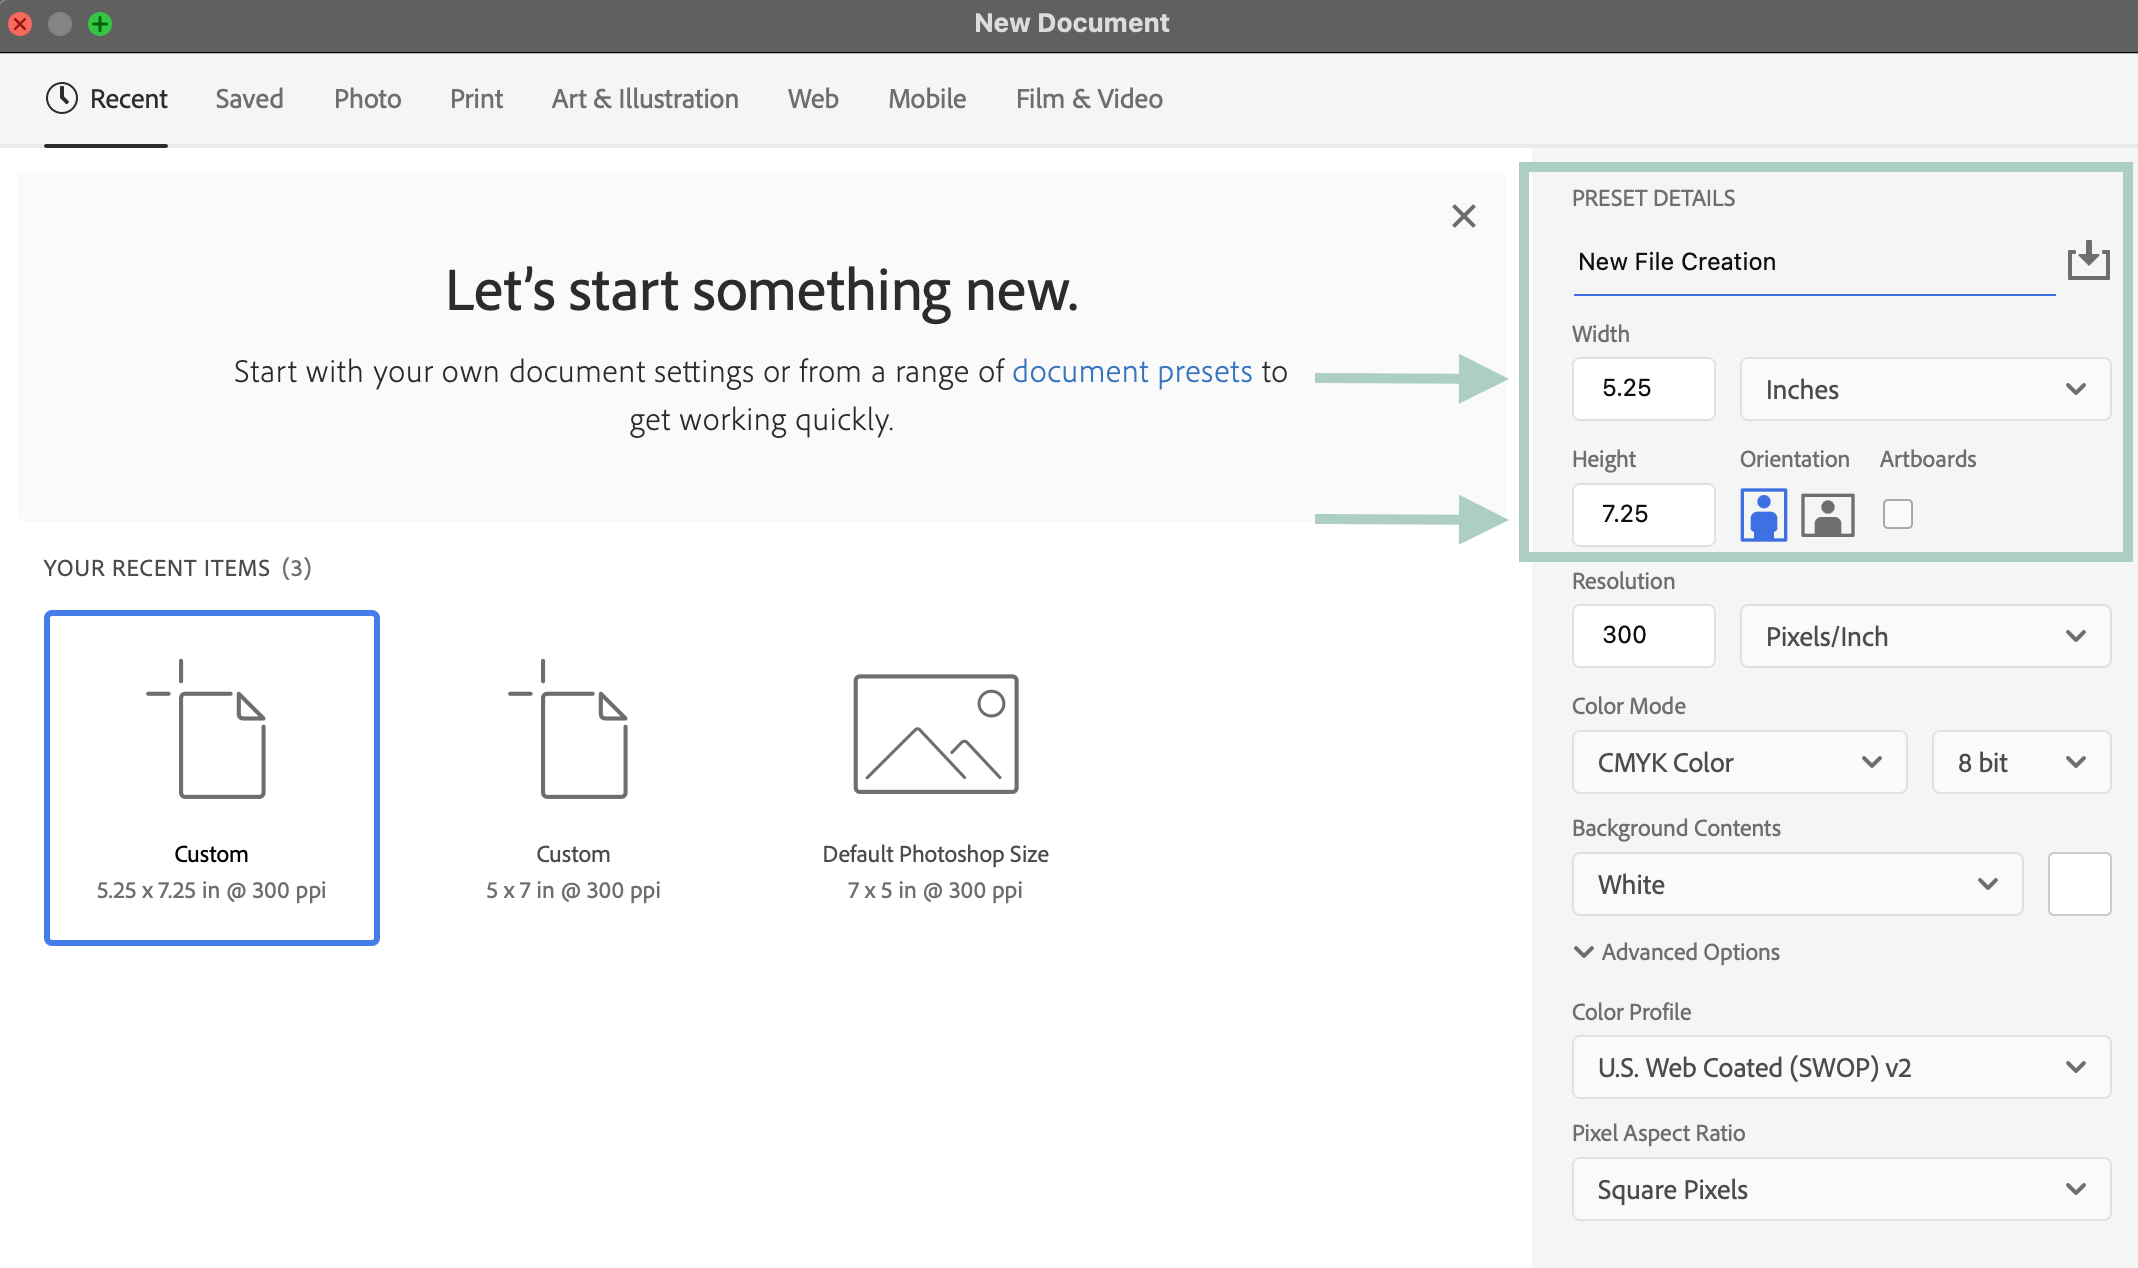
For example:
To print an 5x7 (A7) flat card, your file should be sized at 5.25x7.25 inches.
To print an 4.25x5.5 (A2 ) folded card, your file should be sized at 8.75x5.75, the flat size of the folded card.
Tip: The size of your print-ready file is listed on our templates under "Artwork Size"CMYK Color
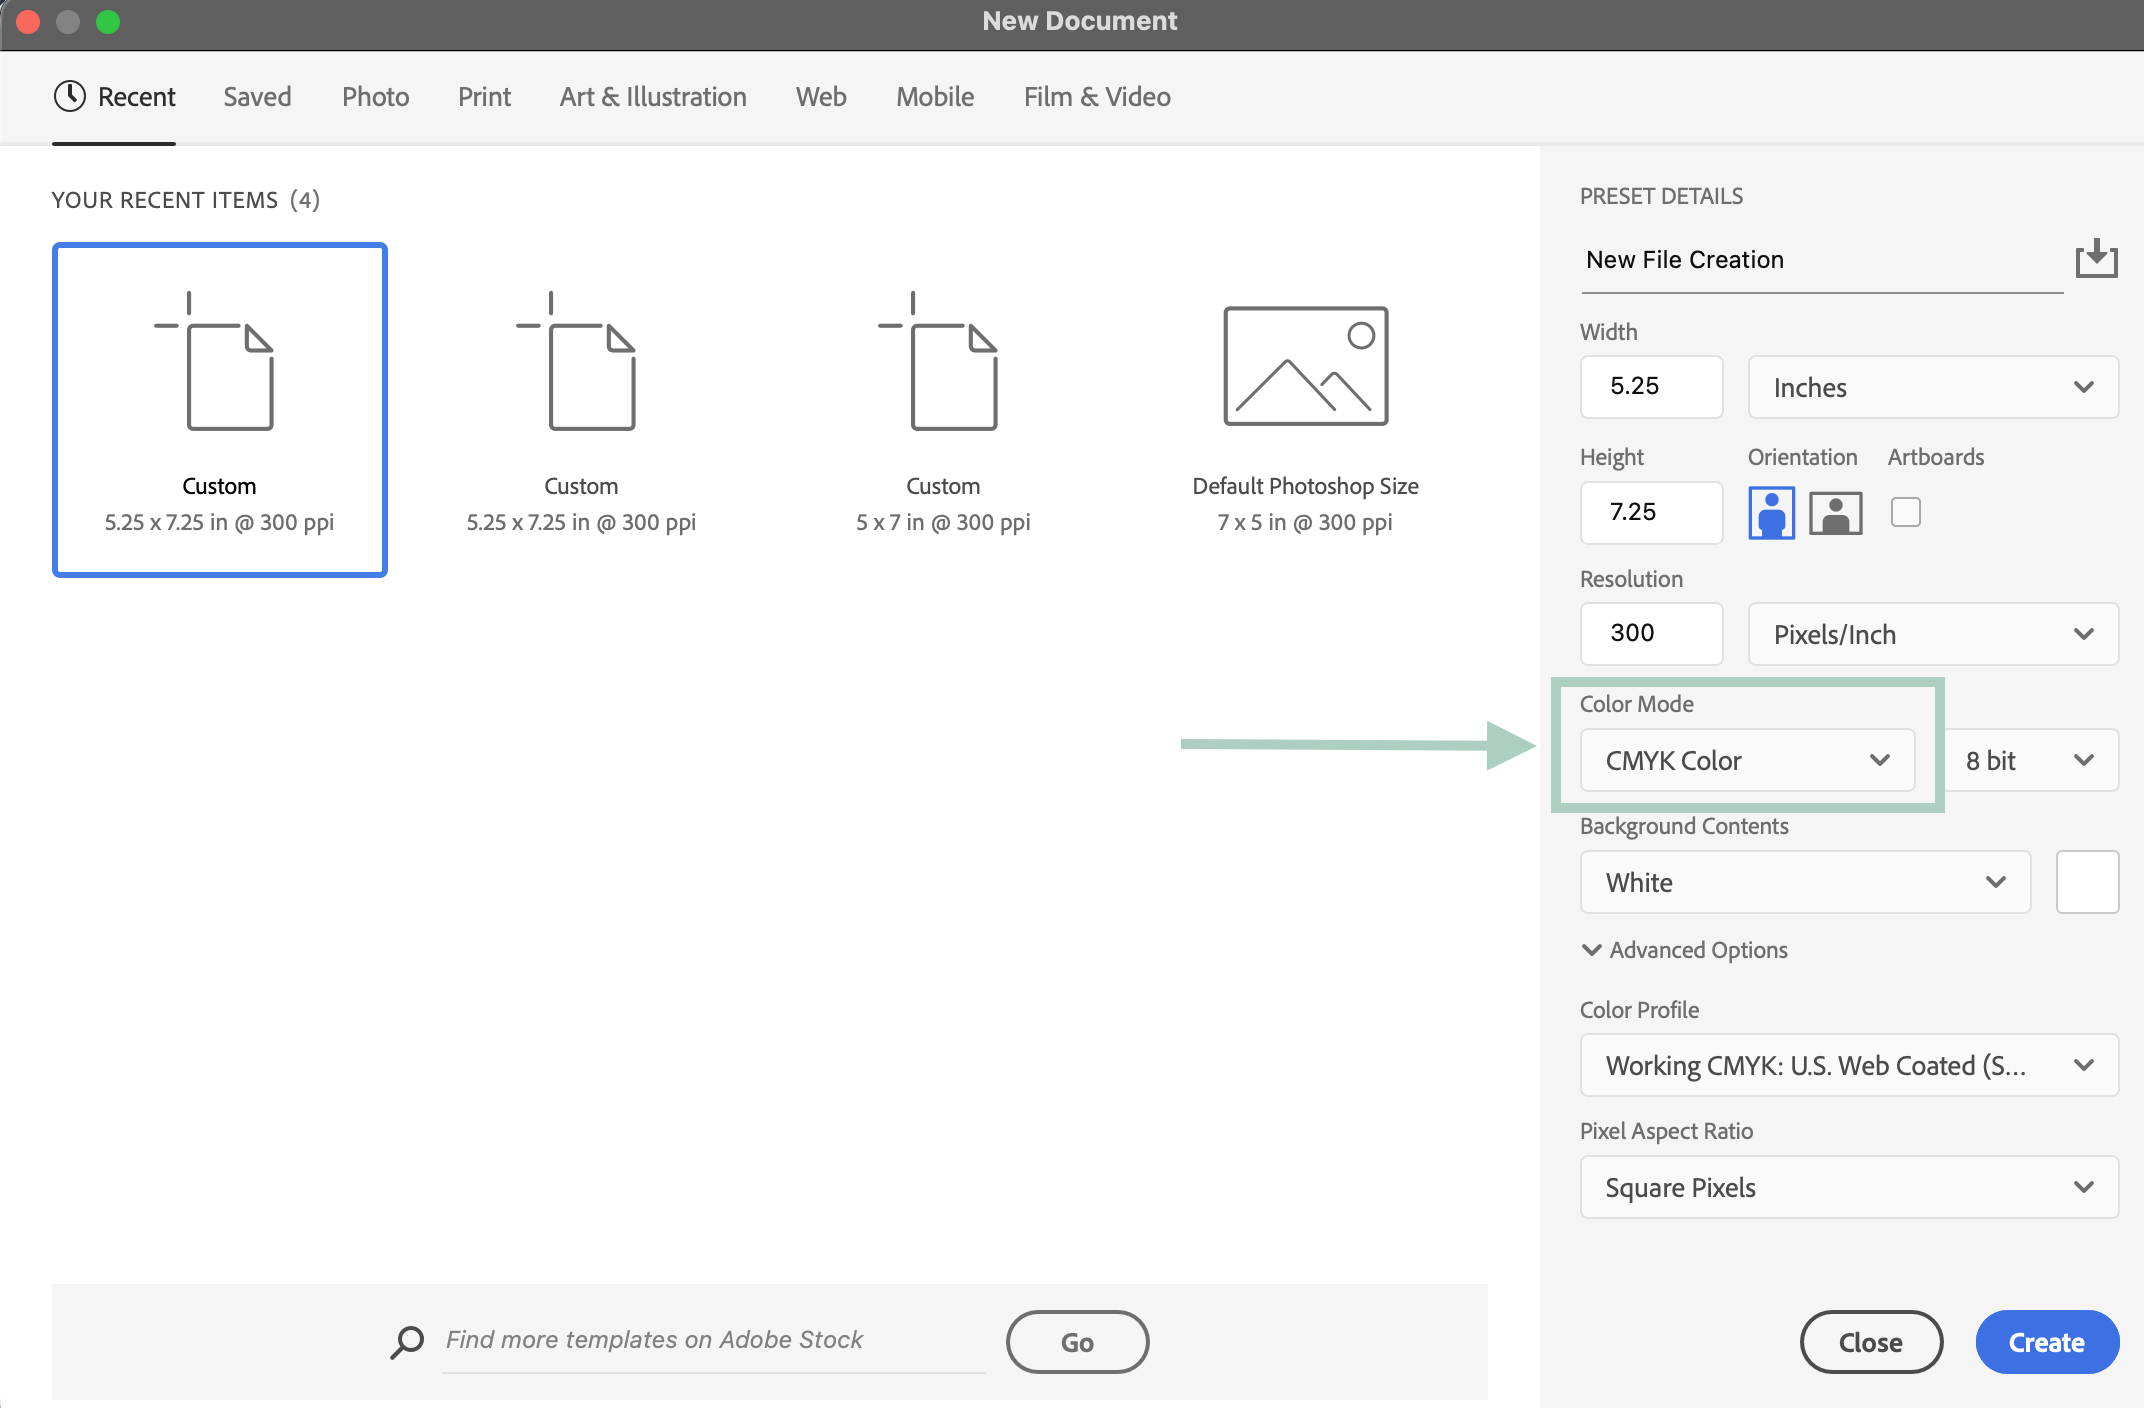
At the start of setting up your file, it is best to select "CMYK Color" for the Color Mode.
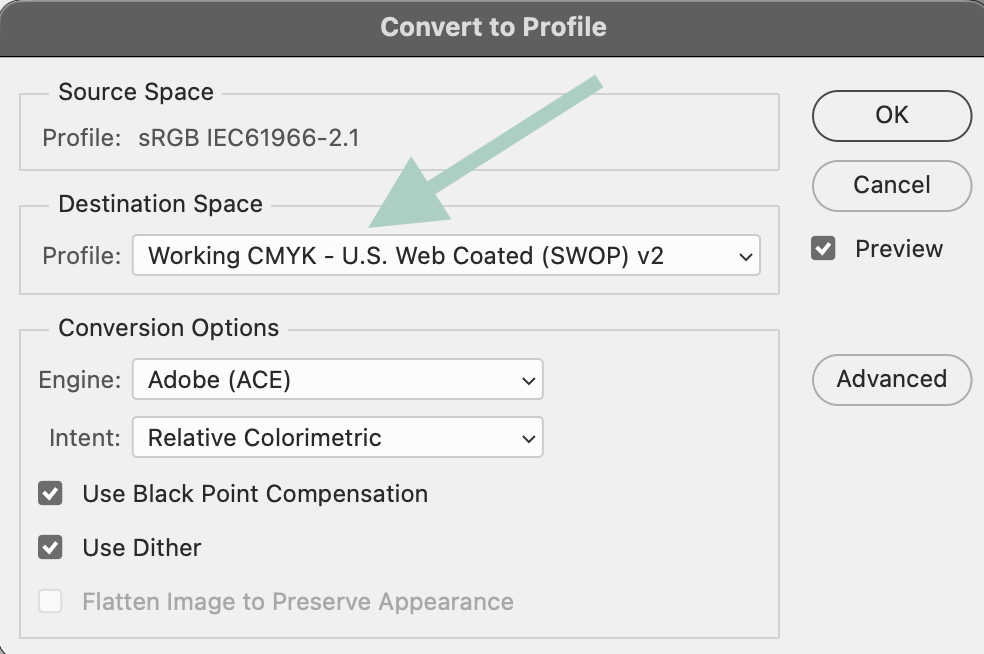
If you do not select CMYK from the start, you can convert your file to CMYK by navigating to: Edit > Convert to Profile
How to Account for Bleed and Margin When Designing
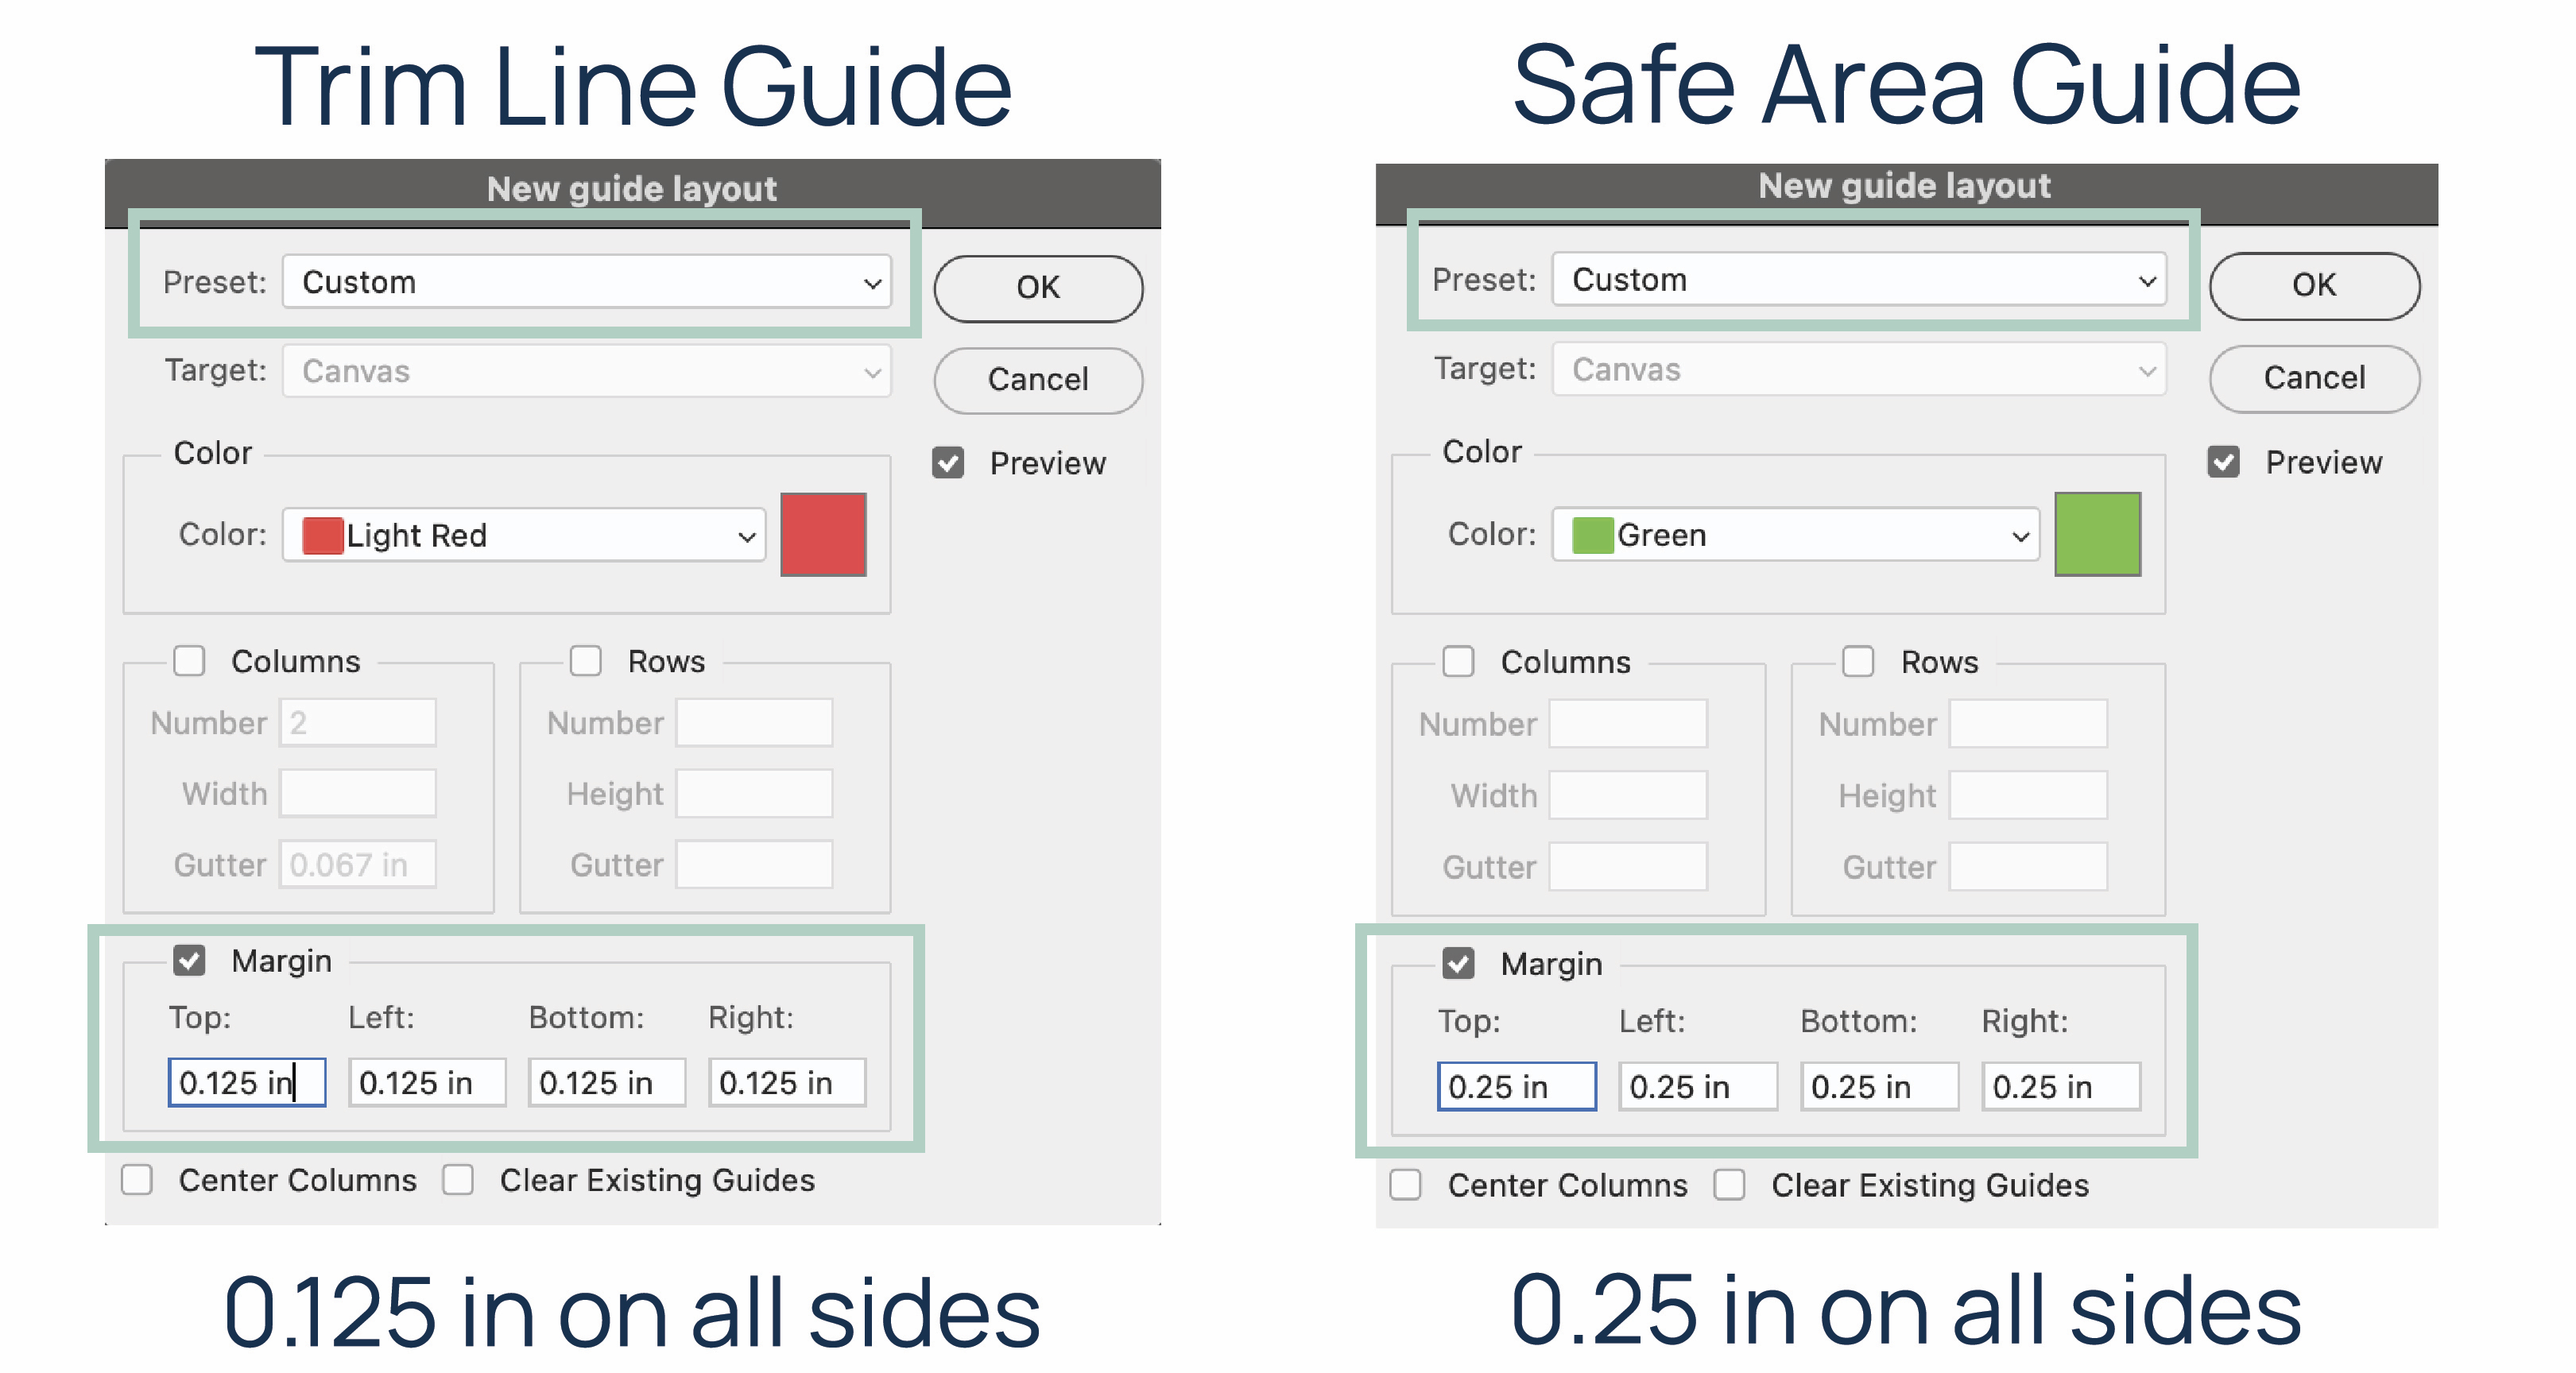
One way to account for bleed and margins in Photoshop is to set up guides for your file. You need to create 2 guide layouts for your file: The Trim Line and the Safe Area
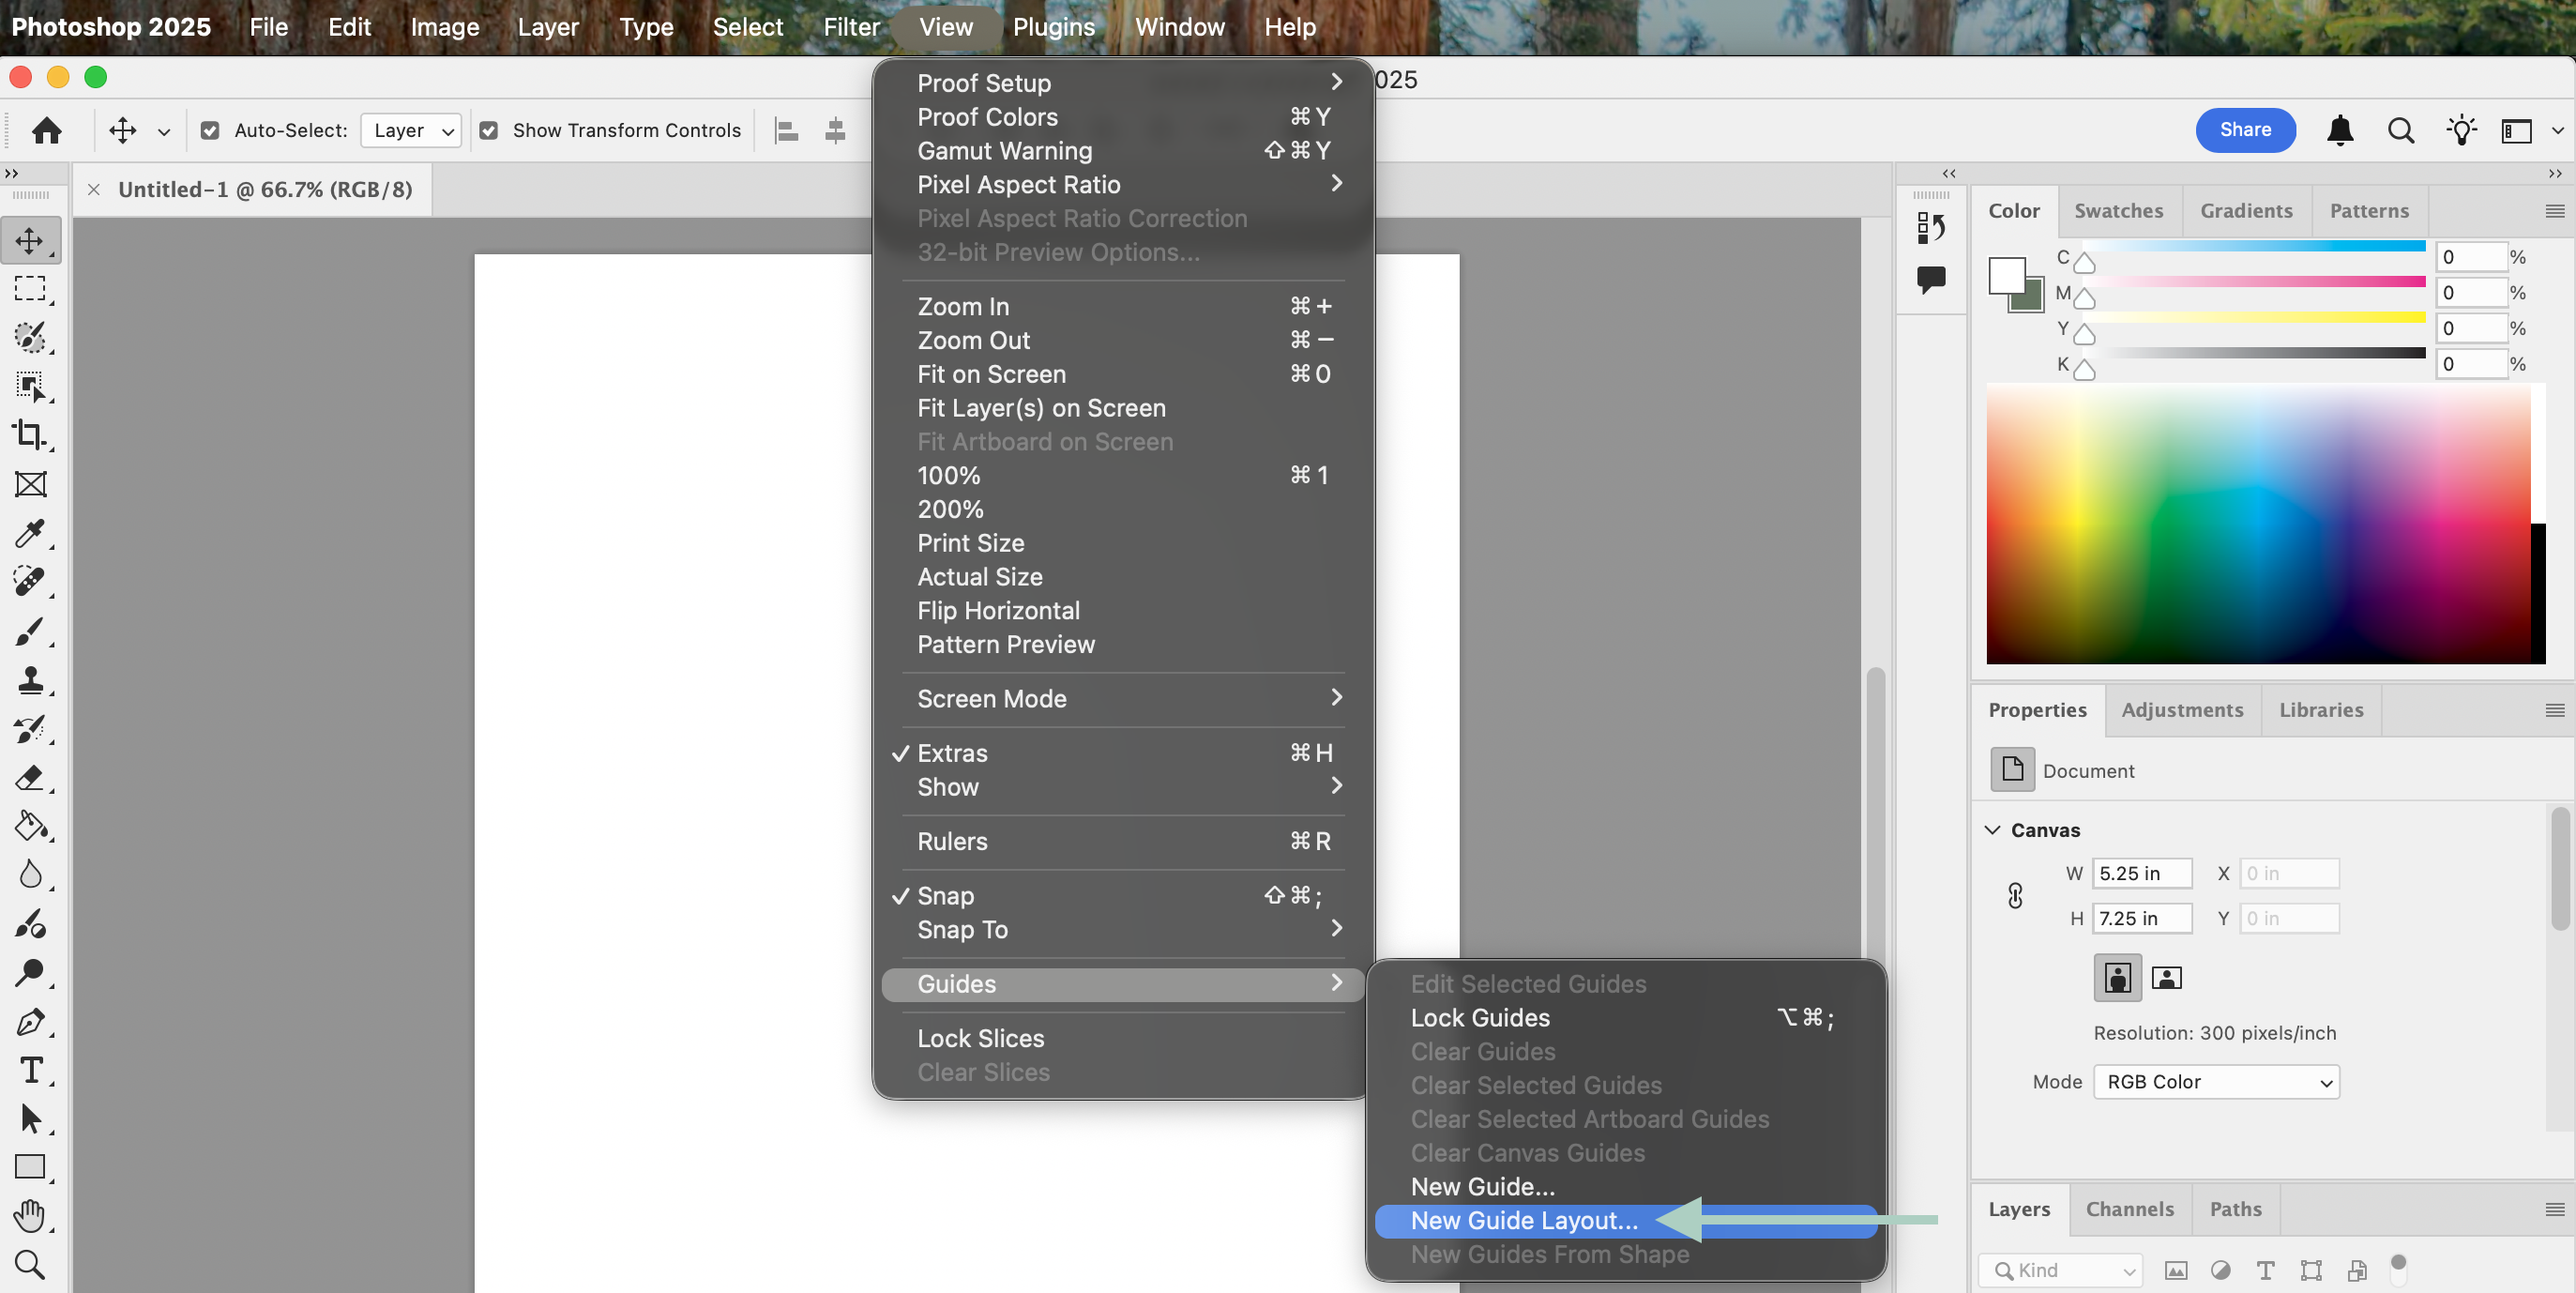
To start, navigate to: View > Guides > New Guide Layout
Setup your guides as shown below:
The end result should leave your file looking something like this:
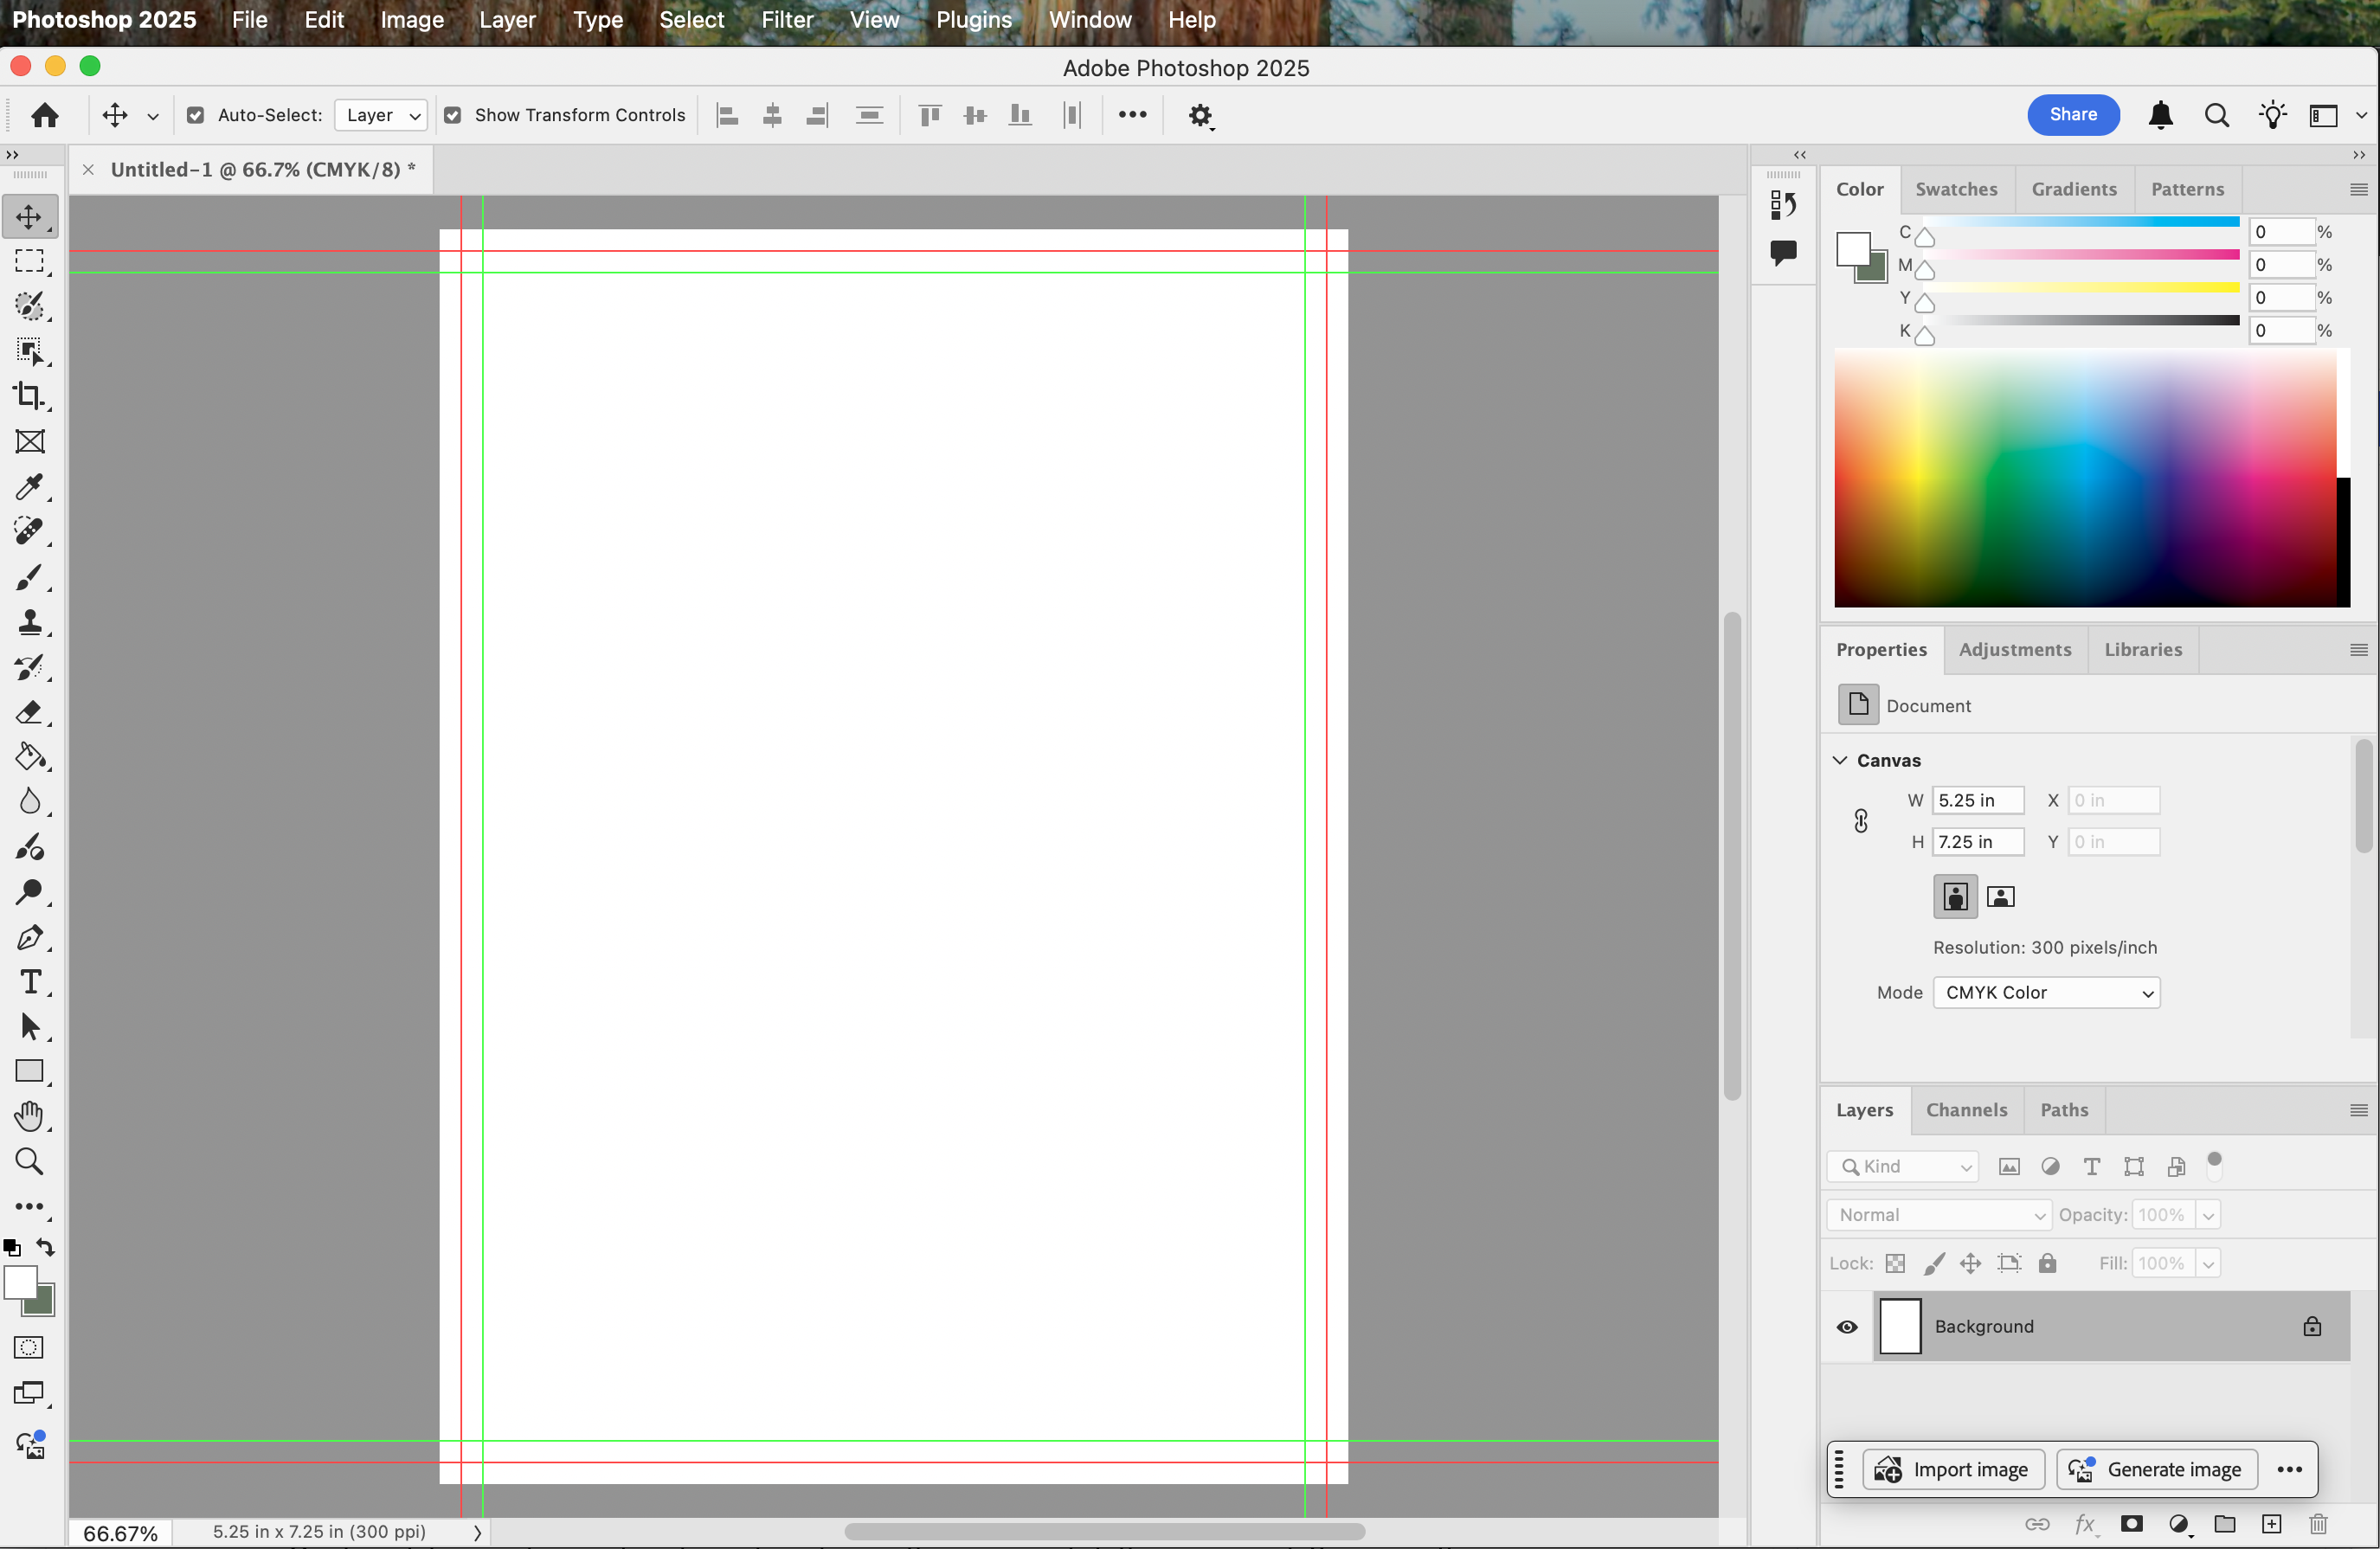
The area outside of the red line is the bleed area of your file. The area inside the green line is your safe area for printing.
Utilizing Templates
Our templates can be used in place of guides, as they accomplish the same goal. You can either:
- Add the PDF version of the template as a new layer, or
- Start out by opening the template instead of creating a new file
When using either of these options, be sure that the "Crop To" option is set to "Bleed Box". This will ensure that the template is imported at the file size including bleed.
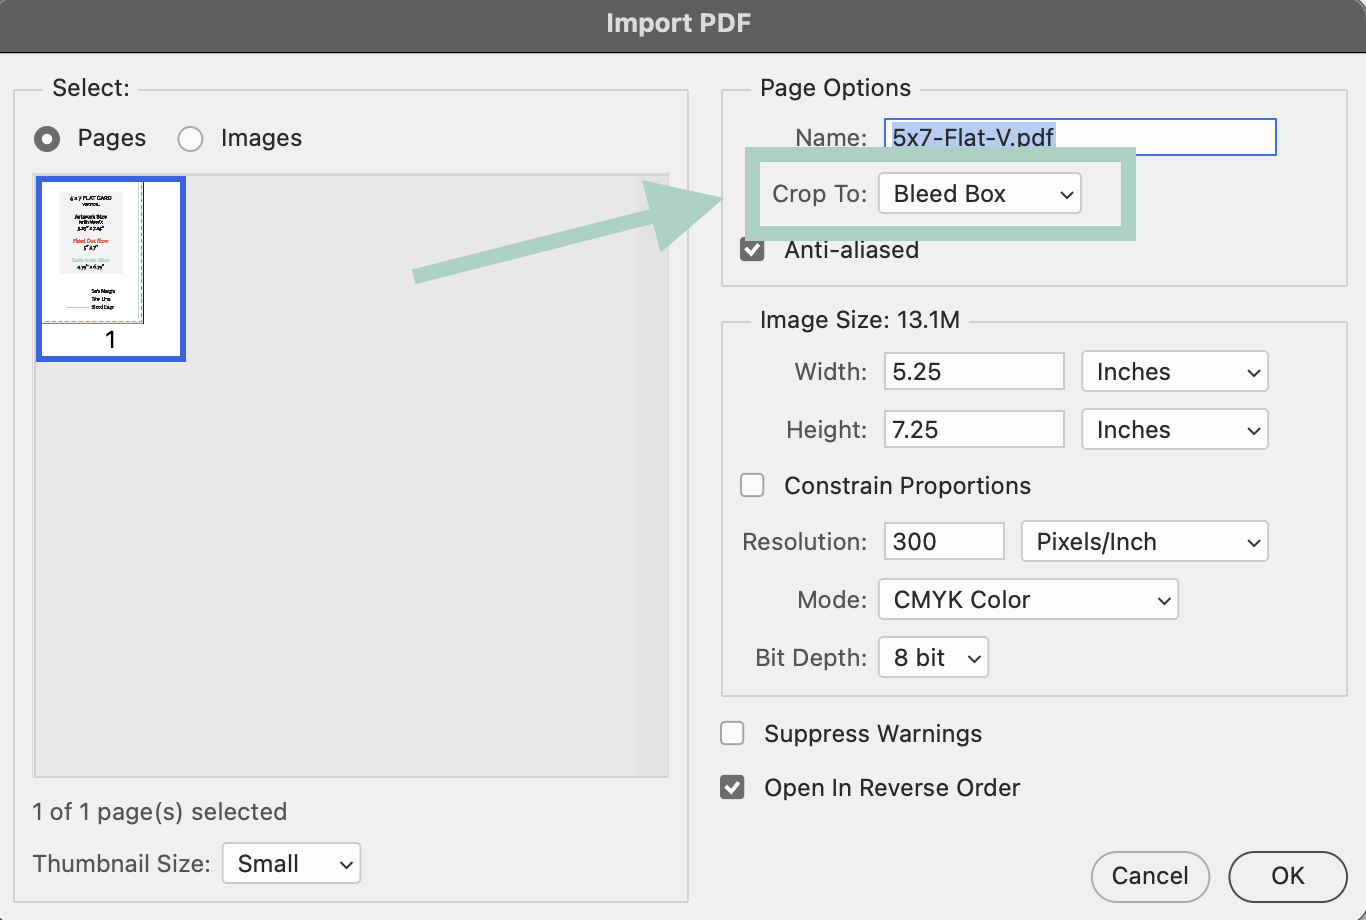
Remember: Always completely remove the template layer from you file before saving your final print-ready PDF.How to Save your Print-Ready PDF
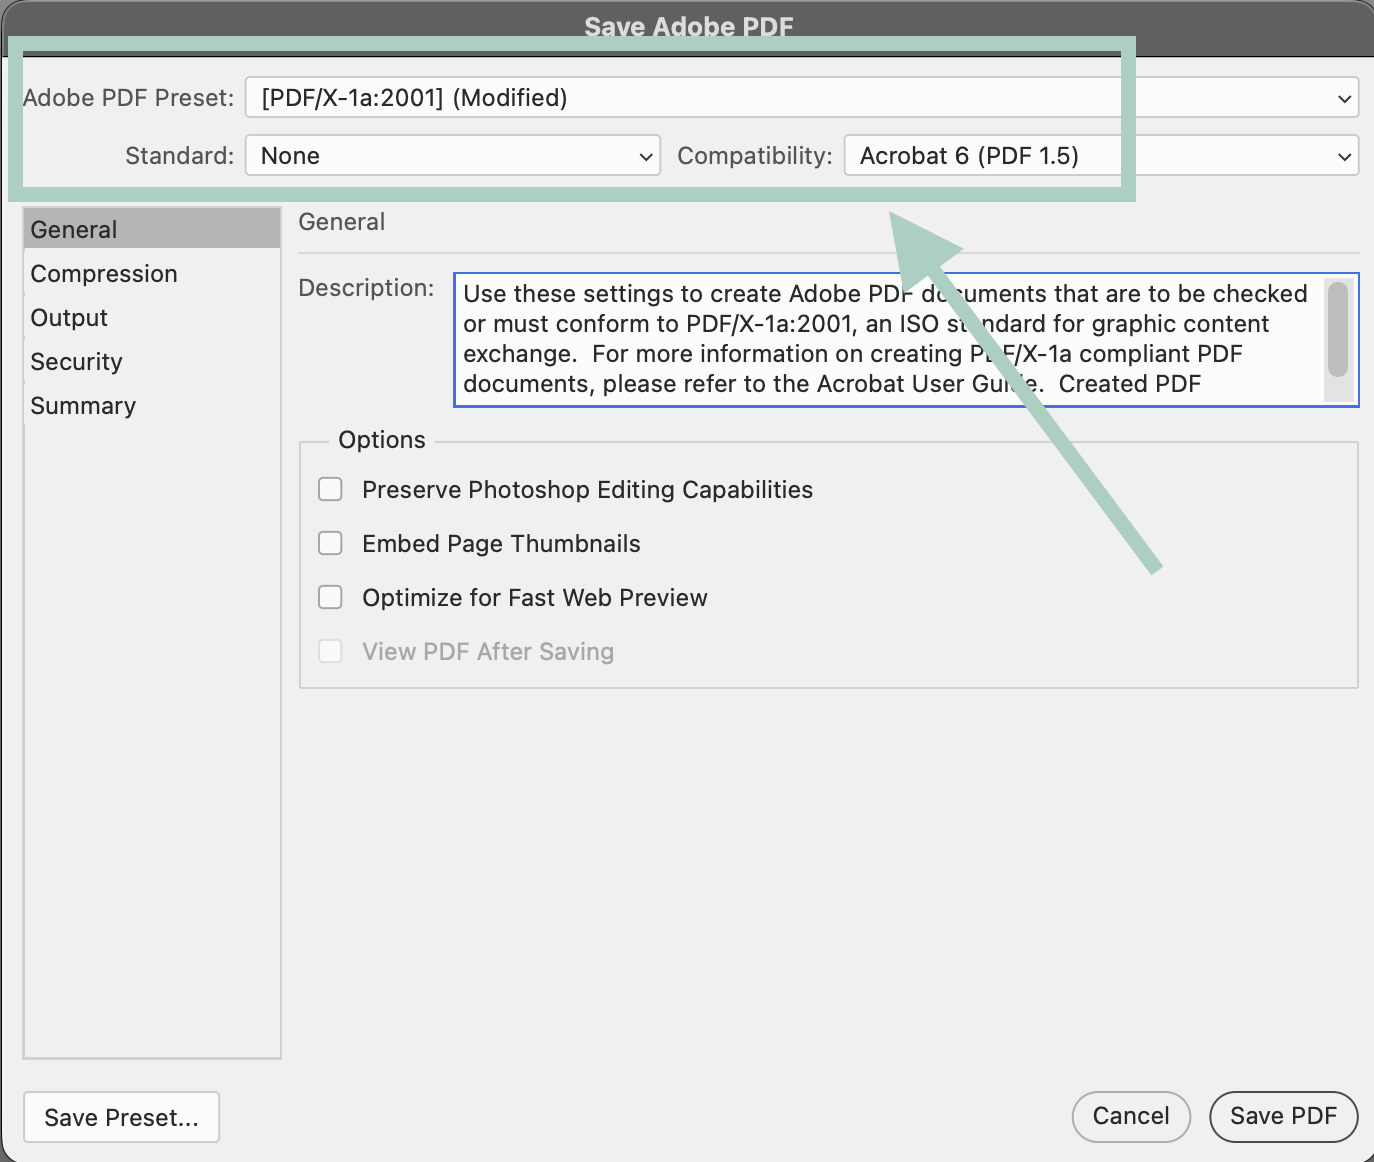
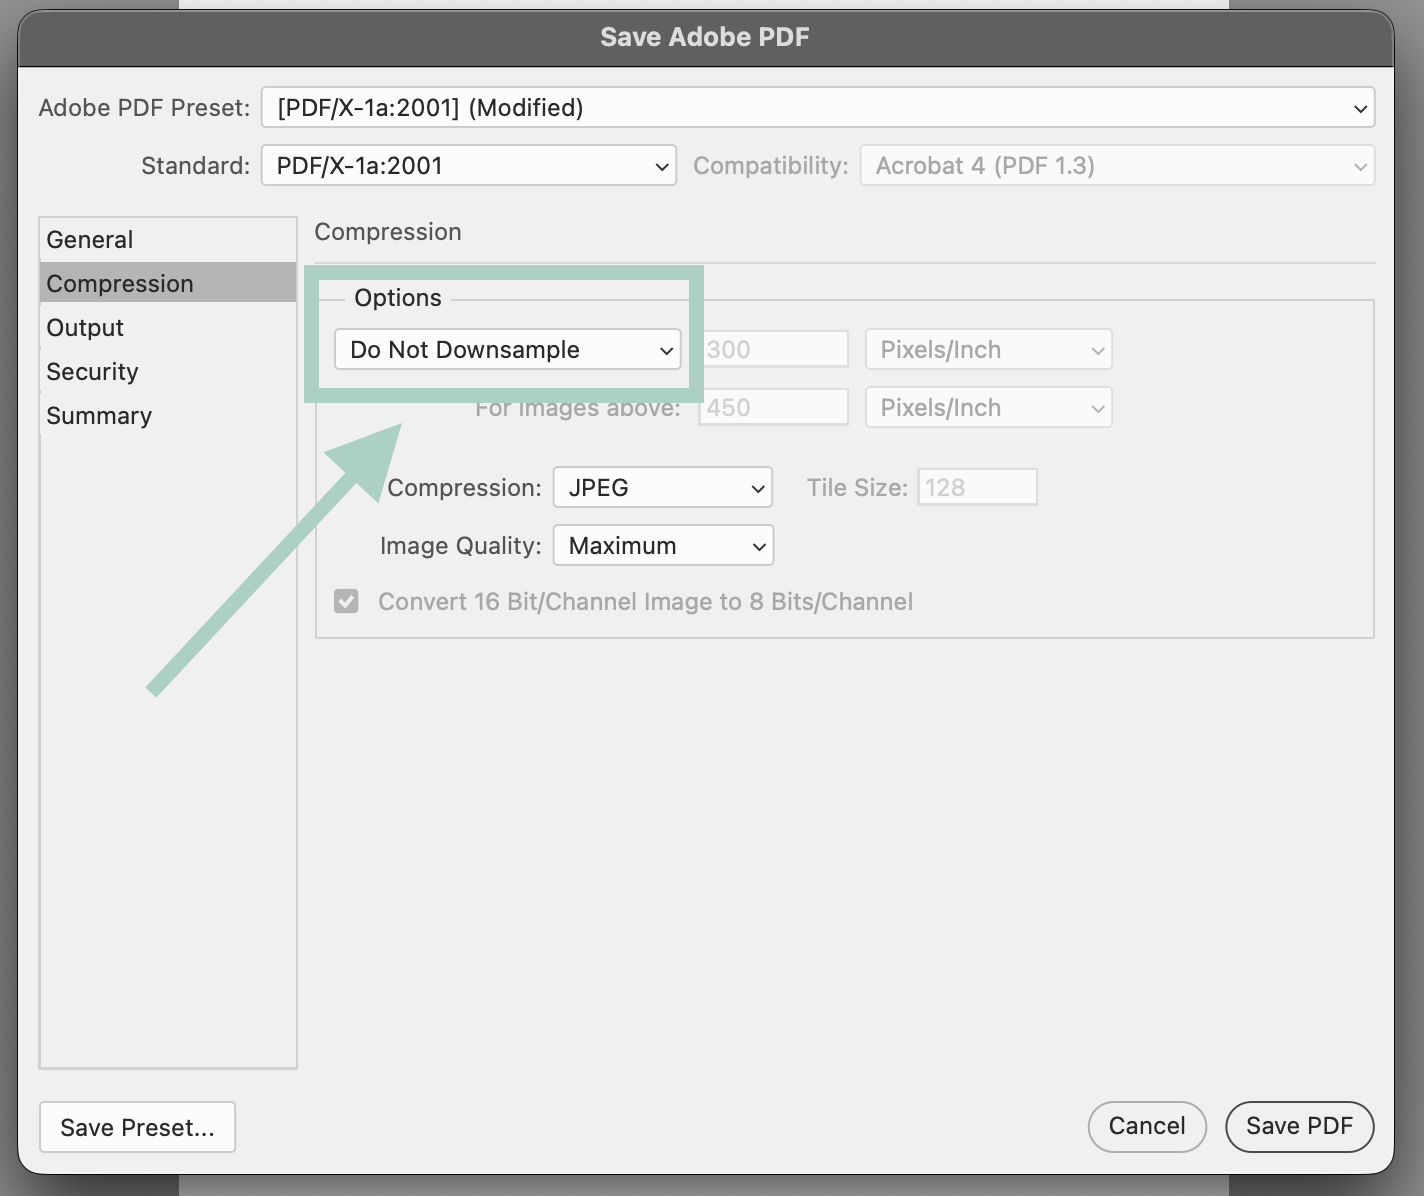
The two most important settings to check when saving your Photoshop as a print-ready PDF are the settings in the "General" Panel and the "Compression" Panel.
General Panel
In the general save settings for your file, you should select:
- "PDF/X-1a" from the "Adobe PDF Presets" drop down menu.
- "None" from the Standard drop down menu.
- "Acrobat 6 (PDF 1.5) from Compatibility drop down menu.
Compression Panel
In the compression panel, you will want to change the options to "Do Not Downsample". Allowing Photoshop to downsample your images may result in unwanted pixelation or blurriness once printed.
There are not any critical changes that need to be made in the "Output", "Security", or "Summary" Panels. The changes in the "General" and "Compression" panel will be sufficient for printing.
Benefits of Using Photoshop for Designing
- Allows additional photo editing capabilities for photo cards.
- Easy setup for PDF files with a transparent background for White Ink Files.
Challenges of Using Photoshop for Designing
- Raster-based, so artwork does not scale like vector artwork. Photoshop is not able to appropriately handle vector artwork since it is intended for raster so creating files for foil stamping may be more difficult.
- No true document bleed setting like Illustrator or InDesign. This makes it easy to setup the file at the final trim size and forget to manually add bleed to the overall dimensions.
- Creating multi-page PDF files takes additional steps.
Ready to Start Setting Up Print-Ready Files?
Head on over to our Print File Setup article for additional information.
Was this article helpful?
That’s Great!
Thank you for your feedback
Sorry! We couldn't be helpful
Thank you for your feedback
Feedback sent
We appreciate your effort and will try to fix the article