Adobe Illustrator is ideal for designs built with vector artwork and typography. It’s especially useful for stationery, invitations, and flat cards where clean lines, sharp text, and precise sizing matter. It’s a strong choice for designers at any stage and offers advanced control for print-ready files.

File Setup in Illustrator
Using Our Templates
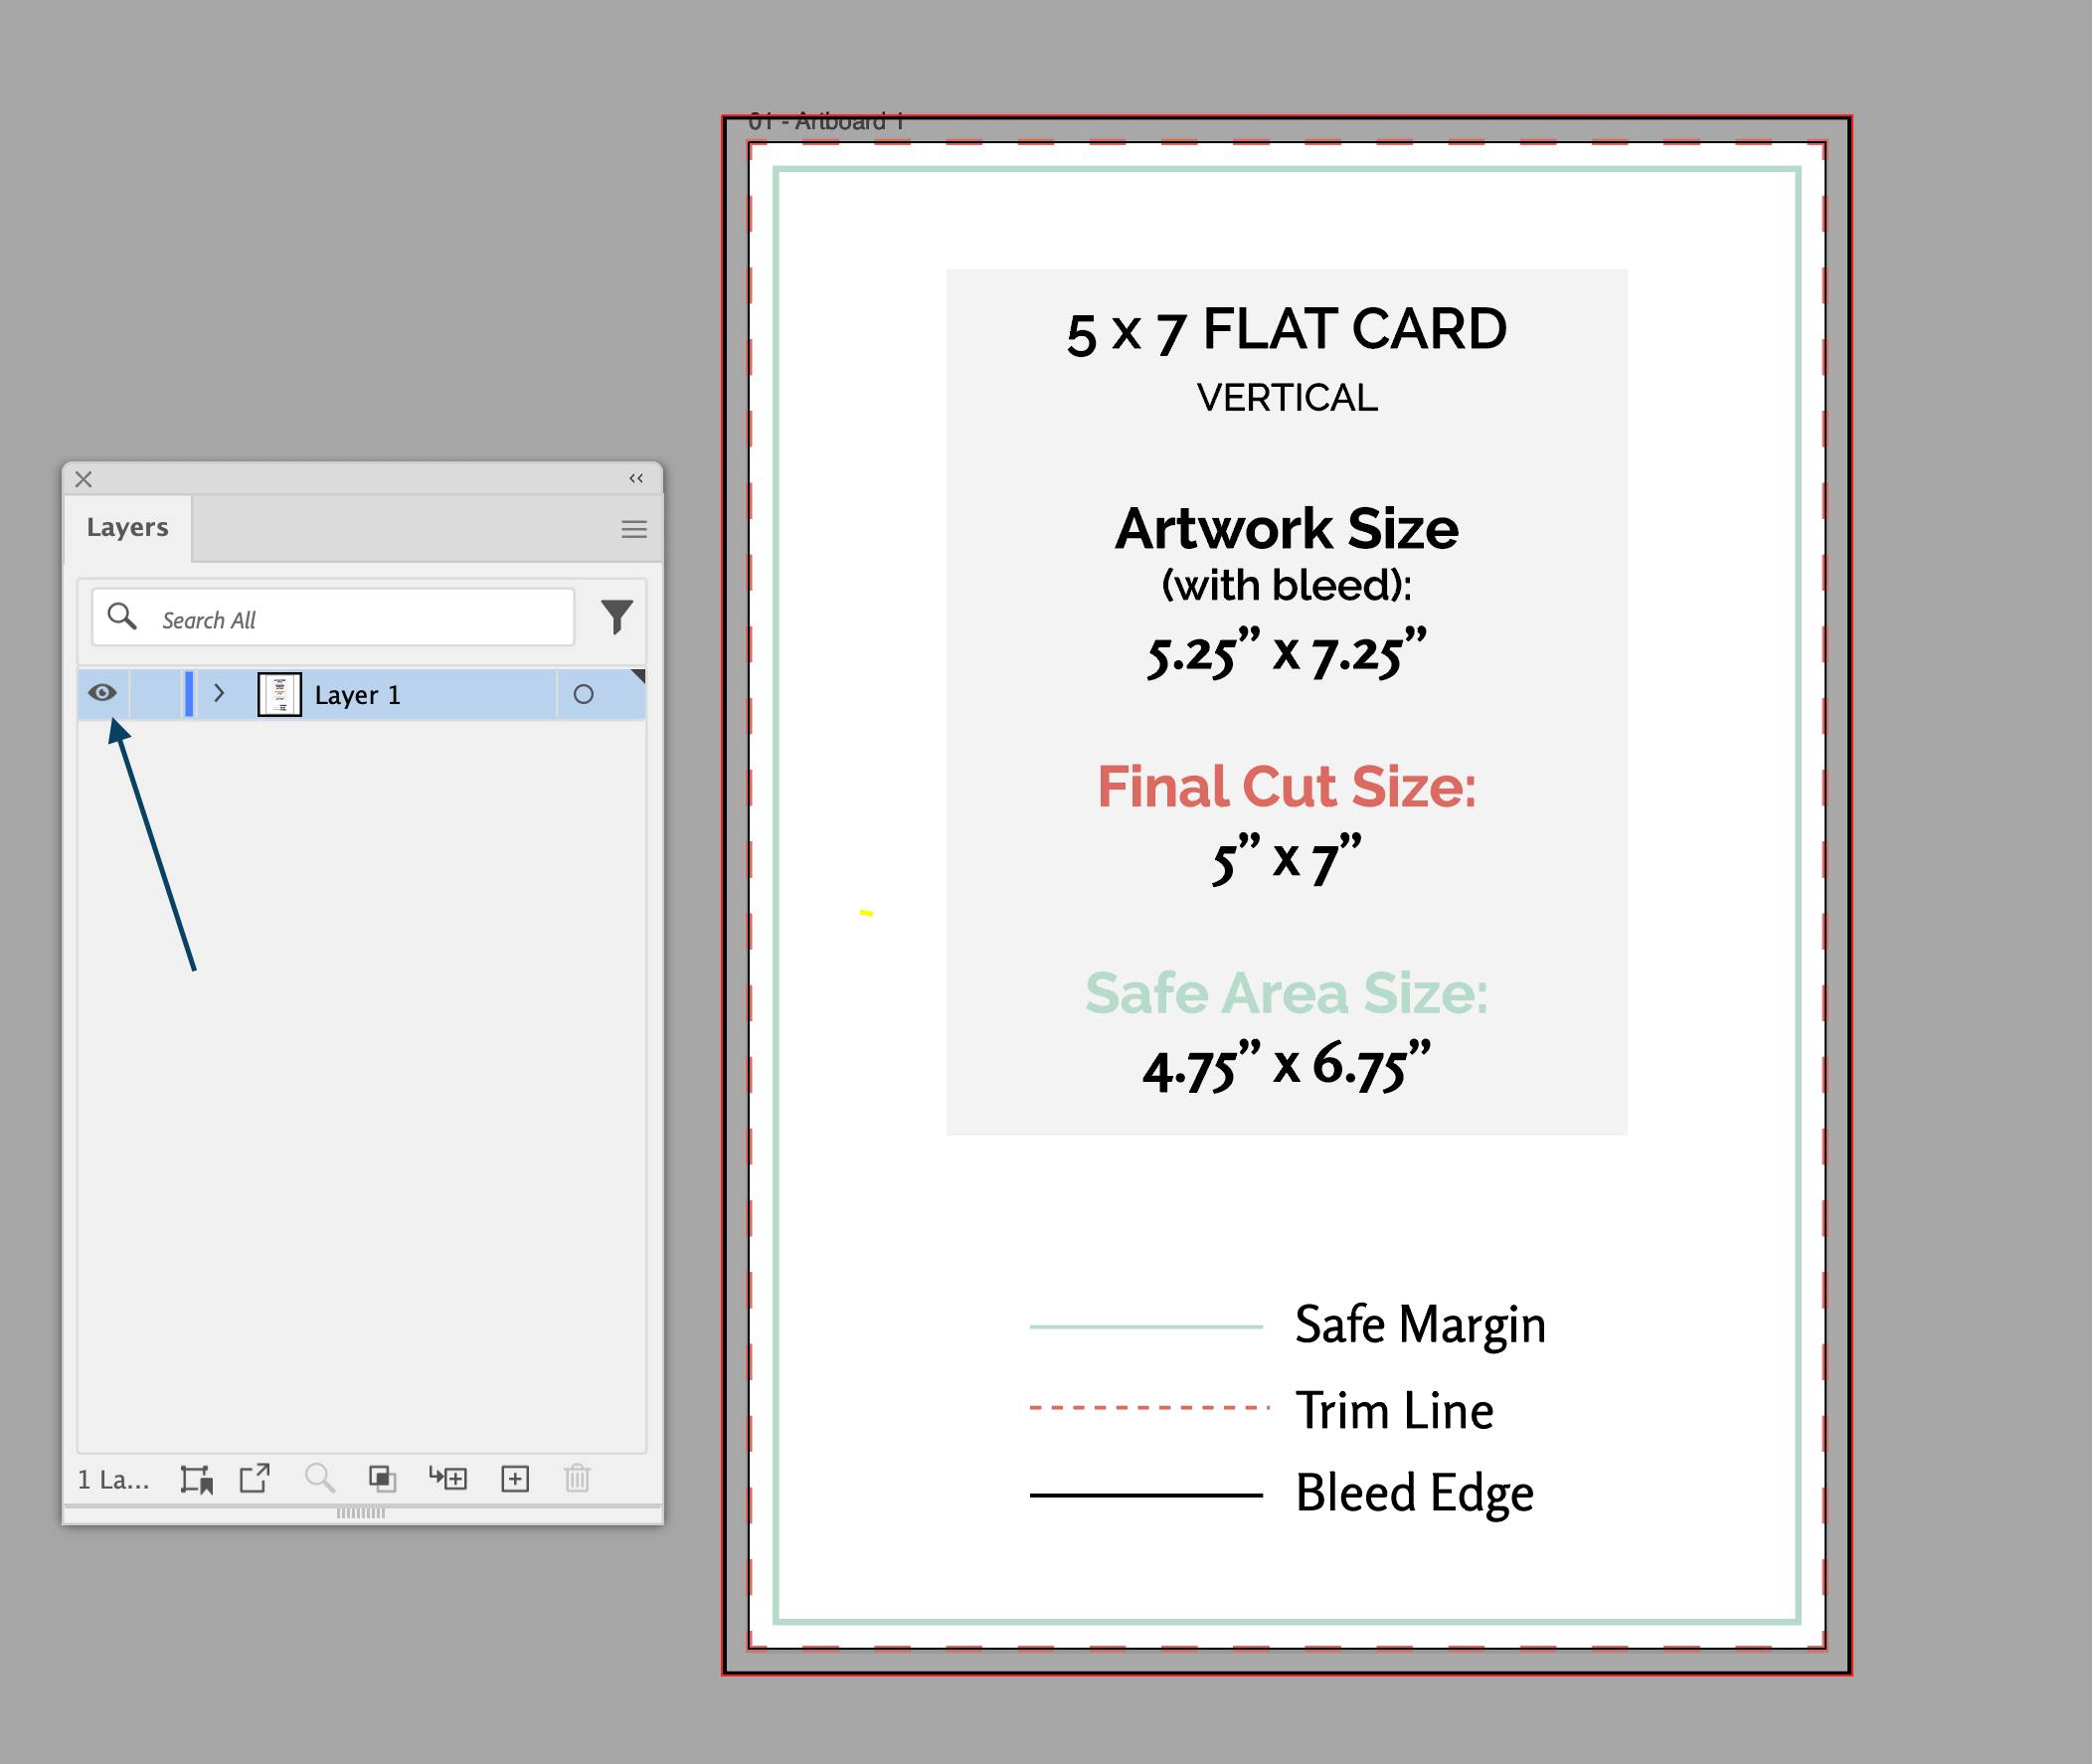
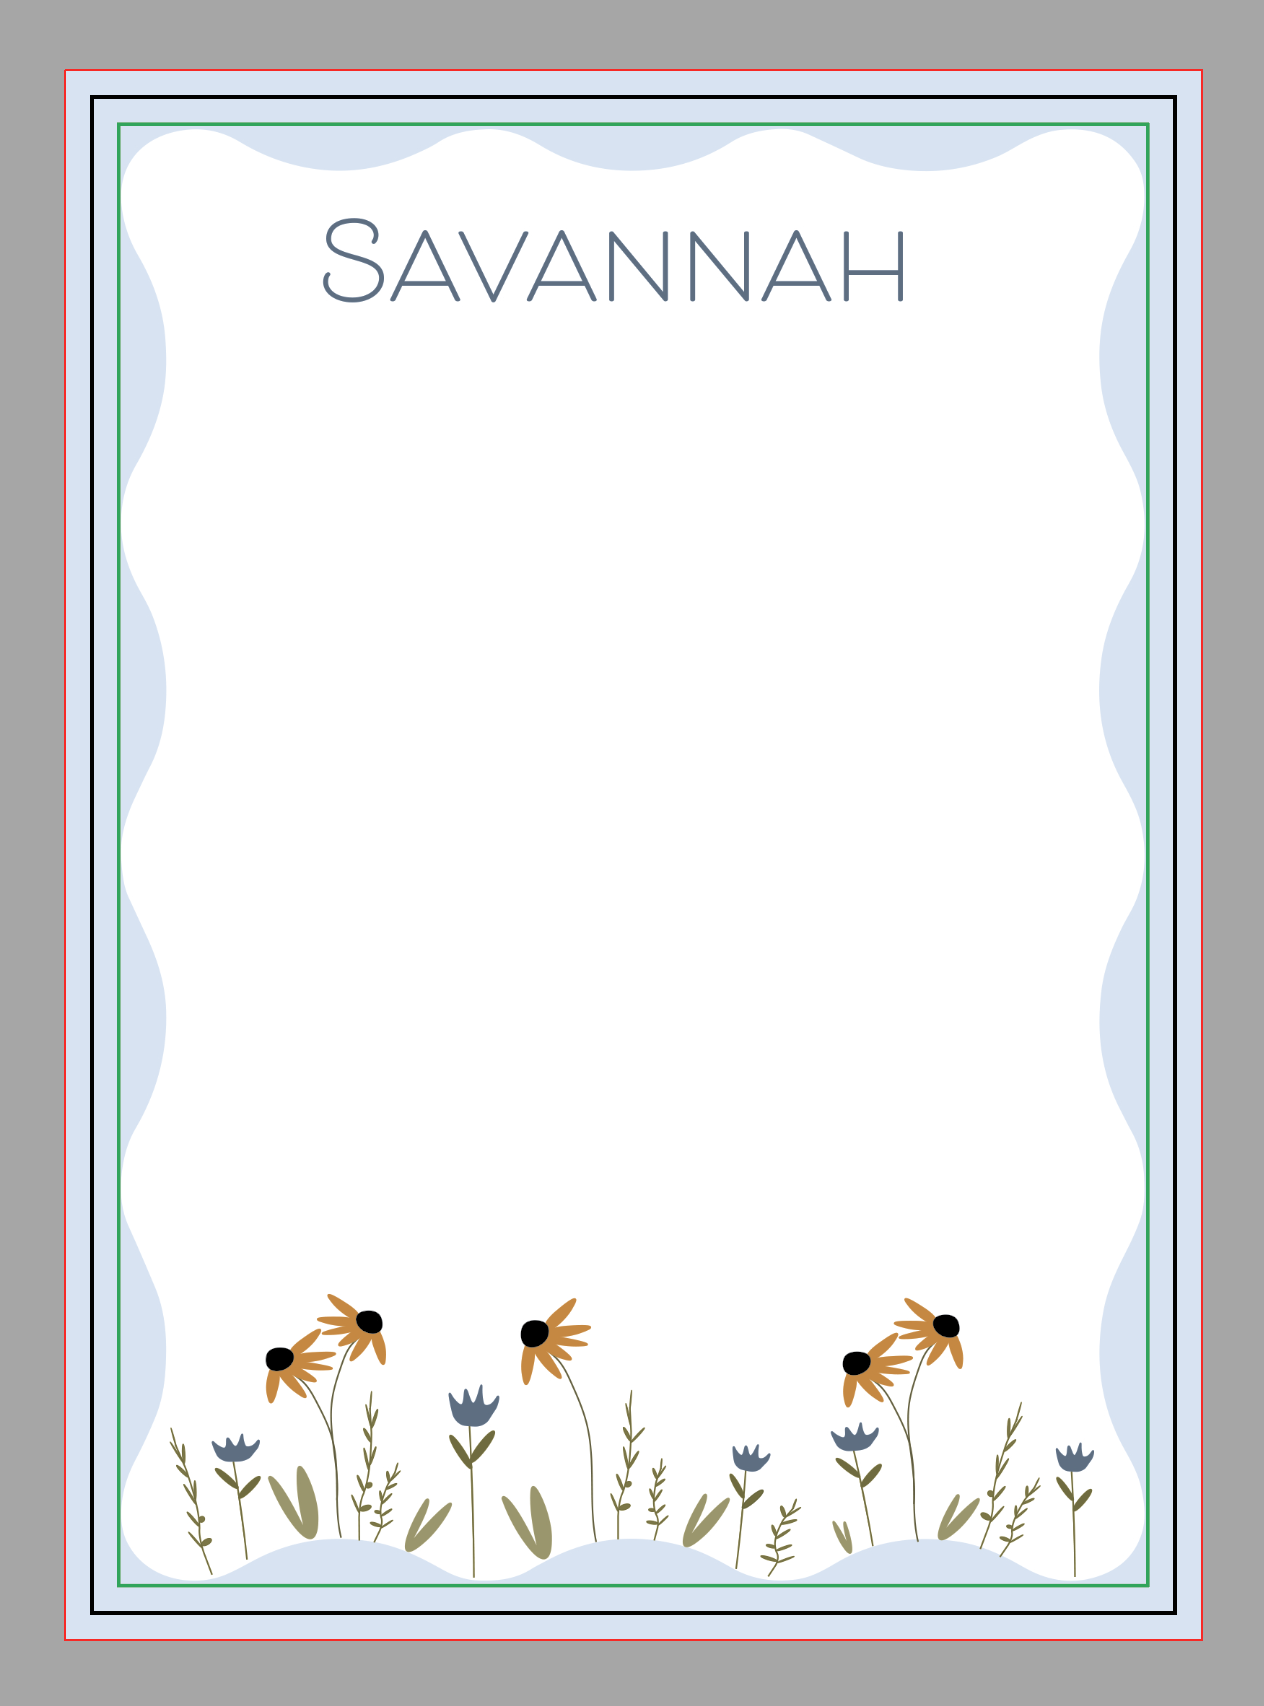
We offer templates for all standard-sized items, which include the final trim size, bleed, and safe margin already built in as separate elements.
Open the Illustrator version of our template and use the Layers panel to toggle individual template elements on and off as you design.
Creating a File Instead of Using Our Template
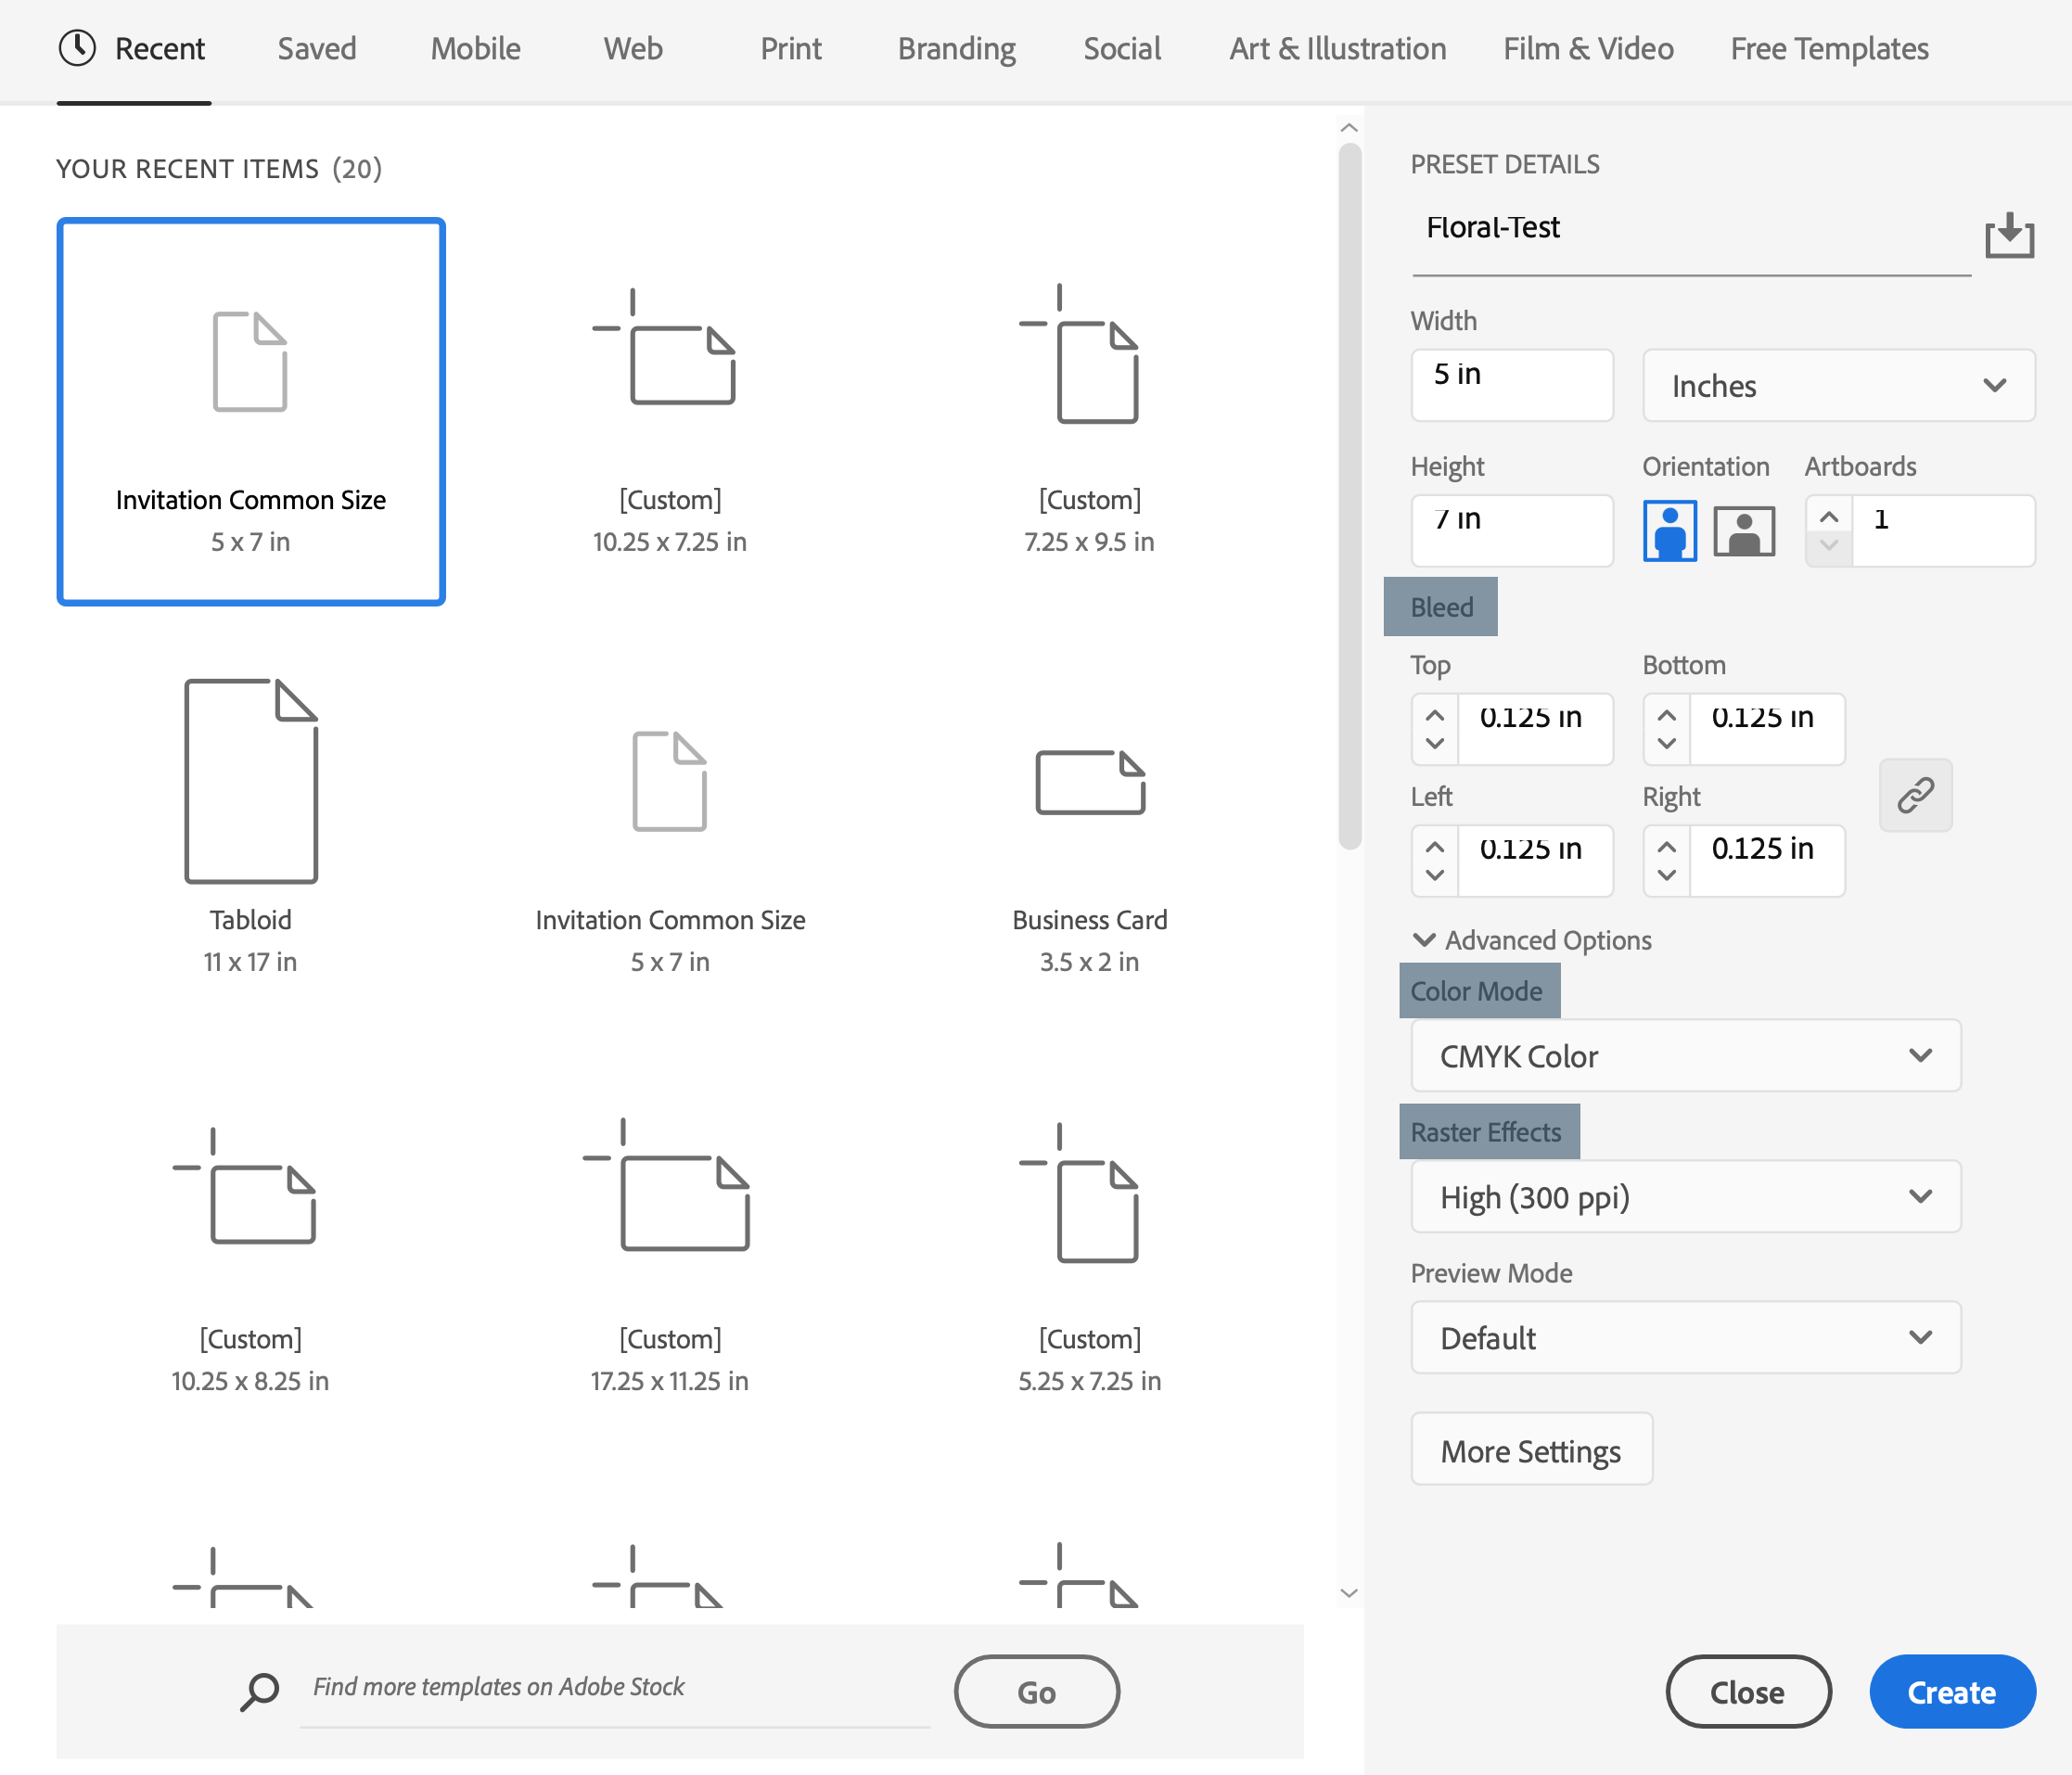
Click File > Create New in Illustrator and enter your width and height of the final product using inches. This is the size your card or stationery item will be after it’s cut.
We require a bleed of 0.125" on all sides, which can be added in the bleed settings section.
Set the Color Mode to CMYK, which is used for printing, and raster effects to 300 ppi so any images print clearly.
Export a Print-Ready PDF
Once your design is complete, exporting correctly is what ensures your file prints as expected.
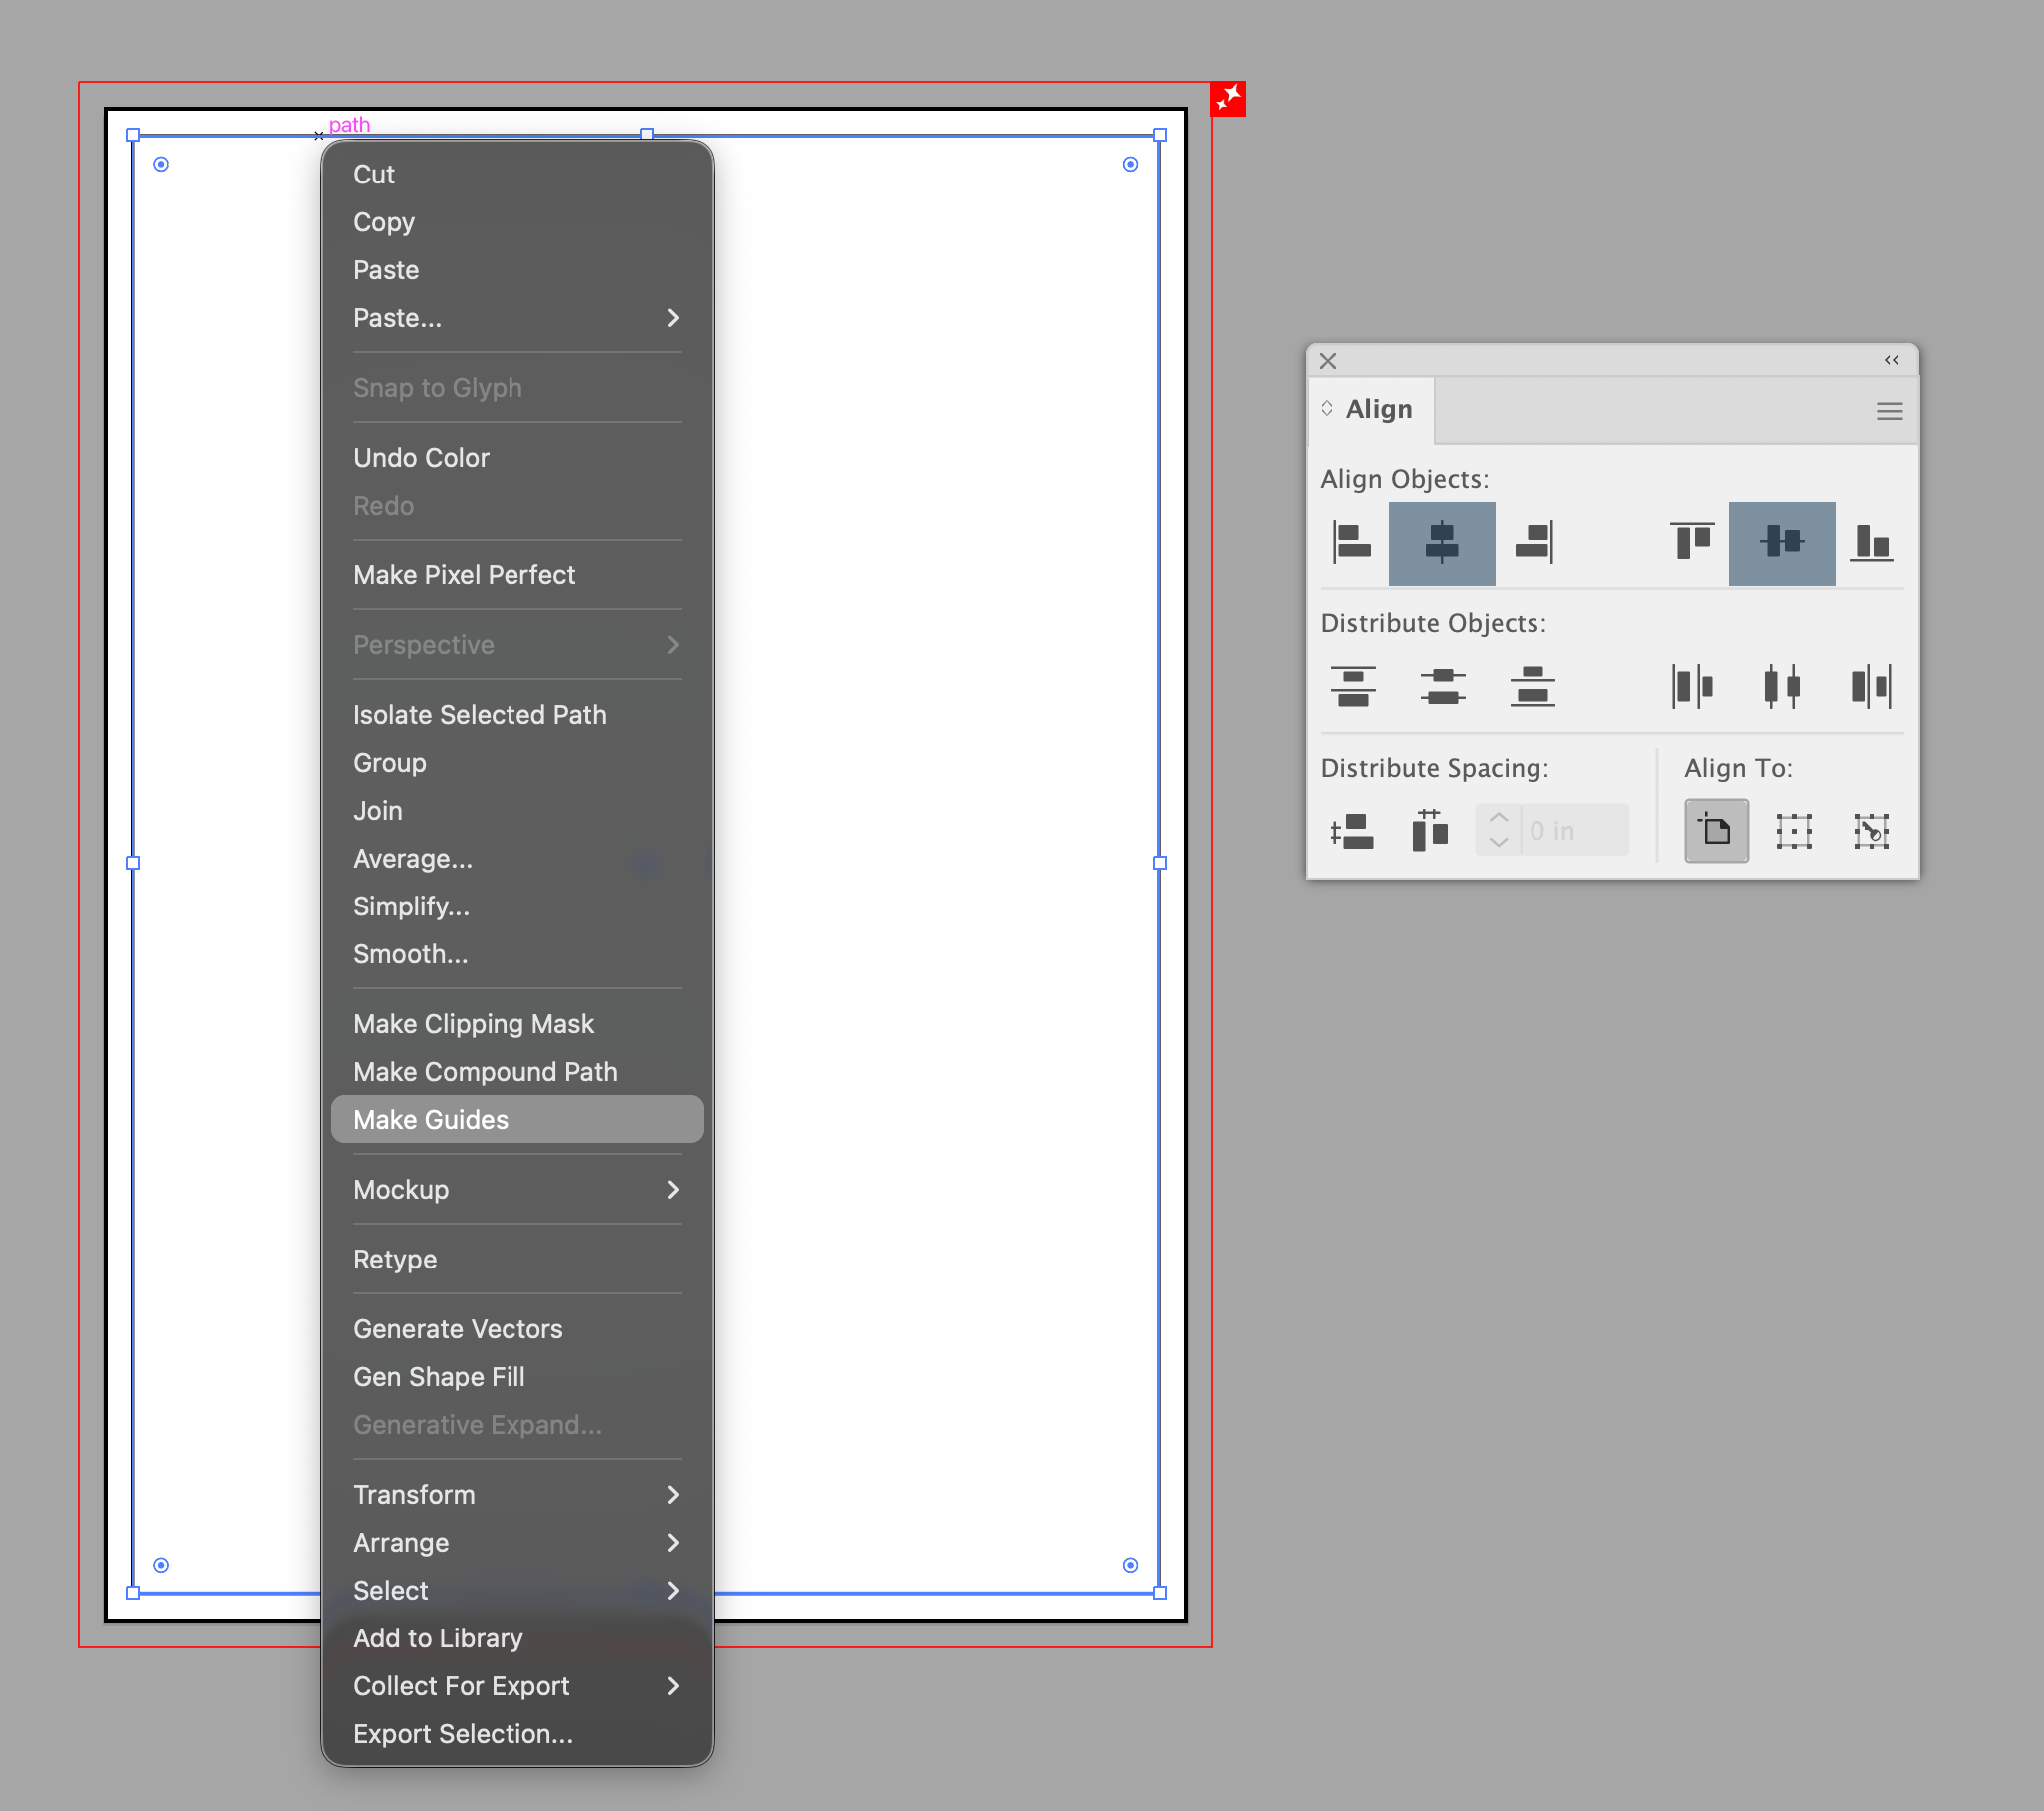
Before exporting, take a moment to finalize your file. Outline your fonts or make sure they are embedded to avoid any discrepancies during printing. You’ll also want to confirm that any template elements have been hidden or deleted and that all images and design elements are in CMYK.
When you’re ready, go to File, Export and choose Adobe PDF . From there, select the PDF/X-1a:2001 preset. Then navigate to the Marks and Bleeds section and check “Use Document Bleed Settings.”
This step is key. It ensures the bleed you set up earlier is included in your final file.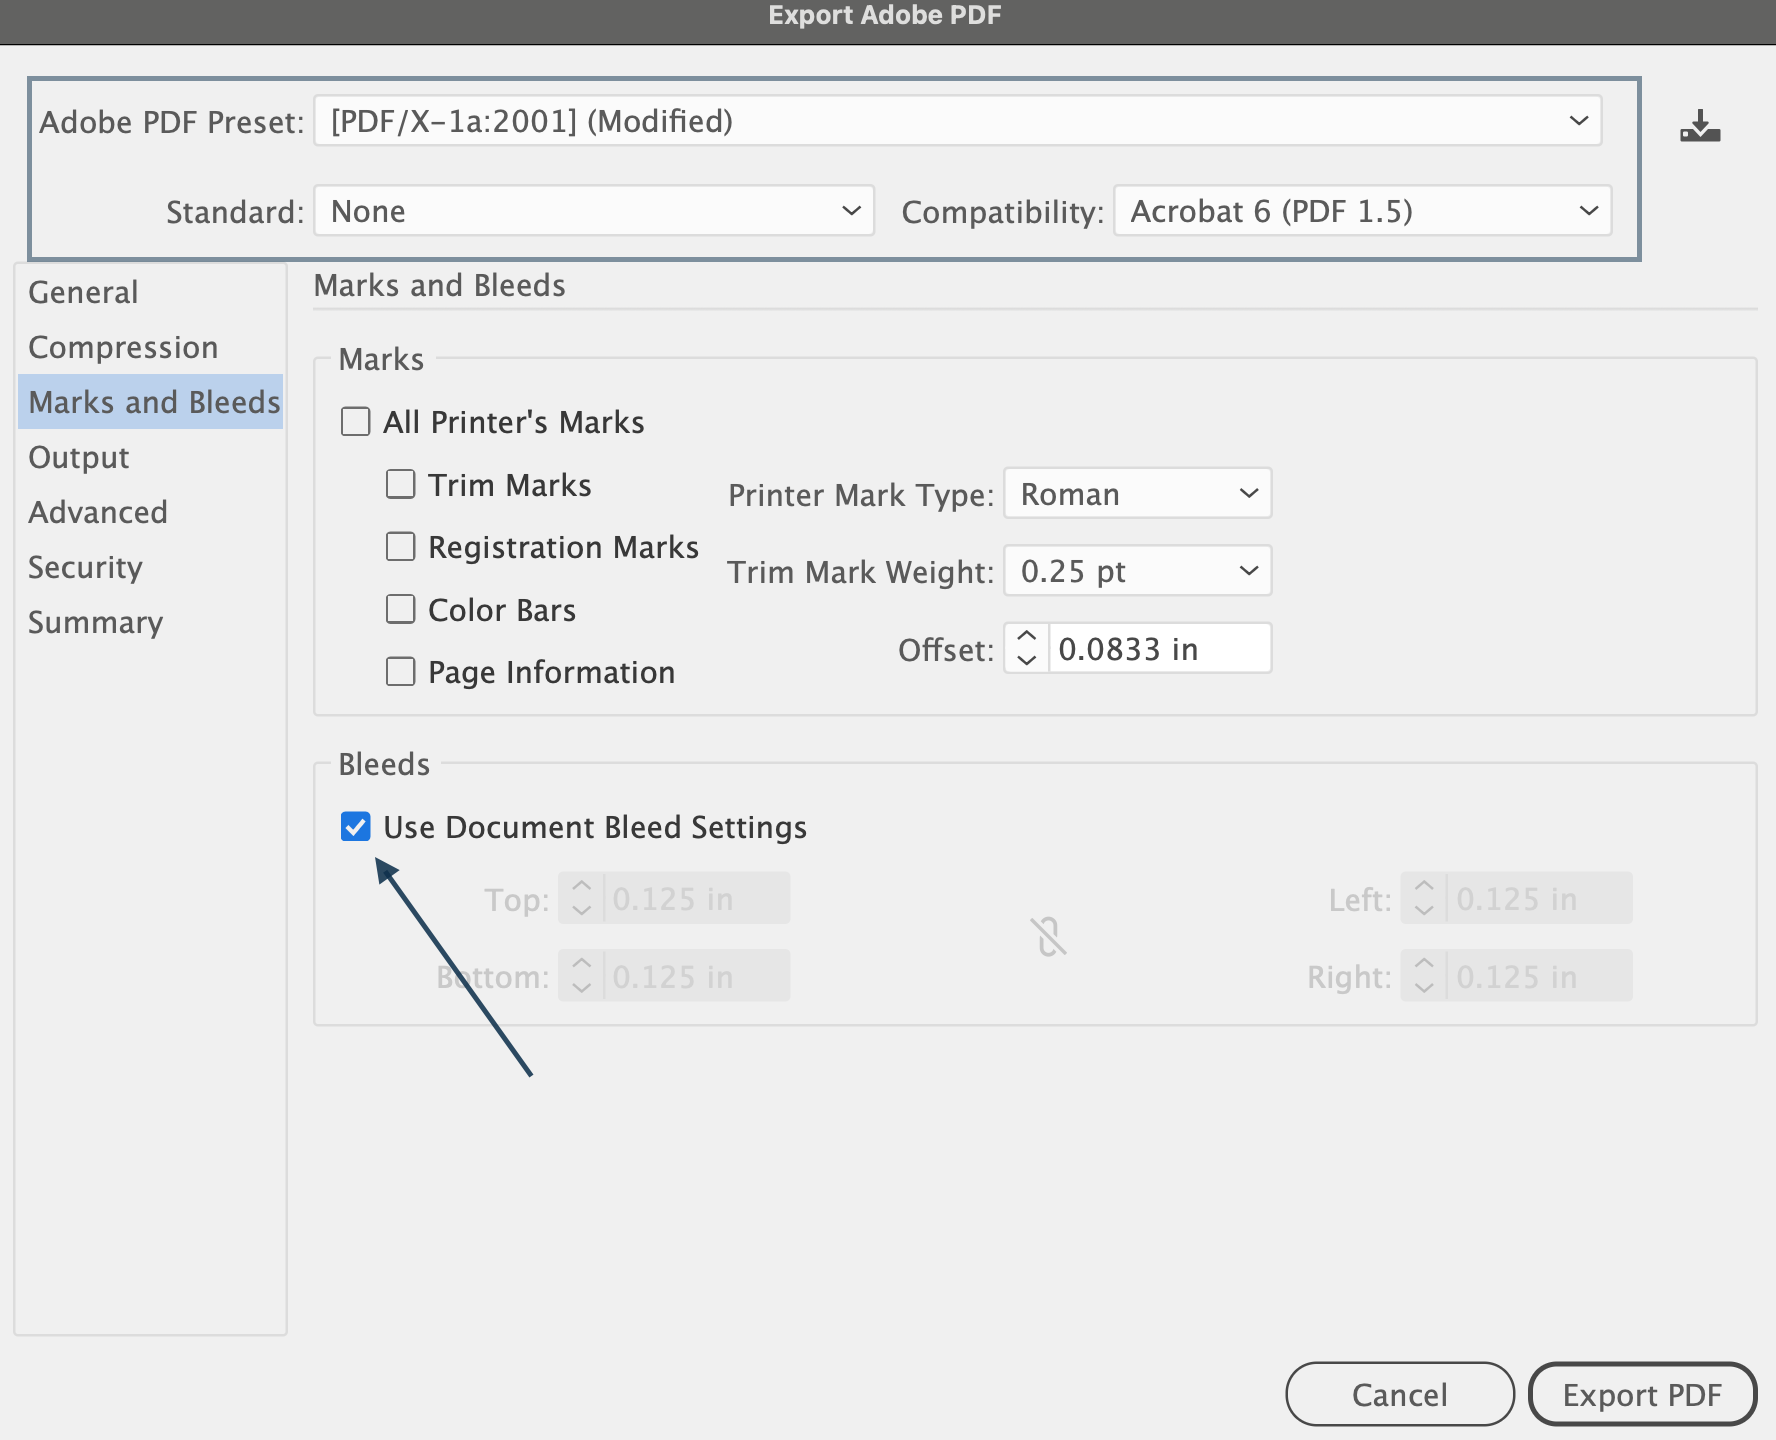
Common Mistakes to Avoid
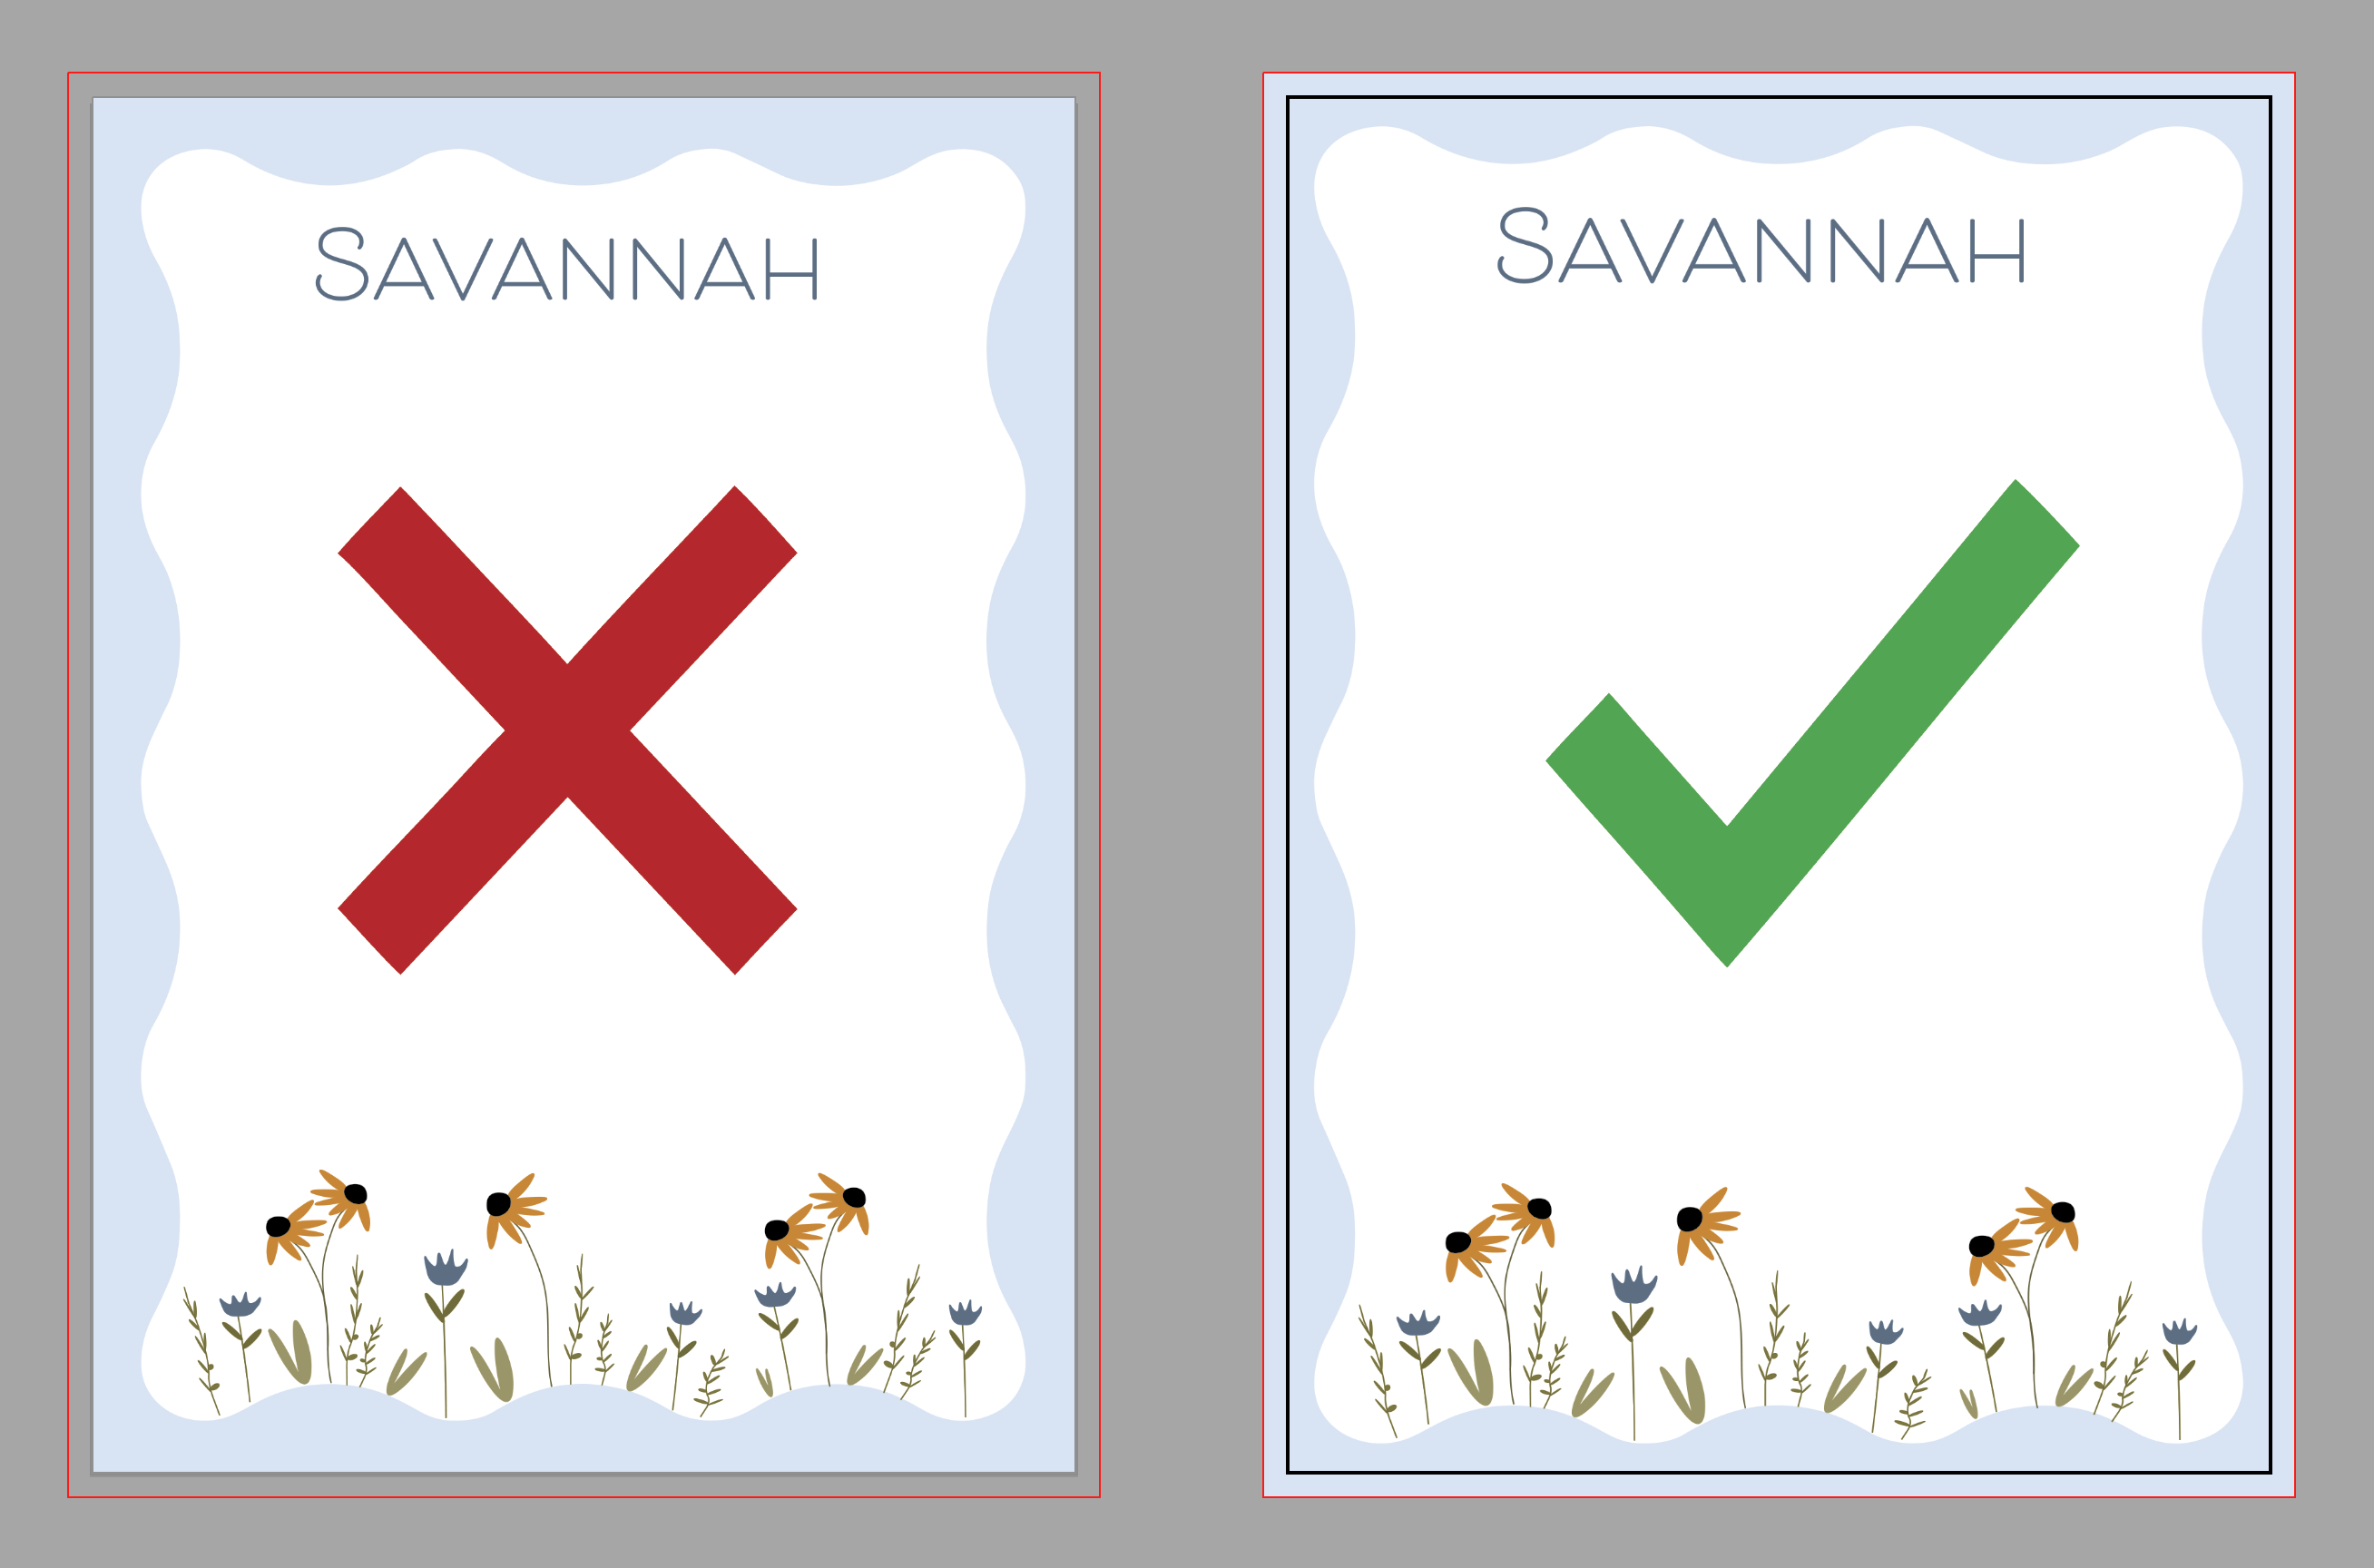
- Forgetting to include bleed. Even if your document is the correct size, backgrounds that stop at the trim edge can result in unwanted white borders after cutting.
- Setting up bleed correctly but not including it during export. If “Use Document Bleed Settings” isn’t selected, the bleed won’t be included in the final file.
- Placing text too close to the edge. Important elements should stay within the safe area to avoid being trimmed off.
Visit How to Set Up a Print-Ready File for a more detailed breakdown of each requirement.
Was this article helpful?
That’s Great!
Thank you for your feedback
Sorry! We couldn't be helpful
Thank you for your feedback
Feedback sent
We appreciate your effort and will try to fix the article