Canva is best suited for simple print designs and is a good option if you’re just starting out or focusing on simpler stationery layouts where advanced print controls are not required.
When designing in Canva for professional printing, proper setup is essential to ensure accurate results. Follow these steps for best practices.
File Setup in Canva
When creating your file in Canva, you’ll need to include the bleed in the overall file size.
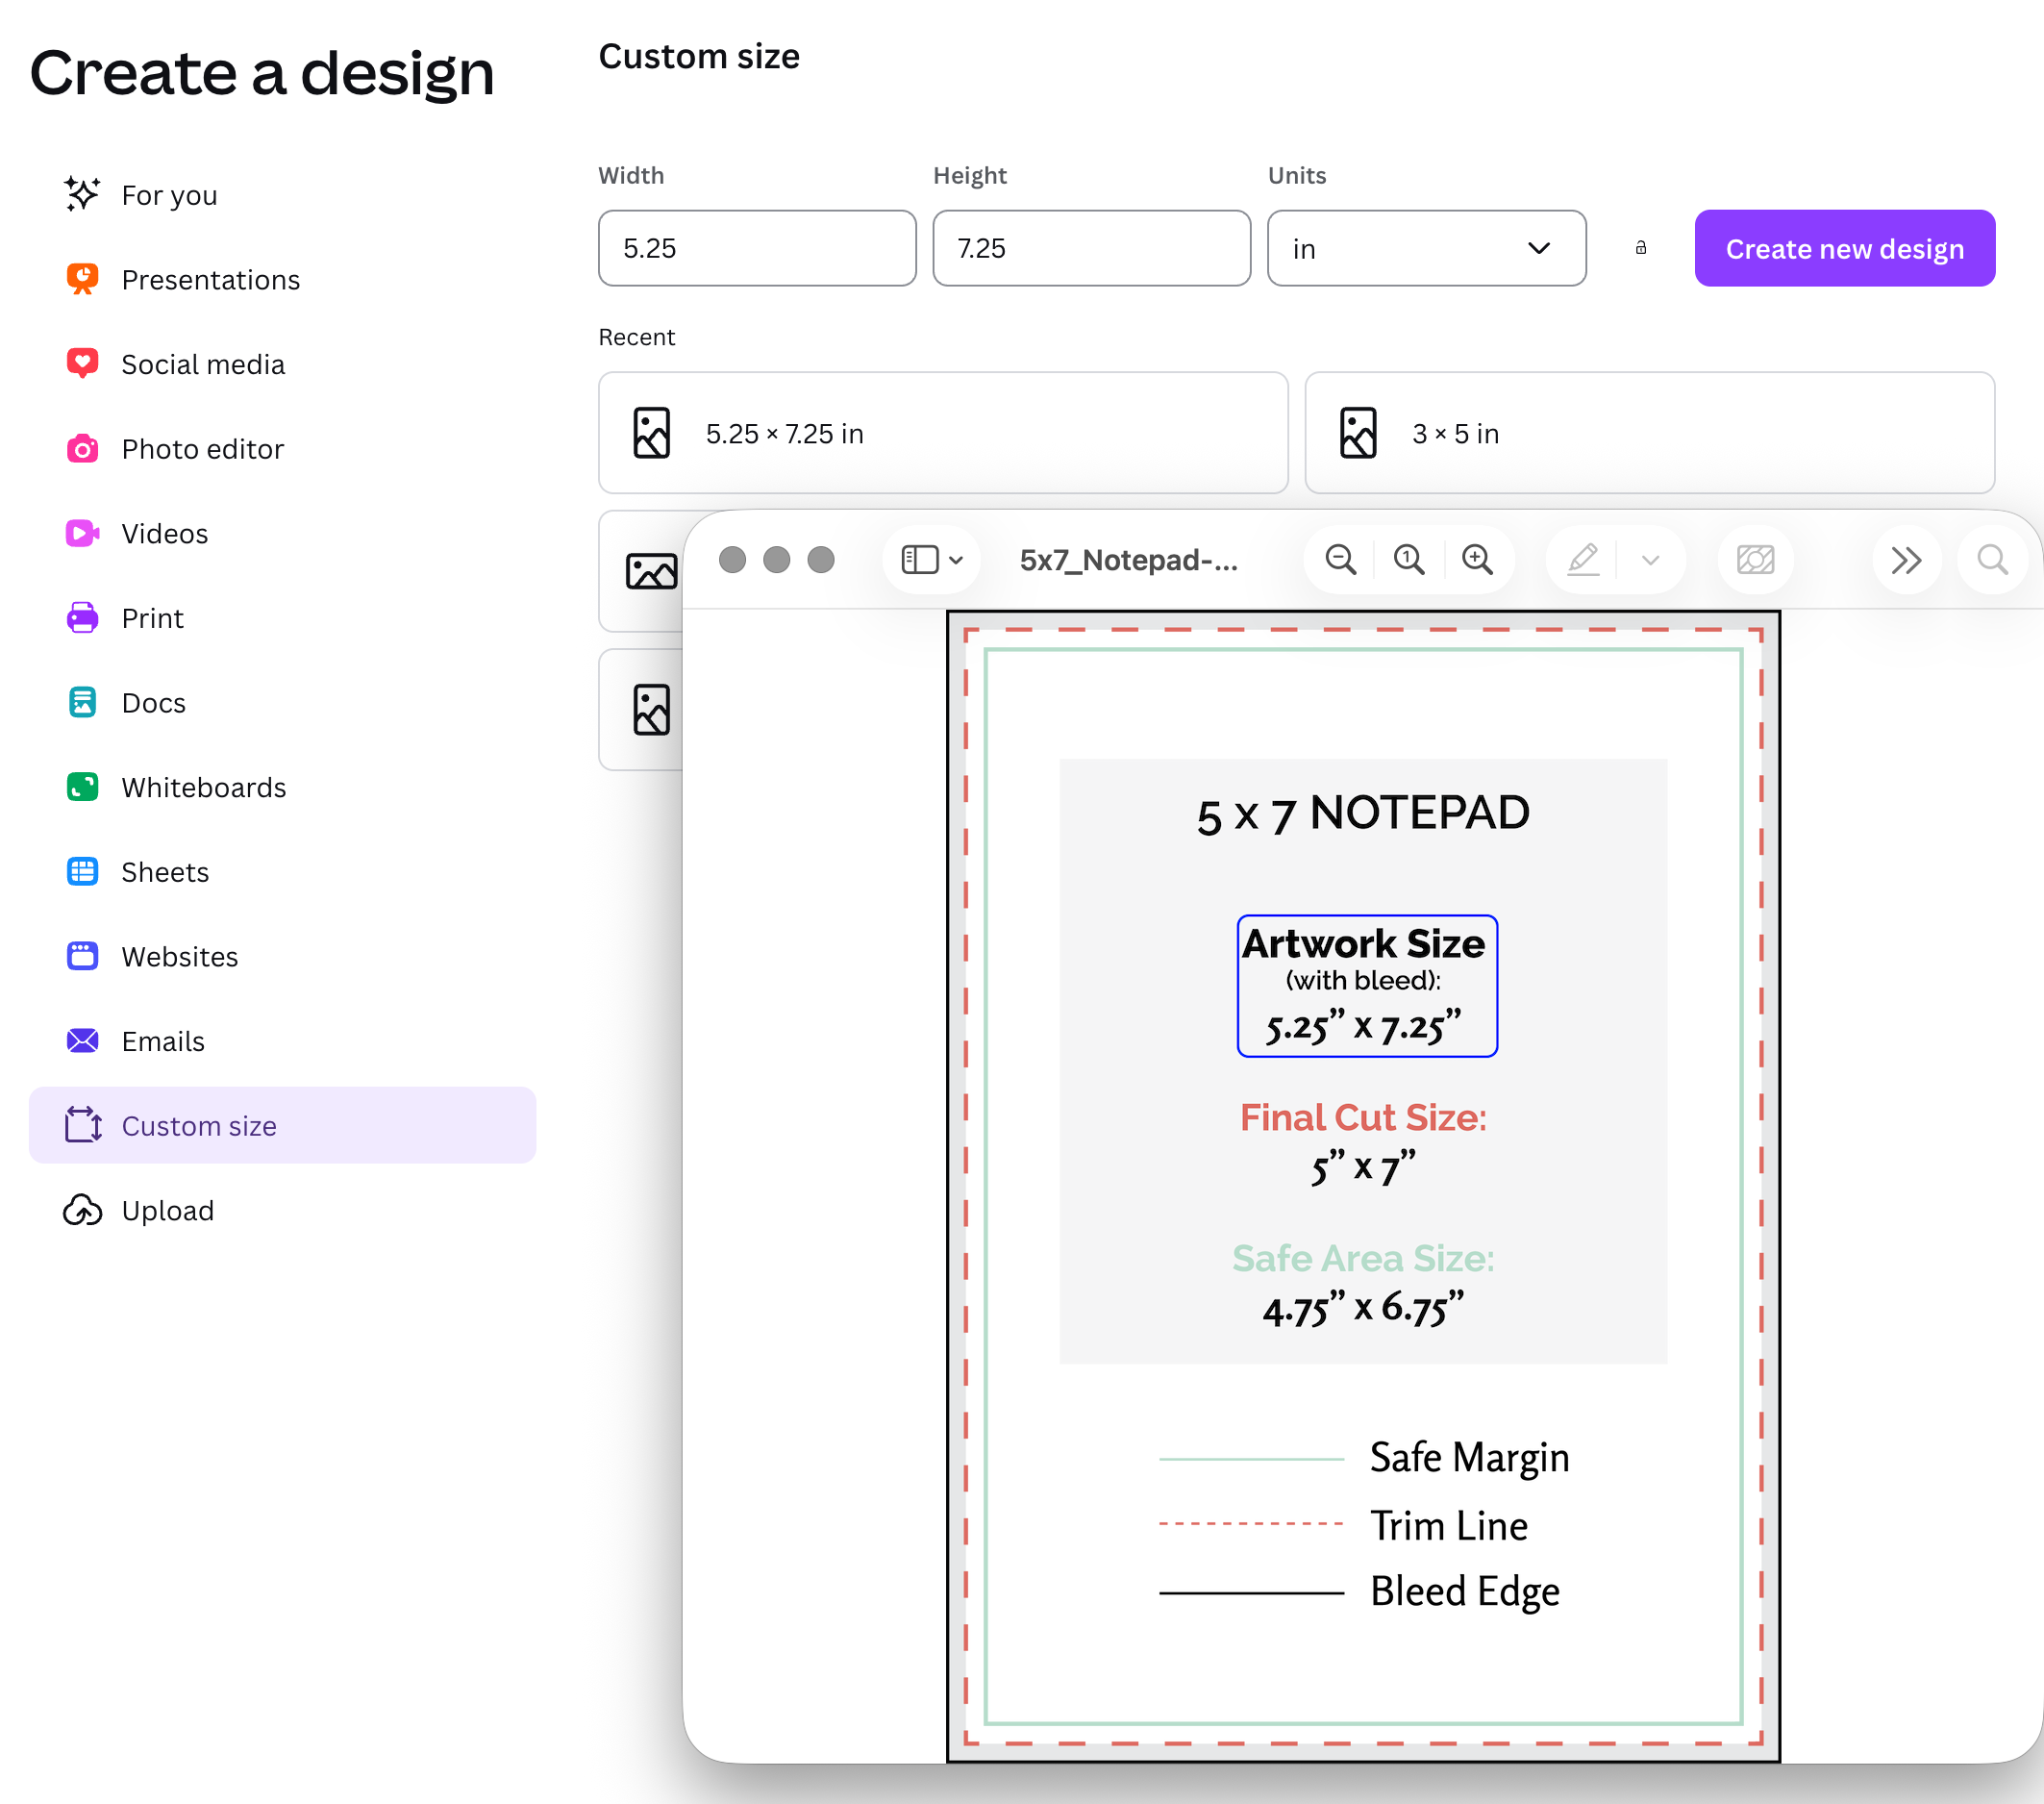
Click Create a Design, then select Custom Size. We require a 0.125" bleed on all sides, which means your file should be 0.25" larger in both width and height than the final trim size.
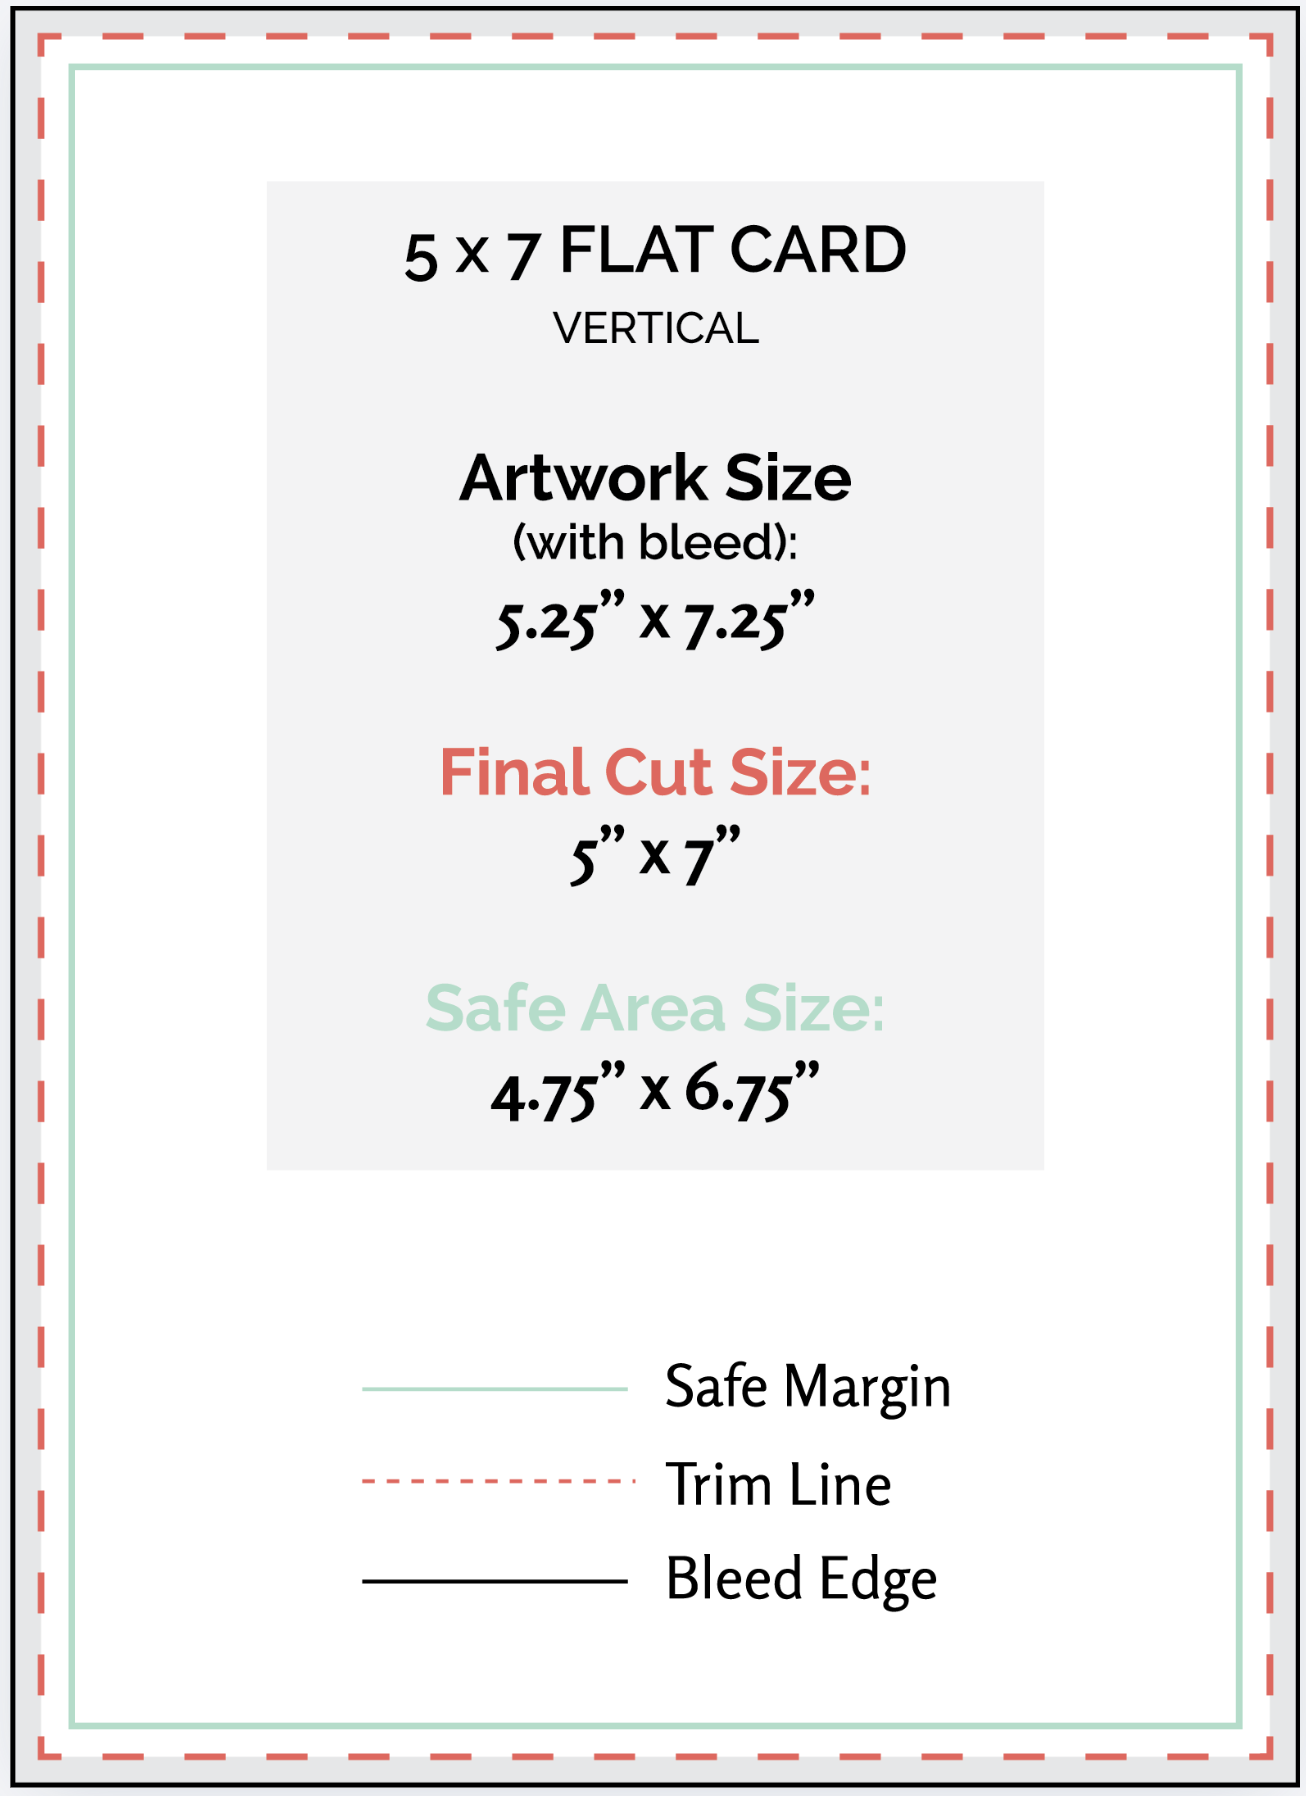
You can also locate the size with bleed under Artwork Size on our templates.
Understanding Bleed and Safe Area
Bleed is the extra space on your file that gets trimmed off after printing. To avoid unwanted white edges, make sure all background colors and images extend fully to the edge of your document.
The safe area sits 0.25" from the bleed edge and is where all important text and artwork should be placed to ensure that nothing gets cut off or appears too close to the edge.
Setting up Guides
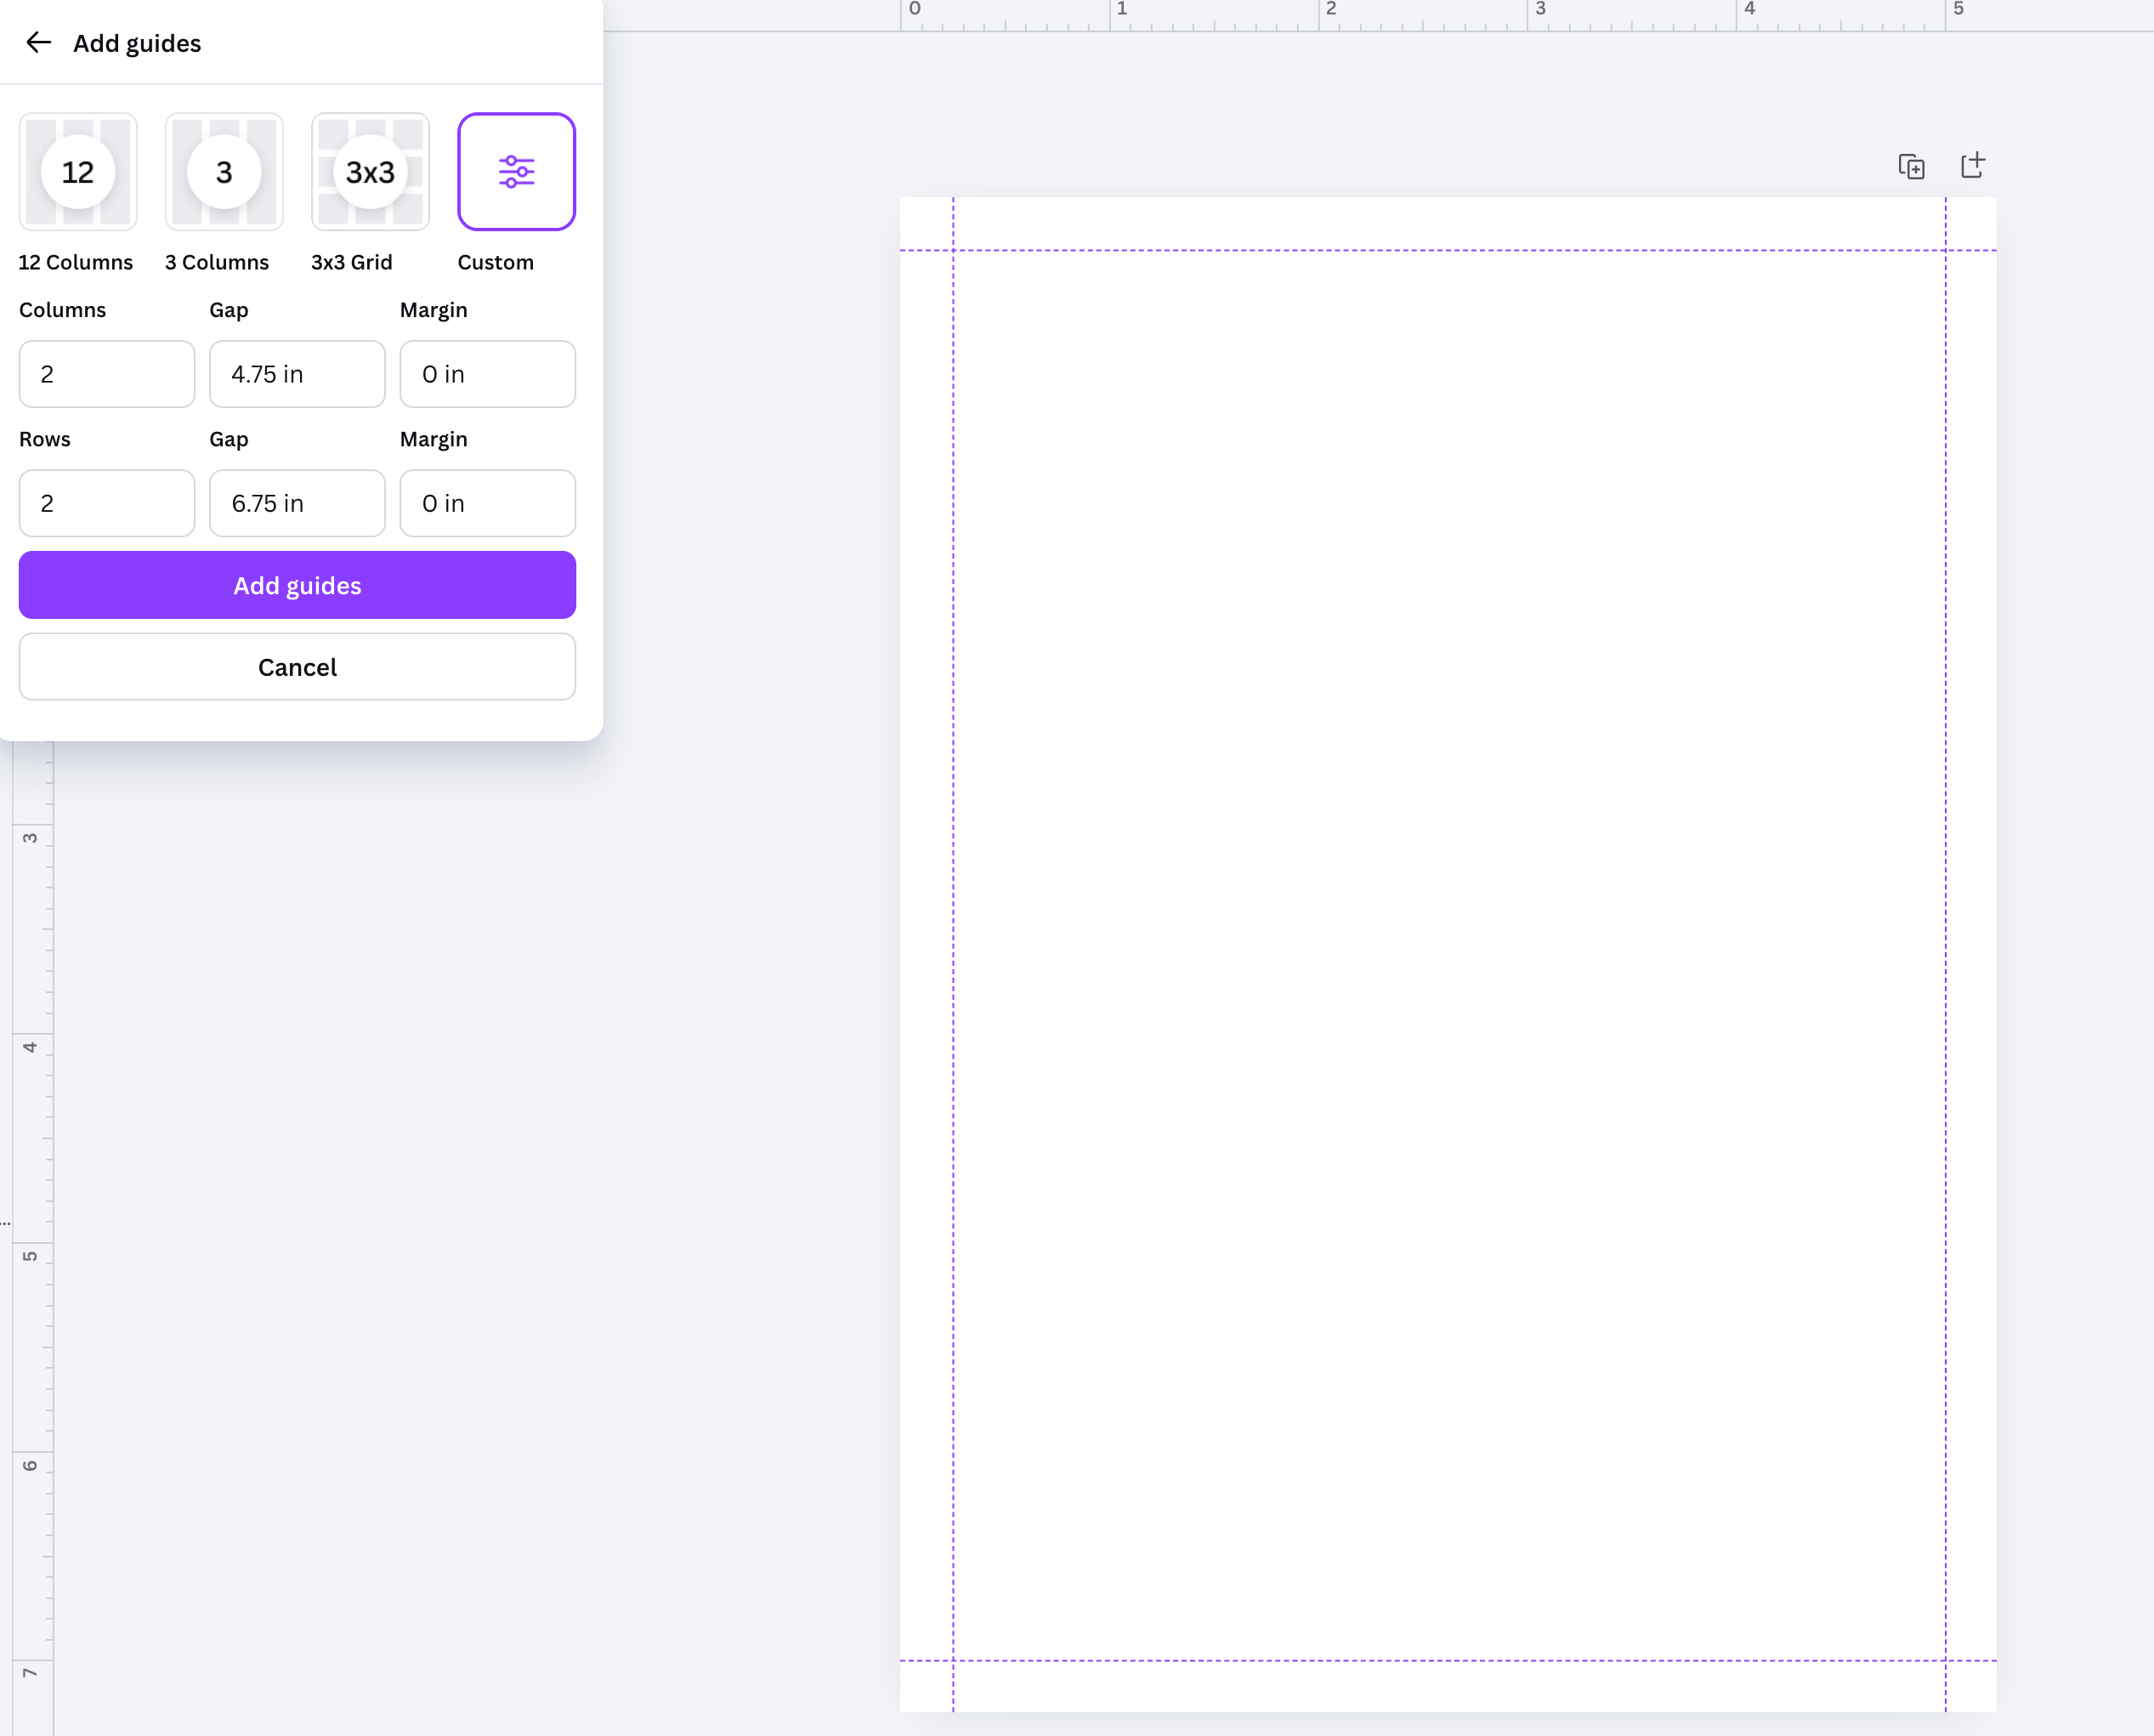
To make this easier while designing, you can set up guides in Canva to represent the safe margin. This helps you clearly see where text and important elements should stay.
Forgot to add the bleed? You can still update it. Under File, click Resize, enter the new dimensions (including bleed), and apply the changes to your current design.
Using Our Templates
We offer templates for all standard-sized items, which include the correct artwork size, trim line, and safe margin.
If a template is available, you can use it as a reference when setting up your file in Canva. You can also upload the PNG version of the template into your design as an overlay to help guide placement.
Before exporting your final file, be sure to remove all template elements so they do not appear in print.
Export a Print-Ready PDF
Once your design is complete, exporting correctly ensures your file prints as expected.
Before downloading, double-check that your design extends fully to the edges if you are printing to the edge of the card and that all important elements are safely within the margins.
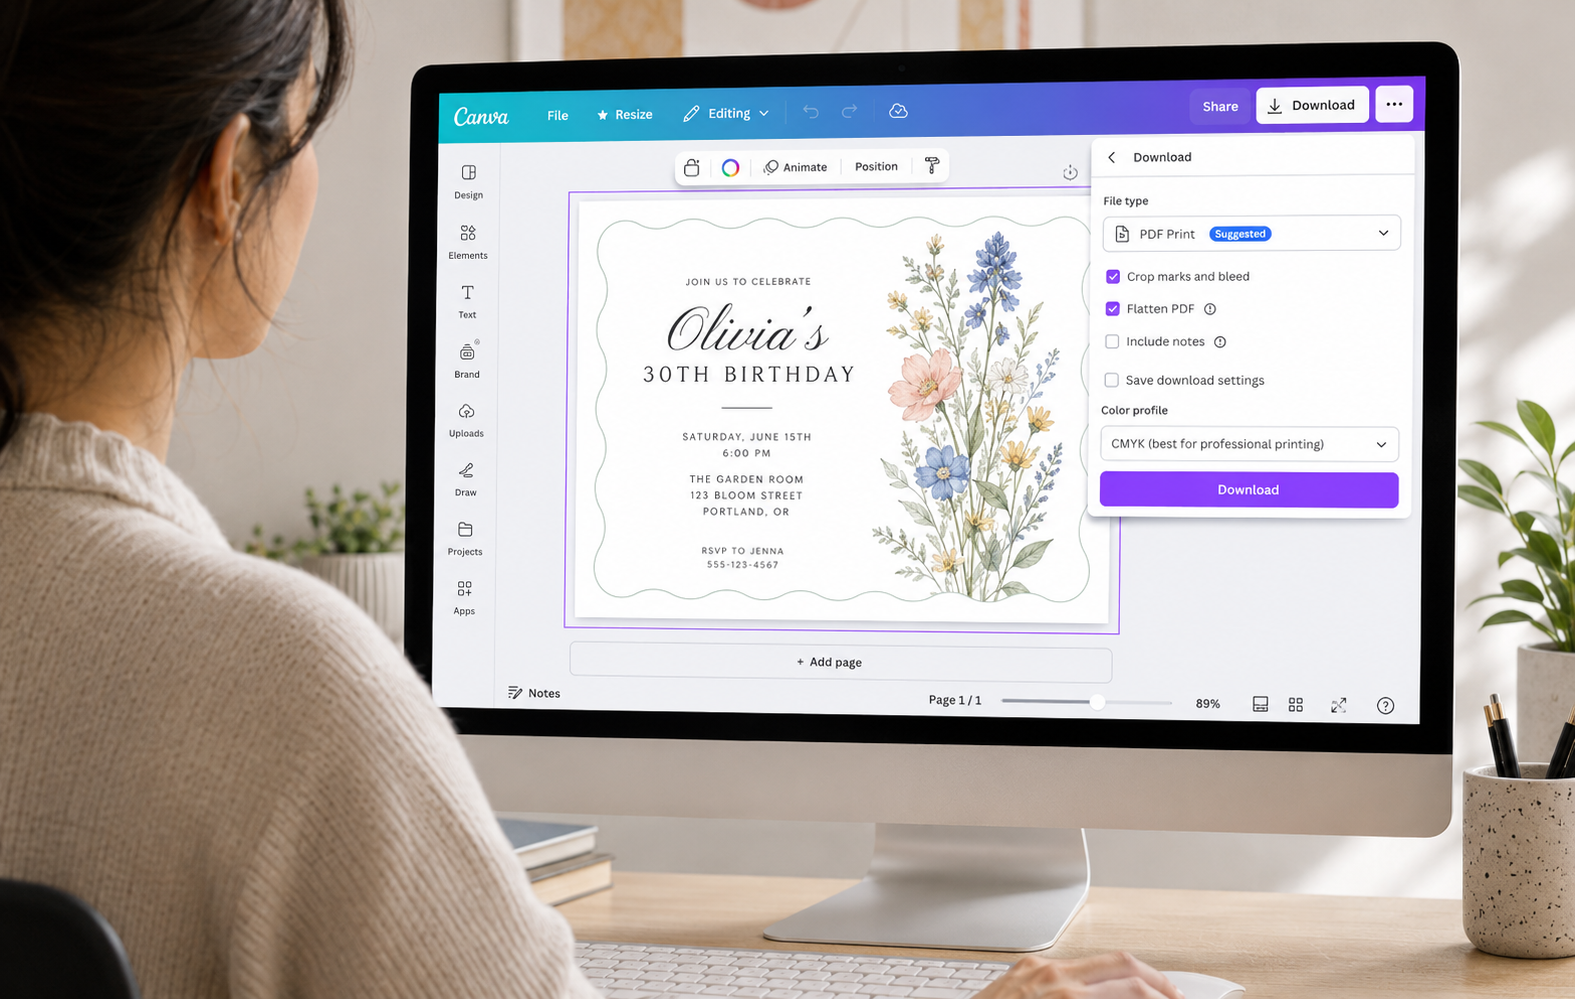
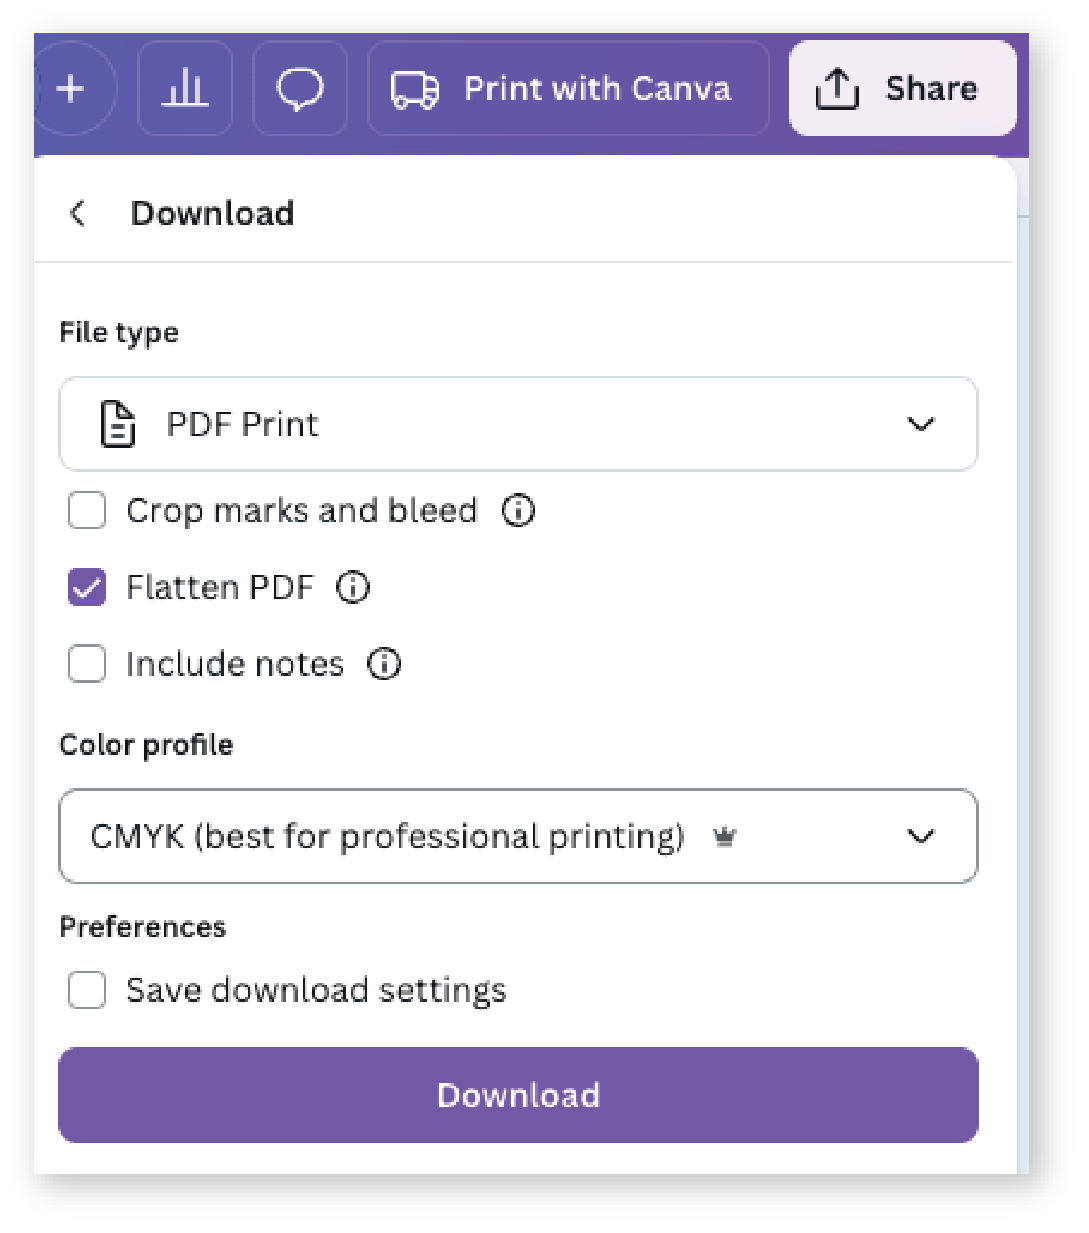
Click Share, then Download, and choose PDF Print as your file type. Select CMYK as your color profile, and enable Flatten PDF before downloading your file.
Common mistakes and limitations
- Designing at the wrong size or not manually adjusting dimensions to include bleed.
Placing text or important design elements too close to the edge, increasing chance of them being trimmed off.
- Relying on Canva for advanced print prep, where limited color control, typography precision, and proofing tools can make highly detailed or technical files less reliable.
- Exporting in the wrong file format or using incorrect export settings for print.
Ready to go further? Visit How to Set Up a Print-Ready File for a more detailed breakdown of each requirement.
Was this article helpful?
That’s Great!
Thank you for your feedback
Sorry! We couldn't be helpful
Thank you for your feedback
Feedback sent
We appreciate your effort and will try to fix the article