Adobe InDesign works especially well for multi-piece layouts and designs with lots of text, placed graphics, or multiple pages. It’s a reliable choice for creating polished print pieces while keeping complex files organized and still maintaining strong control over typography and linked assets.
If you’re working on something like place cards, an invitation suite, or anything with structure and detail, InDesign gives you the control to bring it all together cleanly and confidently. Typography stays consistent, images stay linked, and your file stays organized from start to finish.
Set Up Your File
Create a Document: Start by creating a document at your final trim size.
- Go to File → New → Document
- Enter your finished size (for example, 5" x 7" or 8.5" x 11")
- Choose your orientation and number of pages
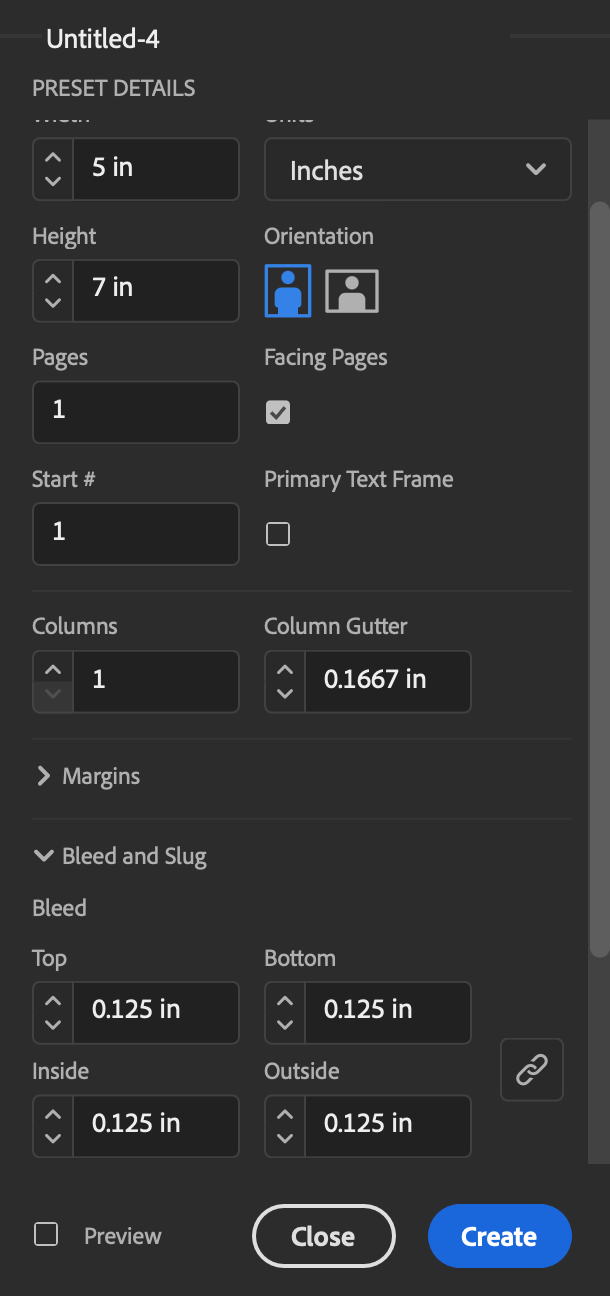
Add a Bleed: Bleed gives your design room to extend past the edge so it trims cleanly with no unexpected white edges.
- In the New Document window, open Bleed and Slug
- Set bleed to 0.125" (1/8 inch) on all sides
- If your design has background color, textures, or full-bleed images, extend them into this space.
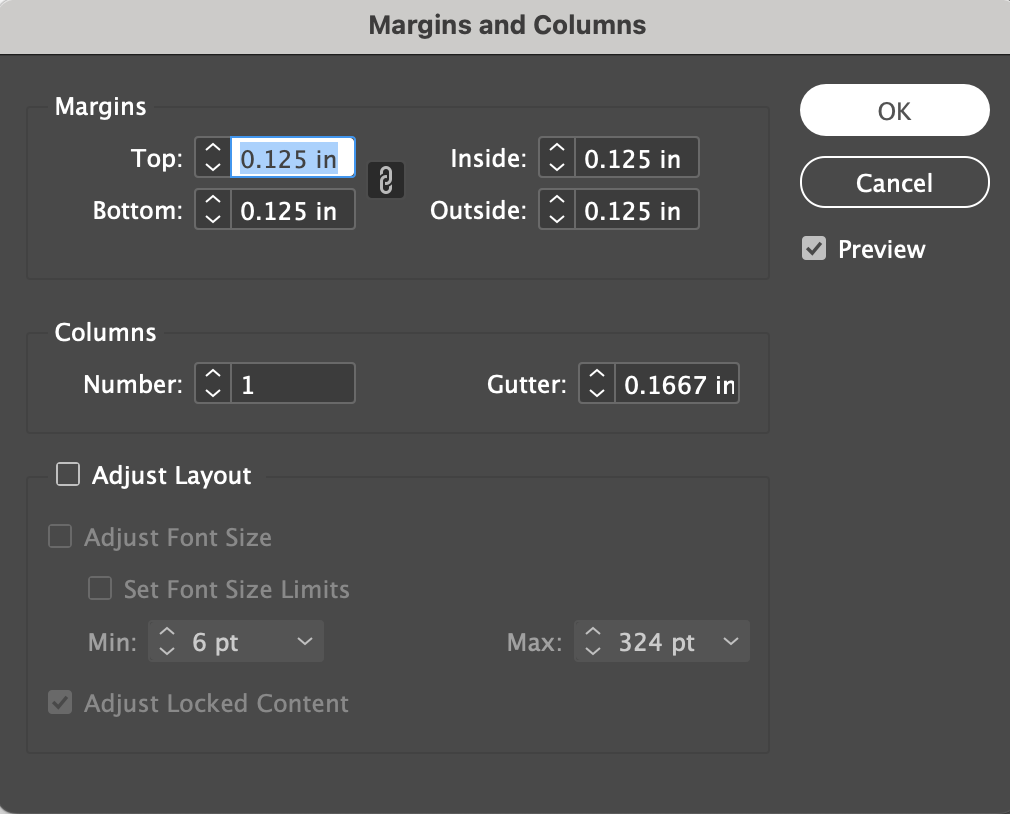
Add a Safe Area (Margins): The safe area accounts for potential shifting and ensures that none of your design is lost during the production process.
- Go to Layout → Margins and Columns
- Enter your safe area value of .125 inches
- Make sure the chain icon is linked to ensure equal margins on all sides.
- Click OK
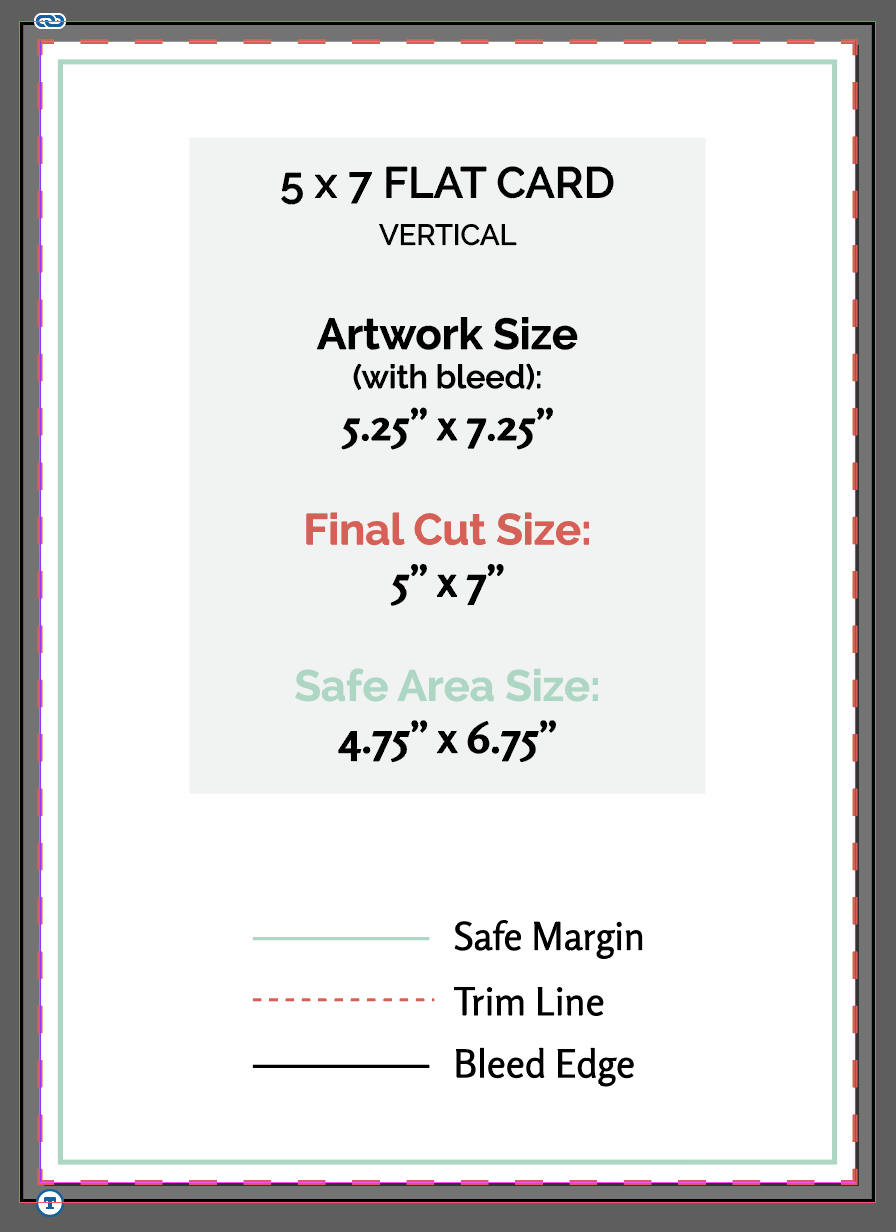
You will now see a box inside your page. This is going to be your safe area. Be sure to keep all text and important artwork inside it.

Utilizing Templates
Working with Variable Text (Data Merge)
If your project includes personalized details such as guest names and addresses, InDesign makes it easy to scale. With Data Merge, you can connect a spreadsheet and automatically flow that data into your layout. It’s a huge time saver for large runs.
(Link to guest addressing/data merge article here)
Export a Print-Ready PDF
When your design is ready, it’s time to package it for print.
- Go to File → Export
- Choose Adobe PDF (Print)
- Select a Preset
Then check a few key settings:
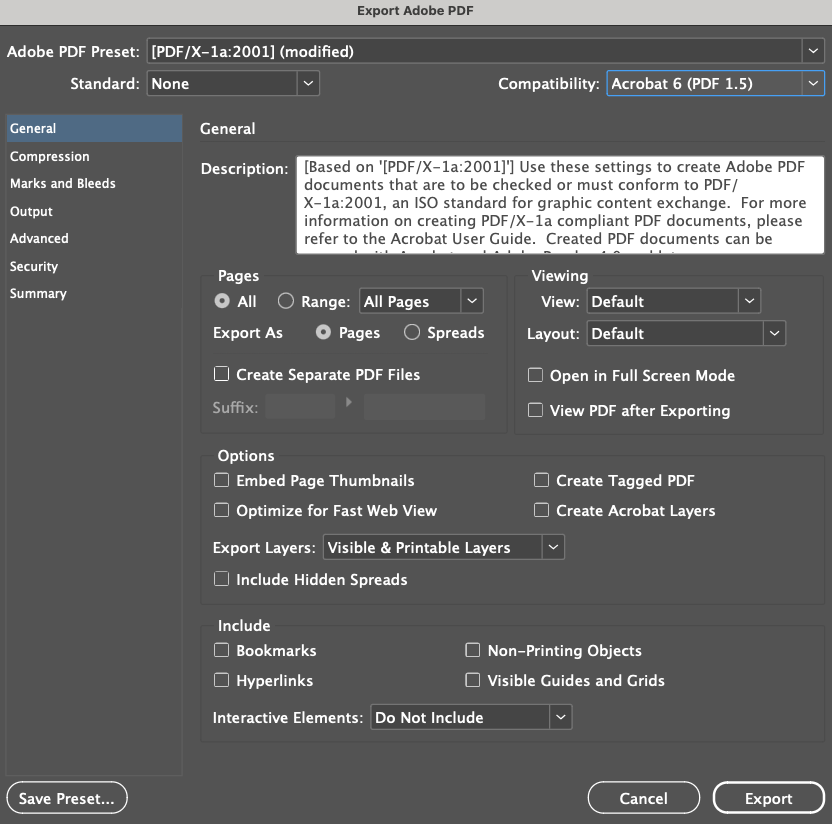
- Under General, set the Preset to [PDF/X-1a:2001]. Change the Standard to None and Compatibility to Acrobat 6.
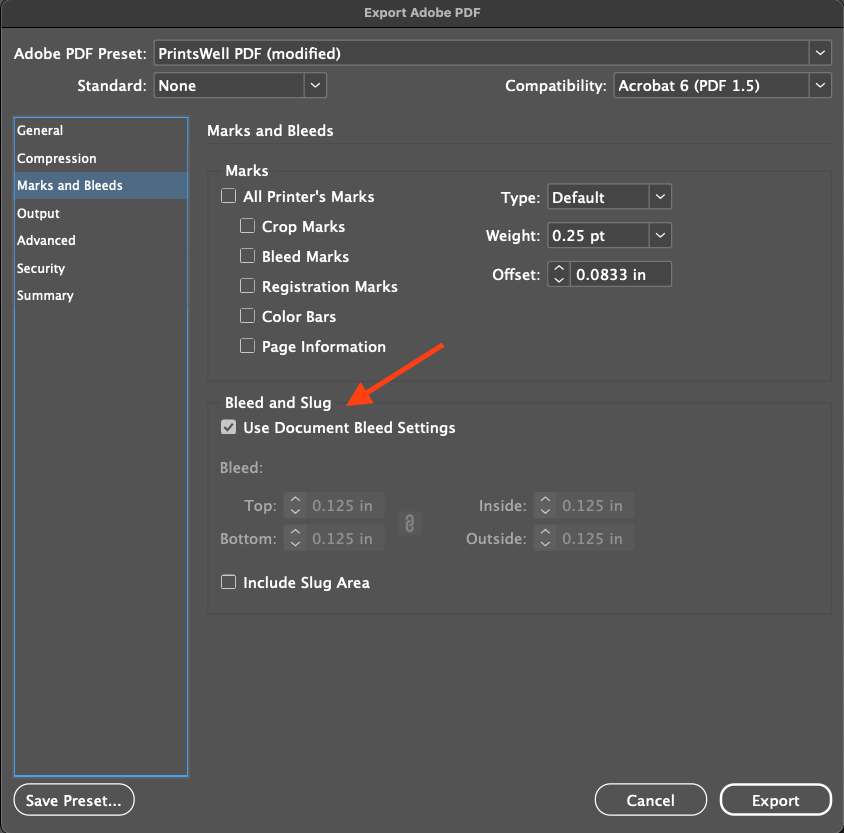
- Under Marks and Bleeds, select Use Document Bleed Settings to keep the .125" bleed
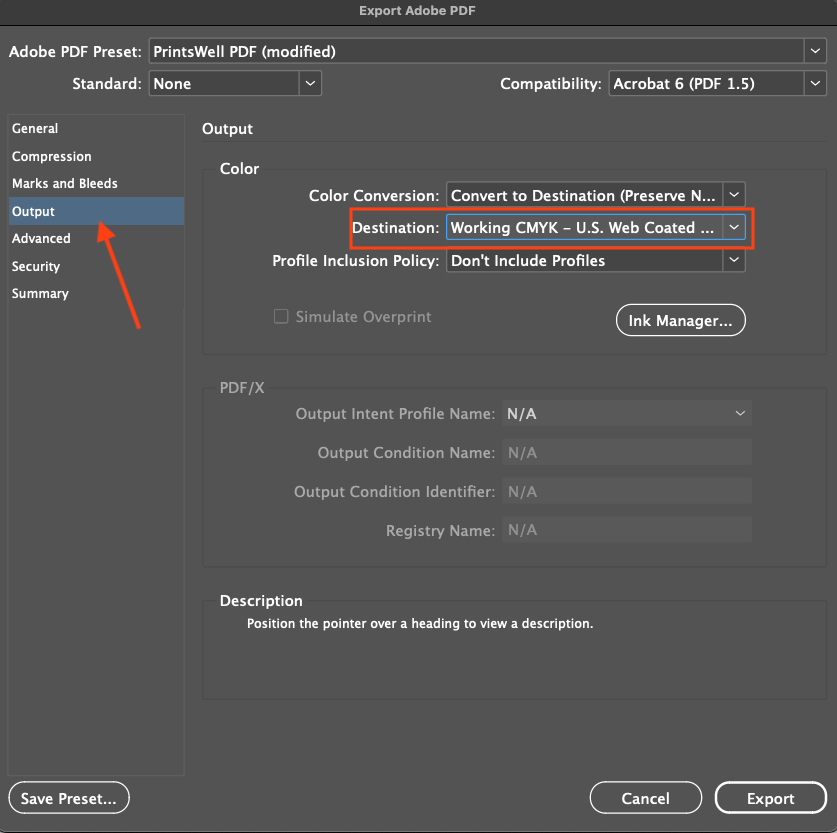
- Under Output, confirm that the color is set to Working CMYK - U.S. Web Coated (SWOP) v2
- Keep image resolution at 300 DPI for crisp printing
Common Mistakes to Watch For
Some mistakes that are made fairly often, but are easy to avoid:
- Missing bleed
If bleed isn’t set up or exported, you may end up with thin white edges after trimming. - Content too close to the edge
Keep important text and details safely inside the trim (at least 0.125"-0.25" in). - Template elements left behind
Guides, notes, or lines from our templates shouldn’t appear in your final PDF. Do a quick check for this before exporting.
A Few Limitations to Keep in Mind
InDesign is great, but it’s not built for everything:
- It’s not the best tool for creating vector artwork from scratch (that type of project is better suited for Illustrator)
- Black ink settings sometimes need manual adjustment for the right print result
- For very simple, one-piece designs, it can feel like more setup than you need
Final Thoughts
With the right setup, InDesign gives you the structure and control to let the rest of your design process flow smoothly.
Was this article helpful?
That’s Great!
Thank you for your feedback
Sorry! We couldn't be helpful
Thank you for your feedback
Feedback sent
We appreciate your effort and will try to fix the article